Avalonian Archmage Boss Guide
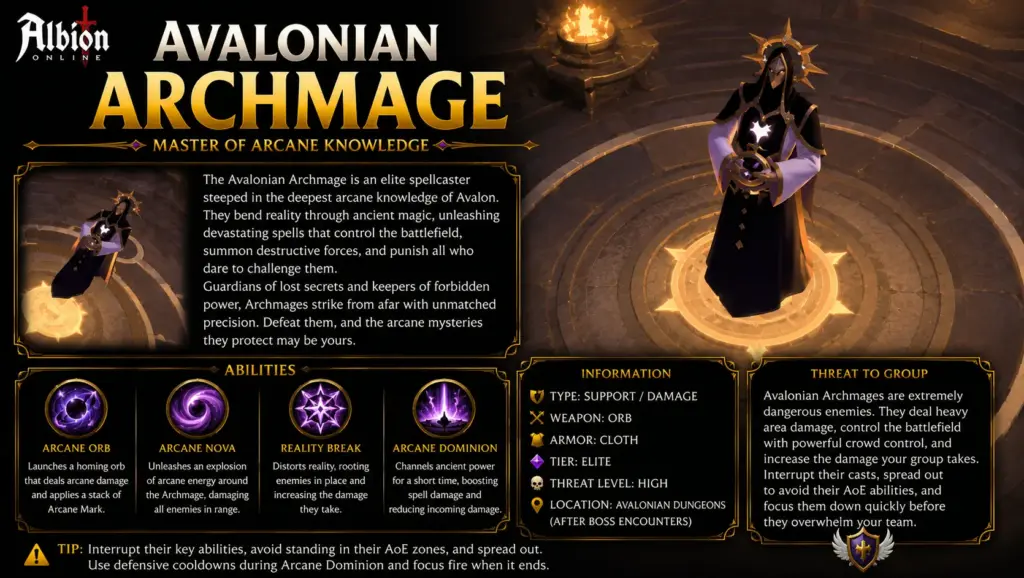
The Avalonian Archmage is a movement-heavy boss built around AoE avoidance, laser mechanics and alternating phases. The fight becomes more dangerous as the boss loses health because the arena becomes more crowded and the frequency of dangerous mechanics increases.
The main goal of this fight is to keep the party moving correctly while rotating damage reduction during the most dangerous windows. Players who panic, stand on top of the boss or fail to react to lasers can quickly create unnecessary healing pressure.
Main Strategy for Avalonian Archmage
The Archmage alternates between two major phases:
- Phase 1: an enclosing-area phase with lasers, beams and knockback clouds.
- Phase 2: a bullet-hell phase with rotating projectiles and heavy movement requirements.
The fight repeats these phases until the boss dies. As her health drops, mechanics become more intense. The party should stay calm, move deliberately and avoid stacking unnecessary damage.
Phase 1: Enclosing Circle / Battle Royale Phase
During the first phase, the arena begins to shrink as an enclosing circle moves inward. Standing in the red outer area deals damage, so players must stay inside the safe area while also dodging the boss’s other mechanics.
The Archmage uses several abilities during this phase:
- double laser attacks in front of and behind the boss,
- knockback smoke clouds that can push players into danger,
- a beam attack that splashes damage around the target,
- random sky beams that target players from above.
Players should avoid walking directly on top of the boss. Standing too close can make the laser mechanic harder to avoid and can cause unnecessary knockback interactions.
How to Handle the Double Laser
The Archmage laser works similarly to the Avalonian Spellweaver laser, but the boss casts it both in front and behind herself. To reduce damage taken, players should move in the opposite direction of the laser’s travel path.
The closer a player stands to the boss, the longer they may remain inside the laser. Ranged players should maintain enough distance to react properly, while melee players need to be especially disciplined.
How to Handle Knockback Clouds
The boss spawns moving smoke-like knockback clouds. These are not always lethal by themselves, but they can interrupt casts and push players into lasers, sky beams or the damaging outer area.
Players should not be afraid to step outside the safe circle briefly if doing so prevents them from being knocked into a worse position. Controlled movement is better than being displaced into multiple mechanics.
How to Handle the Beam Target
If the boss beams a player, that player deals splash damage around themselves. The targeted player should move away from the party to avoid spreading unnecessary damage to allies.
Damage Reduction in Phase 1
The Hammer Tank and Great Arcane can alternate damage-reduction tools during this phase. A practical approach is to rotate damage reduction around laser casts, especially when the safe area becomes smaller and players have less room to dodge.
Judicator Armor or other major defensive tools should often be saved for the later part of the shrinking circle phase, when mistakes become more likely.
Phase 2: Bullet Hell Phase
The second phase is a projectile-dodging phase. The boss uses rotating ball patterns and sky beams, forcing the party to move carefully while staying alive.
There are multiple bullet-hell patterns. Some are easier, while the harder version combines several projectile patterns at once. Beginners commonly die during this phase because they move too late or stand too far away to react properly.
Bullet Hell Pattern 1
Several projectiles rotate around the Archmage in a circular pattern. Players should watch the movement direction and move into safe gaps rather than trying to outrun the mechanic randomly.
Bullet Hell Pattern 2
This pattern resembles a triple-line projectile mechanic. It is easier to navigate when players are closer to the boss because the gaps are easier to read and reaction time is better.
Bullet Hell Pattern 3
The hardest version combines the rotating projectiles with the triple-line pattern. Players must watch both the circular movement and the directional projectile lines at the same time.
This is where inexperienced players are most likely to be downed. Healers should be prepared, and the party should use defensive support if the group is still learning the fight.
Recommended Healer and Support Adjustments
For inexperienced groups, healers can consider recovery-focused swaps such as Reawaken. If multiple players go down during bullet hell, healers should communicate who they are reviving so they do not waste recovery casts on the same target.
Guard Rune and other defensive tools can also help players survive the projectile phase. Damage reduction should be rotated as the phase develops, especially if the group struggles to dodge consistently.
Common Archmage Mistakes
- Standing directly on top of the boss during laser mechanics.
- Moving with the laser instead of against it.
- Spreading beam splash damage through the party.
- Getting knocked by clouds into the shrinking red area.
- Panicking during bullet hell instead of moving through safe gaps.
- Using major defensive cooldowns too early in the phase.
Archmage Caller Checklist
- Assign damage-reduction order before the pull.
- Remind players to move opposite the laser direction.
- Tell beam targets to move away from the group.
- Warn the party before the safe area becomes small.
- Call defensive tools during bullet hell if players are struggling.
- Remind downed players to accept revival at a safe timing.