Sir Bedivere Final Boss Guide
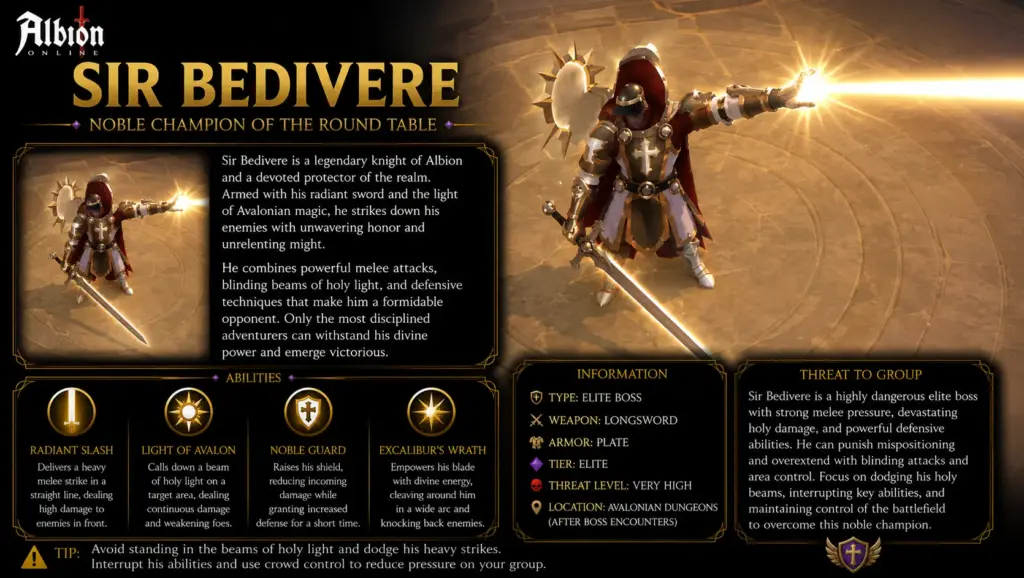
Sir Bedivere is the final boss of every Avalonian Elite Dungeon. The fight is built around debuff stack management, strict boss facing, group positioning and careful handling of sword and reflective shield mechanics.
The boss is not impossible mechanically, but it punishes players who stand in the wrong place, ignore stacks or attack into reflect effects. A disciplined group with clear positioning can make the fight much safer.
Main Strategy for Sir Bedivere
The main mechanic is Fate of the Unworthy, a stacking debuff that damages players over time while they remain near the boss. Players must periodically move away from the boss to drop their stacks or use Guardian Helmet to cleanse them.
The tank should always face the boss in the same direction and away from the party. Sir Bedivere has a wide cleave attack, and during the second phase the cleave angle becomes even larger.
Recommended Group Positioning
The party should be divided into several groups around the boss. Each group should have access to stack cleansing, preferably with a Guardian Helmet available in each group.
A practical group structure is:
- Group 1: main healer group.
- Group 2: Enigmatic group, with one group healer.
- Group 3: Frost and Royal Robe group.
- Group 4: melee group, including melee DPS and melee supports.
The exact grouping depends on the party composition, but each group should be organized before the pull. Players should know where they belong and where to move when they need to reset stacks.
Fate of the Unworthy
When players stand within a certain range of Sir Bedivere, they gain stacks of Fate of the Unworthy. These stacks deal increasing damage every few seconds.
Players can remove the stacks by moving away from the boss for a short time. Guardian Helmet can also cleanse the stacks, which is why each group should ideally have one player assigned to cleanse regularly.
Ignoring stacks is one of the most common ways to die during this fight. Players should not wait until they are already low health before moving away.
Cleave Attack
Sir Bedivere’s auto-attacks are a wide cleave. The tank must face the boss away from the party at all times.
During the second phase, the cleave angle increases significantly, making boss facing even more important. No player except the tank should stand in front of the boss.
Bladestorm
Bladestorm creates spinning swords around the boss. These swords deal damage while spinning and then shoot outward, knocking down players hit by them.
Players must watch the swords and move through safe gaps. Unlike some regular Avalonian Knight interactions, players cannot safely stand inside the center of the boss to ignore this mechanic.
Reflective Shield
During the second phase, Sir Bedivere creates rotating reflective shield zones. Players standing in these shield zones take flat reflected damage when they attack the boss.
The safest choice is to stop attacking and use the time to reset Fate of the Unworthy stacks. Experienced players may continue attacking from safe gaps, but this should only be done if they clearly understand the shield pattern.
Earthbreaker
Sir Bedivere smashes his sword in a straight line. The cast is slow enough to dodge, but players must be careful if they are also dealing with sword knockdowns or poor positioning.
The tank especially should avoid being knocked down by swords and then hit by Earthbreaker afterward.
Grasp of the Undying
During the second phase, Sir Bedivere targets a player and stuns them for the duration of a channel. The target takes damage during the channel, but the damage can be healed or shielded.
Support players, especially Enigmatic-style defensive support, should help protect the target. Players must correctly target the affected player, which may require clicking the ground indicator beneath them rather than their character model.
Second Phase Transition
When Sir Bedivere reaches half health, he knocks nearby players away, heals back to full and enters the second phase. He also creates a blue wall around himself that damages players who enter it.
Healing reduction can reduce or prevent part of this healing. The party should be ready for the transition and should not panic when the boss returns to full health.
Guardian Helmet Usage
Guardian Helmet is extremely important in this fight because it can cleanse Fate of the Unworthy stacks. Each group should rotate Guardian Helmet usage so players do not sit on high stacks for too long.
The caller should remind groups to cleanse regularly. If one group forgets, healers may be forced to spend too many resources on avoidable stack damage.
Common Sir Bedivere Mistakes
- Players stay near the boss too long and die to Fate of the Unworthy stacks.
- The tank faces the boss toward the party.
- DPS attacks into Reflective Shield.
- Players fail to move through Bladestorm safely.
- Groups do not have Guardian Helmet coverage.
- Players panic when the boss heals at the phase transition.
- Support players fail to protect the Grasp of the Undying target.
Sir Bedivere Caller Checklist
- Assign group positions before the fight starts.
- Make sure every group has stack-cleanse coverage if possible.
- Remind the tank to face the boss away from the party.
- Call stack resets before players reach dangerous levels.
- Tell DPS to stop attacking during Reflective Shield unless they are safely positioned.
- Warn the group before the second phase transition.
- Call defensive support for Grasp of the Undying targets.
Final Boss Summary
Sir Bedivere is a test of discipline. The fight becomes much easier when every player manages their own stacks, respects reflective shields and stays in their assigned group position.
The tank must keep the boss faced away from the party, healers must watch stack damage, and support players must react quickly when a player is trapped by Grasp of the Undying.
If the group stays organized, Sir Bedivere is a controlled final encounter rather than a chaotic ending to the dungeon.