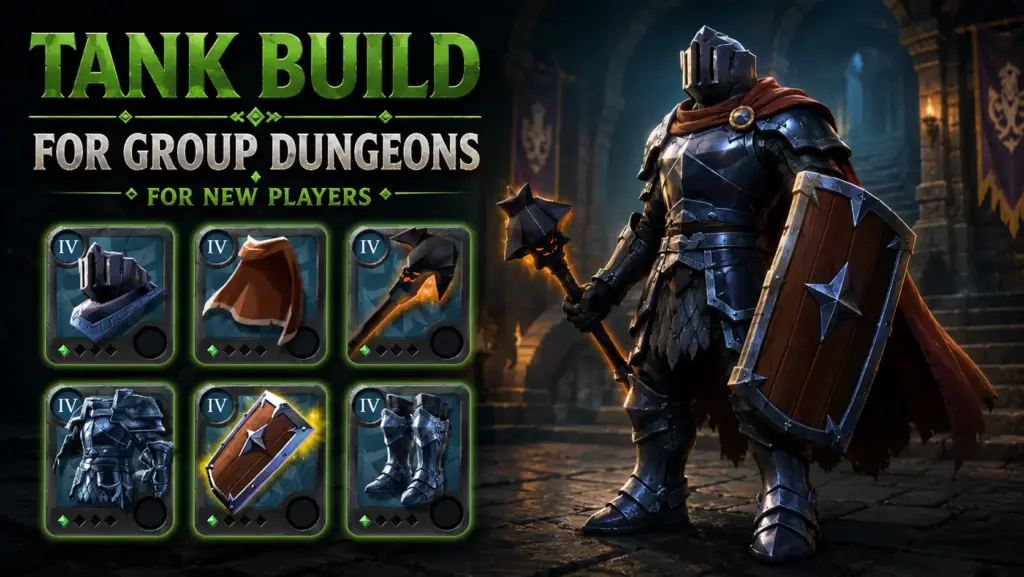
This Tank Build for Group Dungeons for New Players in Albion Online is one of the cheapest and easiest PvE sets to start with. Most items in this setup are inexpensive, easy to buy on the market, and do not require expensive artifact gear. The main exception is the Incubus Mace, which is more valuable than a basic mace, but it gives excellent performance in group PvE because it helps control mobs, reduce incoming pressure, and speed up dungeon clears.
This build is mainly designed for new players who want to learn how to tank in Group Dungeons, static dungeons, and basic PvE fame farming. The tank’s main job is simple: pull mobs, keep their attention, group them in one place, and survive long enough for the DPS players to clear the pack.
Tank gameplay in Albion Online is not only about standing still and taking damage. A good tank controls the pace of the dungeon, decides how many mobs the group can safely pull, keeps threat on enemies, and uses defensive abilities at the right moment. If you rotate your helmet, armor, and boots correctly, your healer will have a much easier time keeping you alive, and your group will be able to clear the dungeon faster and more safely.
A 4.1 or 4.2 version of this set is enough to start learning the basics of PvE tanking. With better specialization, unlocked Destiny Board bonuses, and good knowledge of pulls, this setup can also work in more difficult group dungeons and higher-tier PvE content. However, do not judge a tank only by item tier. Timing, positioning, mob knowledge, and communication with the healer are often more important than gear alone.
How to play this build
At the start of a pull, use Guardian Boots to increase your maximum health and make the first few seconds safer. Move into the mob pack, collect their attention, and try to stack them close together. Use your mace abilities to generate threat and keep enemies focused on you. Once the mobs are grouped, use your crowd control and the main ability from the Incubus Mace.
The most dangerous part of a pull is usually the first few seconds after the mobs are gathered. This is when enemies deal the most damage, your healer is still stabilizing your health, and your DPS players are starting their rotation. This is the best moment to use Guardian Armor, because it reduces the damage dealt by nearby enemies.
If your health drops too low or a boss is preparing a heavy attack, use Soldier Helmet as an emergency defensive ability. It gives you a short window of protection and gives your healer time to recover your health.
Do not use all defensive abilities at the same time without a reason. One of the most common beginner tank mistakes is using helmet, armor, and boots together, then having no defensive tools available for the next dangerous moment. A better order is:
Guardian Boots before or during the pull, Guardian Armor after mobs are grouped, and Soldier Helmet only as an emergency button or for dangerous boss mechanics.
Main tank responsibilities in Group Dungeons
A tank should lead the group, but not rush without control. Before making a large pull, check that your healer has enough energy, your DPS players are nearby, and the previous mob pack is already dead. If you pull too many enemies while the group is not ready, even a good healer may not be able to save the fight.
Your main responsibilities are:
- pulling mobs and keeping them focused on you,
- stacking enemies in one place for AoE damage,
- using crowd control to reduce movement and incoming damage,
- rotating defensive abilities instead of using everything at once,
- watching the health and position of your healer and DPS players,
- interrupting or avoiding dangerous attacks when possible,
- keeping bosses and mobs faced away from your team when they have frontal attacks.
A good tank does not need the most expensive gear. A good tank needs to know when to pull, where to stop, how to position enemies, and when to use defensive cooldowns.
Items in this build
Soldier’s Helmet is one of the simplest and most useful helmets for a beginner tank. Its main value is the defensive ability that gives you a short window of protection. Use it when your health is low, when a boss is preparing a strong attack, or when your healer needs a moment to stabilize you.
Do not waste Soldier Helmet at the beginning of every pull. It is better as an emergency defensive tool than as a basic rotation ability. If you use it too early, you may not have it available when the dangerous part of the fight starts.
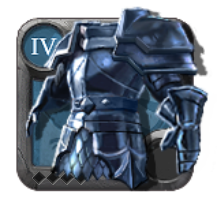
Guardian Armor is the core defensive item in this tank build. It is durable, affordable, and very strong for group PvE. Its main ability creates an area around you that reduces the damage dealt by nearby enemies. This makes pulls safer and gives your healer more time to keep the group stable.
The best time to use Guardian Armor is after you have already gathered the mob pack. First, stack enemies together. Then activate the armor ability when they start dealing heavy damage. If you use it too early, part of its duration may be wasted before the actual fight begins.
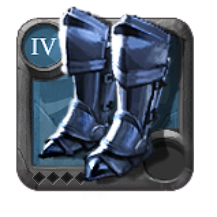
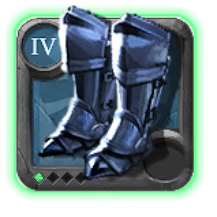
Guardian Boots increase your maximum health and help you survive the first phase of a pull. They are especially useful when you want to gather a larger mob pack or when you need to move deep into a room before your DPS players start attacking.
Use Guardian Boots while you still have high health, preferably at the start of the pull. If you use them when your health is already very low, your healer may struggle to stabilize you once the effect ends. Treat Guardian Boots as a tool for safe engagement, not as your last emergency button.
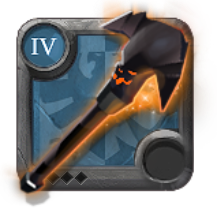
Incubus Mace is the most important item in this build. It is very strong in PvE because it combines threat generation, crowd control, and enemy weakening. Its main value is helping the tank keep mobs grouped together while making them safer and faster for the team to kill.
After pulling the mobs, use your crowd control to keep them stacked, then use the main ability from Incubus Mace. When used correctly, Incubus Mace makes group dungeon clears faster and much more stable.
It is not the cheapest weapon in the whole setup, but it is one of the best PvE tank weapons if your goal is efficient and safe Group Dungeon clearing.
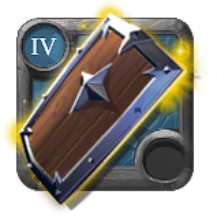
Sarcophagus is a very good off-hand choice for beginner and intermediate PvE tanks. It gives additional durability and helps with threat generation, making it easier to keep mobs focused on you. In terms of price-to-performance, it is one of the most reasonable options for Group Dungeon tanking.
More expensive off-hands may be stronger in specific activities or advanced builds, but Sarcophagus is a practical and affordable choice for learning PvE tanking. If you are still new, it is usually better to invest in a stable and cheap setup than to overpay for gear you cannot fully use yet.
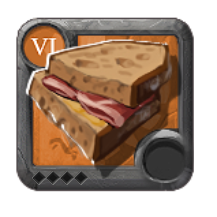
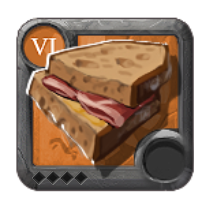
Lamb Sandwich increases your maximum health, making it a natural food choice for tanks. More health means a larger safety margin, better survival during heavy pulls, and more time for your healer to react.
Use your food after entering the dungeon and make sure the effect stays active during the entire run. Playing tank without food is a simple mistake that can make even easy pulls more dangerous than they need to be.
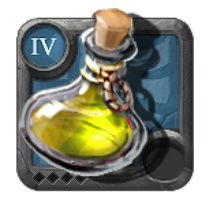
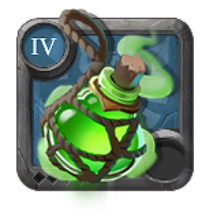
The Minor Poison Potion deals damage to enemies, but for a tank it also has another practical use: it can help pull mobs from a distance. You can use it to tag a mob pack and bring enemies toward you without immediately walking too deep into the room.
It is a cheap and useful consumable for beginner tanks. It does not replace defensive abilities or crowd control, but it helps you start pulls more smoothly and position mobs better for your group.
Simple ability order for beginners
A basic beginner-friendly tanking sequence looks like this:
- Use your food before entering the dungeon.
- Use Guardian Boots before a larger pull.
- Gather mobs and stack them in one place.
- Use your mace Q ability to maintain threat.
- Use crowd control to keep enemies grouped.
- Use Incubus Mace after the mobs are gathered.
- Activate Guardian Armor when enemies start dealing heavy damage.
- Save Soldier Helmet for emergencies or strong boss attacks.
- If mobs run toward your healer or DPS players, rebuild threat and reposition them.
This is not a fixed rotation. Tanking requires reaction. A small pull, a large pull, and a boss fight all require different timing.
Common beginner tank mistakes
The biggest mistake is pulling too many mobs without checking if the group is ready. If your healer has low energy or your DPS players are far behind, even a good set may not save the pull.
The second mistake is using all defensive abilities at once. A tank should spread defensive cooldowns over time. If everything is used at the same moment, you may have no protection left for the next dangerous attack.
The third mistake is poor mob positioning. Enemies should be stacked close together so DPS players can hit them with AoE abilities. If mobs are spread around the room, the dungeon becomes slower and harder for the healer.
Another common mistake is ignoring boss animations. Some attacks should be dodged, some should be blocked, and some should be handled with defensive cooldowns. A tank should learn the most dangerous boss mechanics because the group often depends on the tank’s reaction.
Who is this build for?
This build is a good choice for players who want to start tanking Group Dungeons and need a simple, cheap, and effective setup. It works especially well if you play with friends, learn dungeon pulls, or want to try the tank role without spending too much silver.
This is not the most advanced or most expensive tank set in the game. Its strength is simplicity, low cost, and reliable performance in basic PvE. Once you learn how to play this build well, it will be much easier to move into more advanced tank setups for HCE, Avalonian Dungeons, static dungeons, or other group PvE activities.
Summary
This Tank Build for Group Dungeons is a solid choice for new Albion Online players. Soldier Helmet gives you emergency protection, Guardian Armor reduces incoming damage from nearby mobs, Guardian Boots increase survivability, Incubus Mace helps control and weaken enemies, and Sarcophagus improves your defensive stability and threat generation.
If you want to learn tanking, this build teaches the most important basics: pulling mobs, holding aggro, stacking enemies for DPS, and rotating defensive abilities. It is a practical, affordable, and beginner-friendly PvE tank build for Group Dungeons in Albion Online.
Build Overview, Spells & Market Price
Below you can find the full tank build setup with selected abilities, recommended item tiers, role information, activity type, difficulty level, and estimated market prices for different Albion Online servers.
This section is useful if you want to quickly check the exact gear setup before entering a Group Dungeon. The build card shows the selected equipment, spells, minimum and recommended tier, budget level, and the cheapest available price estimates for Europe, Asia, and America servers.
Prices in Albion Online can change depending on the market, server, city, item quality, enchantment level, and current supply. Treat the listed cost as a practical estimate, not as a fixed final price. If you are a new player, start with the minimum recommended tier first, test the build in easier content, and upgrade your gear only when you feel comfortable with the tank role.
Albion Online build
Tank Build for Group Dungeons for New Players

Build activities
Loadout
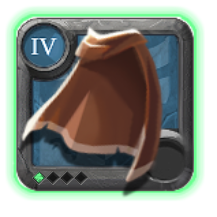
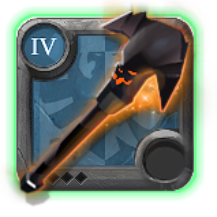
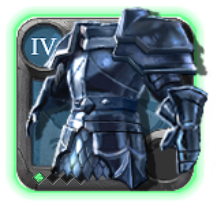
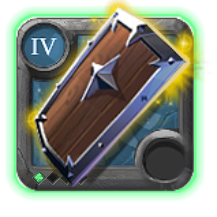
Selected spells and passives
Adept's Soldier Helmet
Skill

Block
Block incoming attacks, becoming immune to damage and all Crowd Control effects while channeling for 1.75s (can move while channeling).
Passive

Toughness
Incoming damage is reduced by 2.439%
Adept's Incubus Mace
First Weapon Spell

Threatening Smash
Swing your mace in a cone in front of you, dealing 419/460 physical damage to all enemies hit. Increases your threat towards all mobs hit by 100
Second Weapon Spell

Snare Charge
Leap towards the targeted position, dealing 153/168 physical damage to all enemies in a 6m radius on impact. Roots all enemies hit for 3.58/3.93 (vs players) / 7.14/7.85 (vs mobs).
Main Weapon Spell

Shrinking Curse
Shrink all enemies in a cone in front of you, decreasing their max and current Health by 25% of their damage dealt and Healing Cast by 40% for 8s.
Weapon Passive

Energetic
Every normal attack, you restore 4 energy.
Adept's Guardian Armor
Skill

Enfeeble Aura
Create an aura in a 7m radius around you that lasts 5s. Decreases all damage all affected enemies deal by 60%. Slows them by 15%. Invisible enemies entering the aura will be revealed
Passive
Toughness
Incoming damage is reduced by 2.439%
Passive 2

Protective Instinct
Increases your Threat Generation by 4.
Mutton Sandwich
Passive

Sandwich
Increases your Max Health by $buffovertime[0].value$ for $buffovertime[0].time$ .
Adept's Guardian Boots
Skill

Giant
Grow to a giant form, Increasing your Max and Current Health by 100%, and your Move Speed by 25% for 8s (can't be purged).
Passive
Toughness
Incoming damage is reduced by 2.439%
Minor Poison Potion
Passive

Poison Potion
Throw the potion at the targeted enemy, poisoning the target and dealing true damage over {0} . [#] Against players: {1} true damage [#] Against mounted players: {2} true damage [#] Against mobs: {3} true damage Whenever the poisoned, unmounted enemy takes direct damage , they will be slowed by {4} for {5} .
Adept's Riding Horse
Passive

Courier
Increases your Max Load by 1.25 kg.
Build prices
Europe Server Cheapest Price
Lowest price: 140,292srebro
Build Price in City
Item price breakdown
T4_BAG@1
- Bridgewatch
- 7,295srebro
- Steppe Cross
- Not available
- Martlock
- 7,559srebro
- Highland Cross
- Not available
- Thetford
- 6,556srebro
- Swamp Cross
- Not available
- Fort Sterling
- 10,978srebro
- Mountain Cross
- Not available
- Lymhurst
- 85,882srebro
- Forest Cross
- Not available
- Caerleon
- 7,960srebro
- Brecilien
- 293,326srebro
- Arthur’s Rest
- Not available
- Merlyn’s Rest
- Not available
- Morgana’s Rest
- Not available
T4_HEAD_PLATE_SET1@1
- Bridgewatch
- 2,220srebro
- Steppe Cross
- Not available
- Martlock
- 1,989srebro
- Highland Cross
- Not available
- Thetford
- 1,757srebro
- Swamp Cross
- Not available
- Fort Sterling
- 1,695srebro
- Mountain Cross
- Not available
- Lymhurst
- 2,145srebro
- Forest Cross
- Not available
- Caerleon
- 3,815srebro
- Brecilien
- 2,959srebro
- Arthur’s Rest
- Not available
- Merlyn’s Rest
- Not available
- Morgana’s Rest
- Not available
T4_CAPE@1
- Bridgewatch
- 4,996srebro
- Steppe Cross
- Not available
- Martlock
- 4,447srebro
- Highland Cross
- Not available
- Thetford
- 13,589srebro
- Swamp Cross
- Not available
- Fort Sterling
- 5,996srebro
- Mountain Cross
- Not available
- Lymhurst
- 9,300srebro
- Forest Cross
- Not available
- Caerleon
- 4,432srebro
- Brecilien
- 3,202srebro
- Arthur’s Rest
- Not available
- Merlyn’s Rest
- Not available
- Morgana’s Rest
- Not available
T4_MAIN_MACE_HELL@1
- Bridgewatch
- 46,998srebro
- Steppe Cross
- Not available
- Martlock
- 70,990srebro
- Highland Cross
- Not available
- Thetford
- Not available
- Swamp Cross
- Not available
- Fort Sterling
- Not available
- Mountain Cross
- Not available
- Lymhurst
- 40,988srebro
- Forest Cross
- Not available
- Caerleon
- 99,999srebro
- Brecilien
- 58,999srebro
- Arthur’s Rest
- Not available
- Merlyn’s Rest
- Not available
- Morgana’s Rest
- Not available
T4_ARMOR_PLATE_SET3@1
- Bridgewatch
- 3,991srebro
- Steppe Cross
- Not available
- Martlock
- 3,998srebro
- Highland Cross
- Not available
- Thetford
- 3,996srebro
- Swamp Cross
- Not available
- Fort Sterling
- 4,881srebro
- Mountain Cross
- Not available
- Lymhurst
- 4,197srebro
- Forest Cross
- Not available
- Caerleon
- 9,520srebro
- Brecilien
- 3,673srebro
- Arthur’s Rest
- Not available
- Merlyn’s Rest
- Not available
- Morgana’s Rest
- Not available
T4_OFF_TOWERSHIELD_UNDEAD@1
- Bridgewatch
- Not available
- Steppe Cross
- Not available
- Martlock
- 8,990srebro
- Highland Cross
- Not available
- Thetford
- 9,900srebro
- Swamp Cross
- Not available
- Fort Sterling
- Not available
- Mountain Cross
- Not available
- Lymhurst
- 10,284srebro
- Forest Cross
- Not available
- Caerleon
- 11,999srebro
- Brecilien
- 5,550srebro
- Arthur’s Rest
- Not available
- Merlyn’s Rest
- Not available
- Morgana’s Rest
- Not available
T6_MEAL_SANDWICH
- Bridgewatch
- 2,197srebro
- Steppe Cross
- 2,099srebro
- Martlock
- 1,931srebro
- Highland Cross
- Not available
- Thetford
- 1,899srebro
- Swamp Cross
- Not available
- Fort Sterling
- 1,774srebro
- Mountain Cross
- Not available
- Lymhurst
- 1,737srebro
- Forest Cross
- Not available
- Caerleon
- 1,988srebro
- Brecilien
- 2,220srebro
- Arthur’s Rest
- Not available
- Merlyn’s Rest
- Not available
- Morgana’s Rest
- Not available
T4_SHOES_PLATE_SET3@1
- Bridgewatch
- Not available
- Steppe Cross
- Not available
- Martlock
- 2,248srebro
- Highland Cross
- Not available
- Thetford
- 48,987srebro
- Swamp Cross
- Not available
- Fort Sterling
- 3,085srebro
- Mountain Cross
- Not available
- Lymhurst
- 2,938srebro
- Forest Cross
- Not available
- Caerleon
- 5,898srebro
- Brecilien
- 1,098srebro
- Arthur’s Rest
- Not available
- Merlyn’s Rest
- Not available
- Morgana’s Rest
- Not available
T4_POTION_COOLDOWN
- Bridgewatch
- 975srebro
- Steppe Cross
- Not available
- Martlock
- 758srebro
- Highland Cross
- Not available
- Thetford
- 784srebro
- Swamp Cross
- Not available
- Fort Sterling
- 824srebro
- Mountain Cross
- Not available
- Lymhurst
- 695srebro
- Forest Cross
- Not available
- Caerleon
- 886srebro
- Brecilien
- 664srebro
- Arthur’s Rest
- Not available
- Merlyn’s Rest
- Not available
- Morgana’s Rest
- Not available
T4_MOUNT_HORSE
- Bridgewatch
- 37,100srebro
- Steppe Cross
- Not available
- Martlock
- 37,382srebro
- Highland Cross
- Not available
- Thetford
- 34,000srebro
- Swamp Cross
- Not available
- Fort Sterling
- 35,000srebro
- Mountain Cross
- Not available
- Lymhurst
- 30,999srebro
- Forest Cross
- Not available
- Caerleon
- 28,713srebro
- Brecilien
- 42,850srebro
- Arthur’s Rest
- Not available
- Merlyn’s Rest
- Not available
- Morgana’s Rest
- Not available
America Server Cheapest Price
Lowest price: 89,546srebro
Build Price in City
Item price breakdown
T4_BAG@1
- Bridgewatch
- 8,500srebro
- Steppe Cross
- Not available
- Martlock
- 6,498srebro
- Highland Cross
- Not available
- Thetford
- 7,269srebro
- Swamp Cross
- Not available
- Fort Sterling
- 6,999srebro
- Mountain Cross
- Not available
- Lymhurst
- 7,810srebro
- Forest Cross
- Not available
- Caerleon
- 9,799srebro
- Brecilien
- 8,395srebro
- Arthur’s Rest
- Not available
- Merlyn’s Rest
- Not available
- Morgana’s Rest
- Not available
T4_HEAD_PLATE_SET1@1
- Bridgewatch
- 9,967srebro
- Steppe Cross
- Not available
- Martlock
- 4,744srebro
- Highland Cross
- Not available
- Thetford
- Not available
- Swamp Cross
- Not available
- Fort Sterling
- 2,284srebro
- Mountain Cross
- Not available
- Lymhurst
- 6,665srebro
- Forest Cross
- Not available
- Caerleon
- 3,997srebro
- Brecilien
- 1,490srebro
- Arthur’s Rest
- Not available
- Merlyn’s Rest
- Not available
- Morgana’s Rest
- Not available
T4_CAPE@1
- Bridgewatch
- 3,800srebro
- Steppe Cross
- Not available
- Martlock
- 4,175srebro
- Highland Cross
- Not available
- Thetford
- 4,496srebro
- Swamp Cross
- Not available
- Fort Sterling
- 3,694srebro
- Mountain Cross
- Not available
- Lymhurst
- 3,692srebro
- Forest Cross
- Not available
- Caerleon
- 7,000srebro
- Brecilien
- 1,771srebro
- Arthur’s Rest
- Not available
- Merlyn’s Rest
- Not available
- Morgana’s Rest
- Not available
T4_MAIN_MACE_HELL@1
- Bridgewatch
- 27,999srebro
- Steppe Cross
- Not available
- Martlock
- 22,000srebro
- Highland Cross
- Not available
- Thetford
- 90,000srebro
- Swamp Cross
- Not available
- Fort Sterling
- 29,992srebro
- Mountain Cross
- Not available
- Lymhurst
- 26,666srebro
- Forest Cross
- Not available
- Caerleon
- Not available
- Brecilien
- 47,998srebro
- Arthur’s Rest
- Not available
- Merlyn’s Rest
- Not available
- Morgana’s Rest
- Not available
T4_ARMOR_PLATE_SET3@1
- Bridgewatch
- 4,957srebro
- Steppe Cross
- Not available
- Martlock
- 6,278srebro
- Highland Cross
- Not available
- Thetford
- 4,587srebro
- Swamp Cross
- Not available
- Fort Sterling
- 3,121srebro
- Mountain Cross
- Not available
- Lymhurst
- 4,866srebro
- Forest Cross
- Not available
- Caerleon
- 19,982srebro
- Brecilien
- 2,894srebro
- Arthur’s Rest
- Not available
- Merlyn’s Rest
- Not available
- Morgana’s Rest
- Not available
T4_OFF_TOWERSHIELD_UNDEAD@1
- Bridgewatch
- 3,853srebro
- Steppe Cross
- Not available
- Martlock
- Not available
- Highland Cross
- Not available
- Thetford
- Not available
- Swamp Cross
- Not available
- Fort Sterling
- 9,964srebro
- Mountain Cross
- Not available
- Lymhurst
- 4,835srebro
- Forest Cross
- Not available
- Caerleon
- 9,500srebro
- Brecilien
- Not available
- Arthur’s Rest
- Not available
- Merlyn’s Rest
- Not available
- Morgana’s Rest
- Not available
T6_MEAL_SANDWICH
- Bridgewatch
- 2,292srebro
- Steppe Cross
- Not available
- Martlock
- 1,893srebro
- Highland Cross
- Not available
- Thetford
- Not available
- Swamp Cross
- Not available
- Fort Sterling
- 1,787srebro
- Mountain Cross
- Not available
- Lymhurst
- 1,810srebro
- Forest Cross
- Not available
- Caerleon
- 2,000srebro
- Brecilien
- 1,850srebro
- Arthur’s Rest
- Not available
- Merlyn’s Rest
- Not available
- Morgana’s Rest
- Not available
T4_SHOES_PLATE_SET3@1
- Bridgewatch
- 2,348srebro
- Steppe Cross
- Not available
- Martlock
- 2,068srebro
- Highland Cross
- Not available
- Thetford
- Not available
- Swamp Cross
- Not available
- Fort Sterling
- 2,989srebro
- Mountain Cross
- Not available
- Lymhurst
- 2,239srebro
- Forest Cross
- Not available
- Caerleon
- Not available
- Brecilien
- Not available
- Arthur’s Rest
- Not available
- Merlyn’s Rest
- Not available
- Morgana’s Rest
- Not available
T4_POTION_COOLDOWN
- Bridgewatch
- 626srebro
- Steppe Cross
- Not available
- Martlock
- 673srebro
- Highland Cross
- Not available
- Thetford
- 498srebro
- Swamp Cross
- Not available
- Fort Sterling
- 595srebro
- Mountain Cross
- Not available
- Lymhurst
- 608srebro
- Forest Cross
- Not available
- Caerleon
- 481srebro
- Brecilien
- 565srebro
- Arthur’s Rest
- Not available
- Merlyn’s Rest
- Not available
- Morgana’s Rest
- Not available
T4_MOUNT_HORSE
- Bridgewatch
- 31,997srebro
- Steppe Cross
- Not available
- Martlock
- 29,983srebro
- Highland Cross
- Not available
- Thetford
- 31,013srebro
- Swamp Cross
- Not available
- Fort Sterling
- 31,111srebro
- Mountain Cross
- Not available
- Lymhurst
- 30,355srebro
- Forest Cross
- Not available
- Caerleon
- 26,860srebro
- Brecilien
- 26,981srebro
- Arthur’s Rest
- Not available
- Merlyn’s Rest
- Not available
- Morgana’s Rest
- Not available
Asia Server Cheapest Price
Lowest price: 198,790srebro
Build Price in City
Item price breakdown
T4_BAG@1
- Bridgewatch
- 9,897srebro
- Steppe Cross
- Not available
- Martlock
- 5,495srebro
- Highland Cross
- Not available
- Thetford
- Not available
- Swamp Cross
- Not available
- Fort Sterling
- 6,994srebro
- Mountain Cross
- Not available
- Lymhurst
- 7,380srebro
- Forest Cross
- Not available
- Caerleon
- 12,092srebro
- Brecilien
- 5,819srebro
- Arthur’s Rest
- Not available
- Merlyn’s Rest
- Not available
- Morgana’s Rest
- Not available
T4_HEAD_PLATE_SET1@1
- Bridgewatch
- Not available
- Steppe Cross
- Not available
- Martlock
- Not available
- Highland Cross
- Not available
- Thetford
- Not available
- Swamp Cross
- Not available
- Fort Sterling
- Not available
- Mountain Cross
- Not available
- Lymhurst
- Not available
- Forest Cross
- Not available
- Caerleon
- 6,962srebro
- Brecilien
- 3,091srebro
- Arthur’s Rest
- Not available
- Merlyn’s Rest
- Not available
- Morgana’s Rest
- Not available
T4_CAPE@1
- Bridgewatch
- Not available
- Steppe Cross
- Not available
- Martlock
- 5,997srebro
- Highland Cross
- Not available
- Thetford
- Not available
- Swamp Cross
- Not available
- Fort Sterling
- 5,197srebro
- Mountain Cross
- Not available
- Lymhurst
- Not available
- Forest Cross
- Not available
- Caerleon
- 5,686srebro
- Brecilien
- 3,000srebro
- Arthur’s Rest
- Not available
- Merlyn’s Rest
- Not available
- Morgana’s Rest
- Not available
T4_MAIN_MACE_HELL@1
- Bridgewatch
- Not available
- Steppe Cross
- Not available
- Martlock
- Not available
- Highland Cross
- Not available
- Thetford
- Not available
- Swamp Cross
- Not available
- Fort Sterling
- 60,497srebro
- Mountain Cross
- Not available
- Lymhurst
- 44,000srebro
- Forest Cross
- Not available
- Caerleon
- 60,849srebro
- Brecilien
- Not available
- Arthur’s Rest
- Not available
- Merlyn’s Rest
- Not available
- Morgana’s Rest
- Not available
T4_ARMOR_PLATE_SET3@1
- Bridgewatch
- Not available
- Steppe Cross
- Not available
- Martlock
- Not available
- Highland Cross
- Not available
- Thetford
- Not available
- Swamp Cross
- Not available
- Fort Sterling
- Not available
- Mountain Cross
- Not available
- Lymhurst
- 8,675srebro
- Forest Cross
- Not available
- Caerleon
- 17,987srebro
- Brecilien
- Not available
- Arthur’s Rest
- Not available
- Merlyn’s Rest
- Not available
- Morgana’s Rest
- Not available
T4_OFF_TOWERSHIELD_UNDEAD@1
- Bridgewatch
- Not available
- Steppe Cross
- Not available
- Martlock
- Not available
- Highland Cross
- Not available
- Thetford
- Not available
- Swamp Cross
- Not available
- Fort Sterling
- Not available
- Mountain Cross
- Not available
- Lymhurst
- Not available
- Forest Cross
- Not available
- Caerleon
- 11,998srebro
- Brecilien
- Not available
- Arthur’s Rest
- Not available
- Merlyn’s Rest
- Not available
- Morgana’s Rest
- Not available
T6_MEAL_SANDWICH
- Bridgewatch
- 2,588srebro
- Steppe Cross
- Not available
- Martlock
- 2,551srebro
- Highland Cross
- Not available
- Thetford
- Not available
- Swamp Cross
- Not available
- Fort Sterling
- 2,546srebro
- Mountain Cross
- Not available
- Lymhurst
- Not available
- Forest Cross
- Not available
- Caerleon
- 2,589srebro
- Brecilien
- Not available
- Arthur’s Rest
- Not available
- Merlyn’s Rest
- Not available
- Morgana’s Rest
- Not available
T4_SHOES_PLATE_SET3@1
- Bridgewatch
- Not available
- Steppe Cross
- Not available
- Martlock
- Not available
- Highland Cross
- Not available
- Thetford
- Not available
- Swamp Cross
- Not available
- Fort Sterling
- Not available
- Mountain Cross
- Not available
- Lymhurst
- Not available
- Forest Cross
- Not available
- Caerleon
- 9,952srebro
- Brecilien
- Not available
- Arthur’s Rest
- Not available
- Merlyn’s Rest
- Not available
- Morgana’s Rest
- Not available
T4_POTION_COOLDOWN
- Bridgewatch
- Not available
- Steppe Cross
- Not available
- Martlock
- Not available
- Highland Cross
- Not available
- Thetford
- 860srebro
- Swamp Cross
- Not available
- Fort Sterling
- 888srebro
- Mountain Cross
- Not available
- Lymhurst
- Not available
- Forest Cross
- Not available
- Caerleon
- 691srebro
- Brecilien
- Not available
- Arthur’s Rest
- Not available
- Merlyn’s Rest
- Not available
- Morgana’s Rest
- Not available
T4_MOUNT_HORSE
- Bridgewatch
- 45,996srebro
- Steppe Cross
- Not available
- Martlock
- 59,899srebro
- Highland Cross
- Not available
- Thetford
- 45,898srebro
- Swamp Cross
- Not available
- Fort Sterling
- 53,497srebro
- Mountain Cross
- Not available
- Lymhurst
- 47,944srebro
- Forest Cross
- Not available
- Caerleon
- 69,984srebro
- Brecilien
- Not available
- Arthur’s Rest
- Not available
- Merlyn’s Rest
- Not available
- Morgana’s Rest
- Not available
FAQ – Tank Build for Group Dungeons for New Players
Is this tank build good for new players?
Yes. This is a simple and affordable tank build for Group Dungeons in Albion Online. It helps new players learn basic PvE tanking, threat generation, mob positioning, and defensive cooldown usage.
Is Incubus Mace required?
It is not absolutely required at the very beginning, but it is a very strong PvE tank weapon. If you need a cheaper option, you can start with a basic one-handed mace and upgrade to Incubus Mace later.
Can I use this build in 4.1 or 4.2?
Yes. A 4.1 or 4.2 version is a good starting point for learning. For harder dungeons, item tier is not the only factor. Specialization, healer quality, group damage, positioning, and game knowledge are also important.
What is the most important part of tanking?
The most important part is keeping mobs focused on you, stacking them in one place, using defensive abilities at the right time, and avoiding pulls that are too large for your group.
What food should I use as a tank?
Mutton Sandwich is a good and simple choice because it increases maximum health. This gives the tank a larger safety margin during pulls and boss fights.
Why does a tank use Minor Poison Potion?
Minor Poison Potion can be used to deal damage, but it is also useful for pulling mobs from a distance. It helps start pulls and bring enemies into position for the group.