
The Great Fire Staff is the best weapon in the Fire Staff line for a new player who wants to start running Group Dungeons. It is inexpensive, easy to use, deals high area-of-effect damage, and does not require purchasing an additional off-hand item.
The Albion Online Fire Mage Build is a very good DPS choice because almost all of its commonly used abilities can damage multiple enemies at once. The tank gathers the mobs in one place, and the Pyromancer takes advantage of that moment by placing Burning Field underneath them, casting Raging Flare, and hitting the entire group with Flame Pillar.
This build also performs well in Solo Dungeons. By replacing the Royal Robe with a Cleric Robe, Mage Robe, or Druid Robe, it can also be used to gain Fame in the Open World and on the Roads of Avalon.
Progressing through the Fire Staff line does not end with ordinary Group Dungeons. Specialized Pyromancers are also welcome in Static Dungeons, Avalonian Dungeons, larger PvE groups, and ZvZ content. The Great Fire Staff is therefore not only an inexpensive starting weapon, but also a good way to begin progressing through the entire Fire Staff weapon line.
Who is this build for?
This build is primarily intended for players who:
- are beginning to progress through the Fire Staff weapon line;
- want to play as a DPS in Group Dungeons;
- are looking for an inexpensive build with high area-of-effect damage;
- want to develop a weapon that will remain useful in later PvE content;
- need a build that can easily be adapted for solo play;
- are learning how to cooperate with a tank and healer;
- want to gain Fame without investing large amounts of Silver.
Why is the Great Fire Staff the best starting choice?
The Great Fire Staff is the least expensive and, at the same time, the best Fire Staff choice for starting group and solo PvE.
Its main ability, Flame Pillar, does not require you to remain stationary or spend a long time casting. After selecting the target area, you can immediately move, avoid an enemy attack, or change your position.
Flame Pillar hits after a short delay of approximately 0.8 seconds. In practice, this is not a problem in Group Dungeons because the DPS begins attacking only after the tank has gathered the mobs. The enemies are then standing in one place, making it easy to hit the entire group.
Another advantage of Flame Pillar is its short cooldown. This allows you to use it during almost every larger pull and several times during longer boss fights.
The main advantages of the Great Fire Staff are:
- low purchase cost;
- very high area-of-effect damage;
- a simple and effective rotation;
- no need to purchase an off-hand item;
- the ability to move immediately after using Flame Pillar;
- a short cooldown on its main ability;
- good performance in both group and solo PvE;
- progression toward specialization bonuses that will later benefit other Fire Staff weapons.
Great Fire Staff abilities
Q – Burning Field
Burning Field is the Pyromancer’s basic ability for clearing groups of enemies. Place it directly underneath the mobs gathered by the tank.
It provides the most value when the enemies are standing close together and remain within the area for the full duration of the ability.
Burning Field is best used:
- against larger groups of mobs;
- near chests;
- during longer pulls;
- against bosses that summon additional enemies;
- in places where the tank can hold the enemies in one position for several seconds.
Multiple Fire Mages in one party
The effects of Burning Field do not stack.
When there is more than one Pyromancer in the party, only one player should use Burning Field. The remaining Fire Mages should switch to the first ability available in the Q slot.
This is not a matter of preference or playstyle. It is a direct consequence of the ability’s mechanics. Using several Burning Fields against the same enemies does not provide the party with an appropriate increase in damage, so additional Pyromancers should use a different Q ability.
Before entering the dungeon, the party should decide:
- which Pyromancer will use Burning Field;
- which players will switch to the first Q ability;
- who will use the Royal Robe first;
- the order in which Poison Potions will be thrown.
These simple arrangements can significantly improve the party’s dungeon-clearing speed.
W – Flame Blast
A new player who is beginning to progress through the Fire Staff line will usually start with Flame Blast.
It is a straightforward area-of-effect ability that performs well during the first Group Dungeons. It does not require a complicated rotation and helps a new Pyromancer learn how to aim correctly at groups of enemies.
Flame Blast is best used:
- after the tank has gathered the mobs;
- directly in the middle of the enemy group;
- between uses of Burning Field and Flame Pillar;
- during the initial progression of the Fire Staff weapon line.
It is a suitable starting ability, but once Raging Flare has been unlocked, you should switch to it.
W – Raging Flare
Raging Flare is the best Great Fire Staff W ability for Group Dungeons.
In group PvE, the tank gathers the enemies and holds them in one place. This allows Raging Flare to hit the entire group easily and deal its full damage.
The main advantages of Raging Flare are:
- high area-of-effect damage;
- the ability to hit an entire group of mobs;
- strong performance against enemies positioned by the tank;
- high effectiveness during chest pulls;
- very good performance during longer pulls;
- effectiveness against bosses and powerful enemies;
- strong synergy with Burning Field and Flame Pillar.
Raging Flare should only be cast after the tank has finished gathering the enemies. When it is used too early, the mobs may still be moving, causing some of its damage to be wasted.
E – Flame Pillar
Flame Pillar is the Great Fire Staff’s main ability.
After selecting the target area, the spell activates with a short delay, but it does not require the player to remain stationary. You can begin moving immediately, making it easier to avoid enemy abilities.
In practice, the delay does not cause problems. A Pyromancer should begin the full rotation only after the tank has gathered and positioned the mobs. The enemies will then remain in one place, making them very easy to hit with Flame Pillar.
Use Flame Pillar:
- against the entire group of mobs gathered by the tank;
- near chests;
- against bosses;
- against enemies with large health pools;
- while the Royal Robe’s ability is active;
- after throwing a Poison Potion;
- whenever the ability is available and you can hit several targets.
Do not cast Flame Pillar against a single weak mob when the party is about to begin a larger pull.
How to play a Fire Mage
The most important rule is simple:
The tank gathers the mobs first, and only then should the DPS begin dealing damage.
Do not attack enemies while the tank is only running past them or attempting to combine several groups into one larger pull.
When you begin attacking too early:
- some mobs may run toward you;
- the enemies will become spread out;
- Burning Field will not cover the entire group;
- Raging Flare will not hit every target;
- the tank will have to regain aggro;
- the healer will waste Energy healing a DPS player;
- the entire party will clear the dungeon more slowly.
A good Pyromancer does not try to be the first player to deal damage. Wait for the enemies to be positioned, and then use all your area-of-effect abilities against the entire group.
Simple rotation
- Wait for the tank to gather the enemies.
- Position yourself behind the tank or slightly to the side.
- Place Burning Field underneath the entire group of mobs.
- Use Raging Flare.
- Hit the enemies with Flame Pillar.
- Move closer and use Firebreath from the Mage Cowl.
- Continue using your Q ability.
- Use Raging Flare and Flame Pillar again when their cooldowns end.
- Use Energetic Sprint when you begin running low on Energy.
- Change your position immediately when an enemy begins using a dangerous ability.

Great Fire Staff is the least expensive and best Fire Staff choice for group or solo PvE. Because its spell activates immediately, you can avoid enemy abilities without interrupting a long cast. Its main ability also has a short cooldown.

Mage Cowl increases the Pyromancer’s damage and works well with the build’s area-of-effect rotation. Firebreath deals damage in a cone. The main disadvantage of this ability is that it requires you to move closer to the enemies. However, you should not walk directly into the middle of the mobs.

Royal Robe is one of the best robes for group PvE.
Its main ability creates an area that strengthens players standing within it. It increases magic damage, improves healing, and reduces cast times.
The greatest value of the Royal Robe is that it strengthens not only the player using it, but also the other members of the party.
The bonus increases while players remain within the ability’s area. For this reason, the Royal Robe should be placed somewhere the DPS players and healer can safely remain for a longer period.

Druid Sandals, use Energetic Sprint because it increases movement speed, helps you avoid attacks, allows you to catch up with the party, and restores Energy while active.
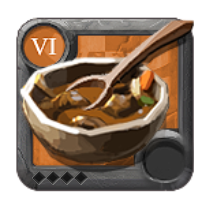
Mutton Stew is suitable food for a DPS player focused on dealing as much damage as possible. Its effect lasts for 30 minutes. Bring between three and five portions to Group Dungeons, depending on the planned length of the run.
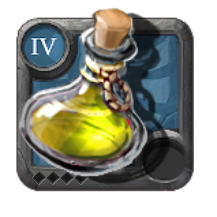
Minor Poison Potions is worth taking between 30 and 50 Minor Poison Potions for a longer series of Group Dungeons. Throw them at mobs with large health pools or high Armor, as well as enemies that deal a large amount of damage in a short time. Most importantly, always use them against bosses and powerful mobs near chests.
Poison Potion effects do not stack, so party members should throw them one after another. Correctly rotating Poison Potions can significantly reduce the time required to kill any enemy that causes the party problems.
Build summary, abilities, and market price
Below is the complete build card containing the selected equipment, abilities, activity, role, difficulty, recommended tiers, and estimated prices across the Albion Online servers.
Use this section as a quick overview of the build before entering a Group Dungeon. Prices may vary depending on the server, city, item quality, enchantment level, and current market conditions, so they should be treated as estimates.
Билд Albion Online
Fire Mage Build for Group Dungeons for New Players

Активности билда
Экипировка





Selected spells and passives
Adept's Mage Cowl
Умение

Firebreath
Breathe fire in a cone in front of you, dealing 420 magical damage over 3s to all enemies hit.
Пассивное

Aggression
Increases your damage and heal power by 3.5%
Adept's Great Fire Staff
First Weapon Spell

Burning Field
Fire a burning orb at the targeted position, dealing 149/164 magical damage in a 3m radius. Sets the ground on fire in a 3m radius for 4s. Deals 158/173 magical damage (vs players)/ 57/63 magical damage (vs mobs) every 0.5s.
Second Weapon Spell

Raging Flare
Unleash a cone of fire in front of you igniting all enemies hit, dealing 497/546 magical damage over 4s. Enemies already affected by Fire Bolt, Burning Field, or Searing Flame will take an additional 201/221 magical damage. Knocks back all enemies hit by 2.87m.
Main Weapon Spell

Flame Pillar
Conjure a flaming pillar with a 4m radius around the targeted position after 0.8s, dealing 599 magical damage to all enemies hit. Hitting at least one enemy reduces the cooldown of the ability by 5s.
Weapon Passive

Burn
Every normal attack sets the enemy on fire, dealing an additional 23 per second for 2.5s
Adept's Royal Robe
Умение

Magic Rune
Place a magic rune with a 5m radius under your feet, lasting 6s. Increases magical damage and Healing Cast by 5% and reduces Cast Times by 10% for up to 6 allies for every 1s they stand on the rune (stacks up to 6 times). The effect lasts for 5s after they leave the area of the rune (this also happens after the rune disappears).
Пассивное
Aggression
Increases your damage and heal power by 3.5%
Mutton Stew
Пассивное

Meat Stew
Increases all damage you deal by $buffovertime[0].value$ for $buffovertime[0].time$ .
Adept's Druid Sandals
Умение

Energetic Sprint
Start to sprint, increasing your Move Speed by 80% for 5s Restores 7 Energy every 1s
Пассивное
Aggression
Increases your damage and heal power by 3.5%
Minor Poison Potion
Пассивное

Poison Potion
Throw the potion at the targeted enemy, poisoning the target and dealing true damage over {0} . [#] Against players: {1} true damage [#] Against mounted players: {2} true damage [#] Against mobs: {3} true damage Whenever the poisoned, unmounted enemy takes direct damage , they will be slowed by {4} for {5} .
Adept's Riding Horse
Пассивное

Courier
Increases your Max Load by 1.25 kg.
Цены билда
Europe Server Cheapest Price
Низшая цена: 243,870srebro (последняя известная цена)
Build Price in City
Item price breakdown
Adept's Bag
- Bridgewatch
- 7,068srebro (последняя известная цена)
- Steppe Cross
- Недоступно
- Martlock
- 6,549srebro (последняя известная цена)
- Highland Cross
- Недоступно
- Thetford
- 5,990srebro (последняя известная цена)
- Swamp Cross
- 24,890srebro (последняя известная цена)
- Fort Sterling
- 6,298srebro (последняя известная цена)
- Mountain Cross
- Недоступно
- Lymhurst
- 6,398srebro (последняя известная цена)
- Forest Cross
- Недоступно
- Caerleon
- 12,980srebro (последняя известная цена)
- Brecilien
- 5,596srebro (последняя известная цена)
- Arthur’s Rest
- Недоступно
- Merlyn’s Rest
- Недоступно
- Morgana’s Rest
- Недоступно
Adept's Mage Cowl
- Bridgewatch
- 2,999srebro (последняя известная цена)
- Steppe Cross
- Недоступно
- Martlock
- 3,869srebro (последняя известная цена)
- Highland Cross
- Недоступно
- Thetford
- 1,598srebro (последняя известная цена)
- Swamp Cross
- Недоступно
- Fort Sterling
- 1,560srebro (последняя известная цена)
- Mountain Cross
- Недоступно
- Lymhurst
- 2,791srebro (последняя известная цена)
- Forest Cross
- Недоступно
- Caerleon
- 13,994srebro (последняя известная цена)
- Brecilien
- 8,000srebro (последняя известная цена)
- Arthur’s Rest
- Недоступно
- Merlyn’s Rest
- Недоступно
- Morgana’s Rest
- Недоступно
Adept's Cape
- Bridgewatch
- 3,492srebro (последняя известная цена)
- Steppe Cross
- Недоступно
- Martlock
- 3,895srebro (последняя известная цена)
- Highland Cross
- Недоступно
- Thetford
- 3,862srebro (последняя известная цена)
- Swamp Cross
- Недоступно
- Fort Sterling
- 4,195srebro (последняя известная цена)
- Mountain Cross
- Недоступно
- Lymhurst
- 3,753srebro (последняя известная цена)
- Forest Cross
- Недоступно
- Caerleon
- 6,662srebro (последняя известная цена)
- Brecilien
- 3,500srebro (последняя известная цена)
- Arthur’s Rest
- Недоступно
- Merlyn’s Rest
- Недоступно
- Morgana’s Rest
- Недоступно
Adept's Great Fire Staff
- Bridgewatch
- 8,690srebro (последняя известная цена)
- Steppe Cross
- Недоступно
- Martlock
- 7,483srebro (последняя известная цена)
- Highland Cross
- Недоступно
- Thetford
- 4,999srebro (последняя известная цена)
- Swamp Cross
- Недоступно
- Fort Sterling
- 4,871srebro (последняя известная цена)
- Mountain Cross
- Недоступно
- Lymhurst
- 6,000srebro (последняя известная цена)
- Forest Cross
- Недоступно
- Caerleon
- 27,894srebro (последняя известная цена)
- Brecilien
- 10,999srebro (последняя известная цена)
- Arthur’s Rest
- Недоступно
- Merlyn’s Rest
- Недоступно
- Morgana’s Rest
- Недоступно
Adept's Royal Robe
- Bridgewatch
- 230,256srebro (последняя известная цена)
- Steppe Cross
- Недоступно
- Martlock
- 199,999srebro (последняя известная цена)
- Highland Cross
- Недоступно
- Thetford
- 189,997srebro (последняя известная цена)
- Swamp Cross
- Недоступно
- Fort Sterling
- 230,950srebro (последняя известная цена)
- Mountain Cross
- Недоступно
- Lymhurst
- 199,997srebro (последняя известная цена)
- Forest Cross
- Недоступно
- Caerleon
- 399,995srebro (последняя известная цена)
- Brecilien
- 253,973srebro (последняя известная цена)
- Arthur’s Rest
- Недоступно
- Merlyn’s Rest
- Недоступно
- Morgana’s Rest
- Недоступно
Mutton Stew
- Bridgewatch
- 2,345srebro (последняя известная цена)
- Steppe Cross
- Недоступно
- Martlock
- 1,675srebro (последняя известная цена)
- Highland Cross
- Недоступно
- Thetford
- 2,100srebro (последняя известная цена)
- Swamp Cross
- Недоступно
- Fort Sterling
- 1,991srebro (последняя известная цена)
- Mountain Cross
- Недоступно
- Lymhurst
- 2,319srebro (последняя известная цена)
- Forest Cross
- Недоступно
- Caerleon
- 1,891srebro (последняя известная цена)
- Brecilien
- 2,089srebro (последняя известная цена)
- Arthur’s Rest
- Недоступно
- Merlyn’s Rest
- Недоступно
- Morgana’s Rest
- Недоступно
Adept's Druid Sandals
- Bridgewatch
- 4,787srebro (последняя известная цена)
- Steppe Cross
- Недоступно
- Martlock
- 6,191srebro (последняя известная цена)
- Highland Cross
- Недоступно
- Thetford
- 2,499srebro (последняя известная цена)
- Swamp Cross
- Недоступно
- Fort Sterling
- 5,005srebro (последняя известная цена)
- Mountain Cross
- Недоступно
- Lymhurst
- 3,975srebro (последняя известная цена)
- Forest Cross
- Недоступно
- Caerleon
- 19,997srebro (последняя известная цена)
- Brecilien
- 3,454srebro (последняя известная цена)
- Arthur’s Rest
- Недоступно
- Merlyn’s Rest
- Недоступно
- Morgana’s Rest
- Недоступно
Minor Poison Potion
- Bridgewatch
- 837srebro
- Steppe Cross
- Недоступно
- Martlock
- 783srebro
- Highland Cross
- Недоступно
- Thetford
- 675srebro
- Swamp Cross
- Недоступно
- Fort Sterling
- 568srebro
- Mountain Cross
- Недоступно
- Lymhurst
- 741srebro
- Forest Cross
- Недоступно
- Caerleon
- 823srebro
- Brecilien
- 569srebro
- Arthur’s Rest
- Недоступно
- Merlyn’s Rest
- Недоступно
- Morgana’s Rest
- Недоступно
Adept's Riding Horse
- Bridgewatch
- 33,420srebro (последняя известная цена)
- Steppe Cross
- 65,000srebro (последняя известная цена)
- Martlock
- 33,284srebro (последняя известная цена)
- Highland Cross
- 56,500srebro (последняя известная цена)
- Thetford
- 32,150srebro (последняя известная цена)
- Swamp Cross
- 60,000srebro (последняя известная цена)
- Fort Sterling
- 34,075srebro (последняя известная цена)
- Mountain Cross
- 43,390srebro (последняя известная цена)
- Lymhurst
- 30,998srebro (последняя известная цена)
- Forest Cross
- 37,990srebro (последняя известная цена)
- Caerleon
- 21,989srebro (последняя известная цена)
- Brecilien
- 10,000,000srebro (последняя известная цена)
- Arthur’s Rest
- Недоступно
- Merlyn’s Rest
- Недоступно
- Morgana’s Rest
- Недоступно
America Server Cheapest Price
Низшая цена: 216,521srebro (последняя известная цена)
Build Price in City
Item price breakdown
Adept's Bag
- Bridgewatch
- 5,795srebro (последняя известная цена)
- Steppe Cross
- Недоступно
- Martlock
- 5,588srebro (последняя известная цена)
- Highland Cross
- Недоступно
- Thetford
- 6,458srebro (последняя известная цена)
- Swamp Cross
- Недоступно
- Fort Sterling
- 10,277srebro (последняя известная цена)
- Mountain Cross
- 12,500srebro (последняя известная цена)
- Lymhurst
- 6,673srebro (последняя известная цена)
- Forest Cross
- Недоступно
- Caerleon
- 9,597srebro (последняя известная цена)
- Brecilien
- 14,996srebro (последняя известная цена)
- Arthur’s Rest
- Недоступно
- Merlyn’s Rest
- Недоступно
- Morgana’s Rest
- Недоступно
Adept's Mage Cowl
- Bridgewatch
- 4,697srebro (последняя известная цена)
- Steppe Cross
- Недоступно
- Martlock
- 1,490srebro (последняя известная цена)
- Highland Cross
- Недоступно
- Thetford
- 1,040srebro (последняя известная цена)
- Swamp Cross
- Недоступно
- Fort Sterling
- 1,519srebro (последняя известная цена)
- Mountain Cross
- Недоступно
- Lymhurst
- 1,392srebro (последняя известная цена)
- Forest Cross
- Недоступно
- Caerleon
- 3,797srebro (последняя известная цена)
- Brecilien
- 1,484srebro (последняя известная цена)
- Arthur’s Rest
- Недоступно
- Merlyn’s Rest
- Недоступно
- Morgana’s Rest
- Недоступно
Adept's Cape
- Bridgewatch
- 4,443srebro (последняя известная цена)
- Steppe Cross
- Недоступно
- Martlock
- 3,598srebro (последняя известная цена)
- Highland Cross
- Недоступно
- Thetford
- 2,397srebro (последняя известная цена)
- Swamp Cross
- Недоступно
- Fort Sterling
- 2,998srebro (последняя известная цена)
- Mountain Cross
- Недоступно
- Lymhurst
- 2,998srebro (последняя известная цена)
- Forest Cross
- Недоступно
- Caerleon
- 6,296srebro (последняя известная цена)
- Brecilien
- 3,600srebro (последняя известная цена)
- Arthur’s Rest
- Недоступно
- Merlyn’s Rest
- Недоступно
- Morgana’s Rest
- Недоступно
Adept's Great Fire Staff
- Bridgewatch
- 9,184srebro (последняя известная цена)
- Steppe Cross
- Недоступно
- Martlock
- 8,997srebro (последняя известная цена)
- Highland Cross
- Недоступно
- Thetford
- 5,991srebro (последняя известная цена)
- Swamp Cross
- Недоступно
- Fort Sterling
- 6,981srebro (последняя известная цена)
- Mountain Cross
- Недоступно
- Lymhurst
- 7,496srebro (последняя известная цена)
- Forest Cross
- Недоступно
- Caerleon
- 18,999srebro (последняя известная цена)
- Brecilien
- 5,900srebro (последняя известная цена)
- Arthur’s Rest
- Недоступно
- Merlyn’s Rest
- Недоступно
- Morgana’s Rest
- Недоступно
Adept's Royal Robe
- Bridgewatch
- 179,695srebro (последняя известная цена)
- Steppe Cross
- Недоступно
- Martlock
- 198,986srebro (последняя известная цена)
- Highland Cross
- Недоступно
- Thetford
- 209,298srebro (последняя известная цена)
- Swamp Cross
- Недоступно
- Fort Sterling
- 160,000srebro (последняя известная цена)
- Mountain Cross
- Недоступно
- Lymhurst
- 159,990srebro (последняя известная цена)
- Forest Cross
- Недоступно
- Caerleon
- 230,000srebro (последняя известная цена)
- Brecilien
- 246,995srebro (последняя известная цена)
- Arthur’s Rest
- Недоступно
- Merlyn’s Rest
- Недоступно
- Morgana’s Rest
- Недоступно
Mutton Stew
- Bridgewatch
- 2,050srebro (последняя известная цена)
- Steppe Cross
- Недоступно
- Martlock
- 2,264srebro (последняя известная цена)
- Highland Cross
- 10,000srebro (последняя известная цена)
- Thetford
- 2,331srebro (последняя известная цена)
- Swamp Cross
- Недоступно
- Fort Sterling
- 2,210srebro (последняя известная цена)
- Mountain Cross
- Недоступно
- Lymhurst
- 2,030srebro (последняя известная цена)
- Forest Cross
- Недоступно
- Caerleon
- 1,761srebro (последняя известная цена)
- Brecilien
- 1,980srebro (последняя известная цена)
- Arthur’s Rest
- Недоступно
- Merlyn’s Rest
- Недоступно
- Morgana’s Rest
- Недоступно
Adept's Druid Sandals
- Bridgewatch
- 9,991srebro (последняя известная цена)
- Steppe Cross
- Недоступно
- Martlock
- 2,398srebro (последняя известная цена)
- Highland Cross
- Недоступно
- Thetford
- 1,493srebro (последняя известная цена)
- Swamp Cross
- Недоступно
- Fort Sterling
- 3,345srebro (последняя известная цена)
- Mountain Cross
- Недоступно
- Lymhurst
- 5,465srebro (последняя известная цена)
- Forest Cross
- Недоступно
- Caerleon
- 6,999srebro (последняя известная цена)
- Brecilien
- 1,294srebro (последняя известная цена)
- Arthur’s Rest
- Недоступно
- Merlyn’s Rest
- Недоступно
- Morgana’s Rest
- Недоступно
Minor Poison Potion
- Bridgewatch
- 584srebro
- Steppe Cross
- Недоступно
- Martlock
- 637srebro
- Highland Cross
- Недоступно
- Thetford
- 638srebro
- Swamp Cross
- Недоступно
- Fort Sterling
- 644srebro
- Mountain Cross
- Недоступно
- Lymhurst
- 580srebro
- Forest Cross
- Недоступно
- Caerleon
- 519srebro
- Brecilien
- 479srebro
- Arthur’s Rest
- Недоступно
- Merlyn’s Rest
- Недоступно
- Morgana’s Rest
- Недоступно
Adept's Riding Horse
- Bridgewatch
- 31,500srebro (последняя известная цена)
- Steppe Cross
- Недоступно
- Martlock
- 26,930srebro (последняя известная цена)
- Highland Cross
- 48,786srebro (последняя известная цена)
- Thetford
- 29,938srebro (последняя известная цена)
- Swamp Cross
- 59,999srebro (последняя известная цена)
- Fort Sterling
- 29,970srebro (последняя известная цена)
- Mountain Cross
- 30,000srebro (последняя известная цена)
- Lymhurst
- 29,897srebro (последняя известная цена)
- Forest Cross
- Недоступно
- Caerleon
- 25,563srebro (последняя известная цена)
- Brecilien
- 31,826srebro (последняя известная цена)
- Arthur’s Rest
- Недоступно
- Merlyn’s Rest
- Недоступно
- Morgana’s Rest
- Недоступно
Asia Server Cheapest Price
Низшая цена: 342,802srebro (последняя известная цена)
Build Price in City
Item price breakdown
Adept's Bag
- Bridgewatch
- 7,759srebro (последняя известная цена)
- Steppe Cross
- Недоступно
- Martlock
- 8,995srebro (последняя известная цена)
- Highland Cross
- Недоступно
- Thetford
- 7,699srebro (последняя известная цена)
- Swamp Cross
- 40,000srebro (последняя известная цена)
- Fort Sterling
- 6,485srebro (последняя известная цена)
- Mountain Cross
- Недоступно
- Lymhurst
- 6,997srebro (последняя известная цена)
- Forest Cross
- Недоступно
- Caerleon
- 13,500srebro (последняя известная цена)
- Brecilien
- 9,082srebro (последняя известная цена)
- Arthur’s Rest
- Недоступно
- Merlyn’s Rest
- Недоступно
- Morgana’s Rest
- Недоступно
Adept's Mage Cowl
- Bridgewatch
- 2,389srebro (последняя известная цена)
- Steppe Cross
- Недоступно
- Martlock
- 3,997srebro (последняя известная цена)
- Highland Cross
- Недоступно
- Thetford
- 5,525srebro (последняя известная цена)
- Swamp Cross
- Недоступно
- Fort Sterling
- 1,885srebro (последняя известная цена)
- Mountain Cross
- Недоступно
- Lymhurst
- 3,333srebro (последняя известная цена)
- Forest Cross
- Недоступно
- Caerleon
- 19,977srebro (последняя известная цена)
- Brecilien
- 1,994srebro (последняя известная цена)
- Arthur’s Rest
- Недоступно
- Merlyn’s Rest
- Недоступно
- Morgana’s Rest
- Недоступно
Adept's Cape
- Bridgewatch
- 4,000srebro (последняя известная цена)
- Steppe Cross
- Недоступно
- Martlock
- 3,250srebro (последняя известная цена)
- Highland Cross
- Недоступно
- Thetford
- 3,495srebro (последняя известная цена)
- Swamp Cross
- Недоступно
- Fort Sterling
- 5,000srebro (последняя известная цена)
- Mountain Cross
- Недоступно
- Lymhurst
- 4,458srebro (последняя известная цена)
- Forest Cross
- Недоступно
- Caerleon
- 8,555srebro (последняя известная цена)
- Brecilien
- 2,288srebro (последняя известная цена)
- Arthur’s Rest
- Недоступно
- Merlyn’s Rest
- Недоступно
- Morgana’s Rest
- Недоступно
Adept's Great Fire Staff
- Bridgewatch
- 10,999srebro (последняя известная цена)
- Steppe Cross
- Недоступно
- Martlock
- 15,500srebro (последняя известная цена)
- Highland Cross
- Недоступно
- Thetford
- 11,455srebro (последняя известная цена)
- Swamp Cross
- Недоступно
- Fort Sterling
- 16,994srebro (последняя известная цена)
- Mountain Cross
- Недоступно
- Lymhurst
- 10,999srebro (последняя известная цена)
- Forest Cross
- Недоступно
- Caerleon
- 29,998srebro (последняя известная цена)
- Brecilien
- 13,861srebro (последняя известная цена)
- Arthur’s Rest
- Недоступно
- Merlyn’s Rest
- Недоступно
- Morgana’s Rest
- Недоступно
Adept's Royal Robe
- Bridgewatch
- 339,994srebro (последняя известная цена)
- Steppe Cross
- Недоступно
- Martlock
- 327,996srebro (последняя известная цена)
- Highland Cross
- Недоступно
- Thetford
- 296,883srebro (последняя известная цена)
- Swamp Cross
- Недоступно
- Fort Sterling
- 259,998srebro (последняя известная цена)
- Mountain Cross
- Недоступно
- Lymhurst
- 299,991srebro (последняя известная цена)
- Forest Cross
- Недоступно
- Caerleon
- 250,000srebro (последняя известная цена)
- Brecilien
- 335,990srebro (последняя известная цена)
- Arthur’s Rest
- Недоступно
- Merlyn’s Rest
- Недоступно
- Morgana’s Rest
- Недоступно
Mutton Stew
- Bridgewatch
- 2,695srebro (последняя известная цена)
- Steppe Cross
- Недоступно
- Martlock
- 2,496srebro (последняя известная цена)
- Highland Cross
- Недоступно
- Thetford
- 2,668srebro (последняя известная цена)
- Swamp Cross
- Недоступно
- Fort Sterling
- 2,030srebro (последняя известная цена)
- Mountain Cross
- Недоступно
- Lymhurst
- 2,795srebro (последняя известная цена)
- Forest Cross
- Недоступно
- Caerleon
- 2,993srebro (последняя известная цена)
- Brecilien
- 2,399srebro (последняя известная цена)
- Arthur’s Rest
- Недоступно
- Merlyn’s Rest
- Недоступно
- Morgana’s Rest
- Недоступно
Adept's Druid Sandals
- Bridgewatch
- 3,885srebro (последняя известная цена)
- Steppe Cross
- Недоступно
- Martlock
- 3,742srebro (последняя известная цена)
- Highland Cross
- Недоступно
- Thetford
- 6,984srebro (последняя известная цена)
- Swamp Cross
- Недоступно
- Fort Sterling
- 3,879srebro (последняя известная цена)
- Mountain Cross
- Недоступно
- Lymhurst
- 4,146srebro (последняя известная цена)
- Forest Cross
- Недоступно
- Caerleon
- 14,998srebro (последняя известная цена)
- Brecilien
- 3,892srebro (последняя известная цена)
- Arthur’s Rest
- Недоступно
- Merlyn’s Rest
- Недоступно
- Morgana’s Rest
- Недоступно
Minor Poison Potion
- Bridgewatch
- 940srebro (последняя известная цена)
- Steppe Cross
- Недоступно
- Martlock
- 999srebro (последняя известная цена)
- Highland Cross
- Недоступно
- Thetford
- 800srebro (последняя известная цена)
- Swamp Cross
- Недоступно
- Fort Sterling
- 795srebro (последняя известная цена)
- Mountain Cross
- Недоступно
- Lymhurst
- 886srebro (последняя известная цена)
- Forest Cross
- Недоступно
- Caerleon
- 829srebro (последняя известная цена)
- Brecilien
- 741srebro (последняя известная цена)
- Arthur’s Rest
- Недоступно
- Merlyn’s Rest
- Недоступно
- Morgana’s Rest
- Недоступно
Adept's Riding Horse
- Bridgewatch
- 41,700srebro (последняя известная цена)
- Steppe Cross
- Недоступно
- Martlock
- 45,560srebro (последняя известная цена)
- Highland Cross
- Недоступно
- Thetford
- 49,881srebro (последняя известная цена)
- Swamp Cross
- Недоступно
- Fort Sterling
- 45,736srebro (последняя известная цена)
- Mountain Cross
- Недоступно
- Lymhurst
- 41,853srebro (последняя известная цена)
- Forest Cross
- Недоступно
- Caerleon
- 34,970srebro (последняя известная цена)
- Brecilien
- 57,974srebro (последняя известная цена)
- Arthur’s Rest
- Недоступно
- Merlyn’s Rest
- Недоступно
- Morgana’s Rest
- Недоступно
Alternative items
Mage Robe is a less expensive replacement for players with a limited budget. Use its second ability, which increases your resistances when you enter enemy spells or when a boss uses area-of-effect abilities.

Druid Robe or Cleric Robe is a less expensive alternative and a good choice for a player focused on increasing personal damage.
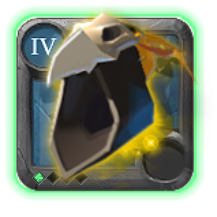
Druid Cowl can replace the Mage Cowl when the party has serious Energy problems.
It creates an area that restores Energy to several party members at once.

If you have already fully specialized the Great Fire Staff, you can begin progressing the one-handed Fire Staff. A one-handed weapon can be combined with a Tome of Spells for Energy or a Cryptcandle for increased damage.
Uses outside Group Dungeons
Solo Dungeons
The Great Fire Staff performs very well against groups of enemies in Solo Dungeons.
When playing solo, it is worth increasing your own survivability because you do not have a tank or healer.
You can then replace:
- the Royal Robe with a Cleric Robe;
- the Mage Cowl with an item that provides Energy or protection;
- the cape with an option better suited to solo play.
Open World
When gaining Fame in the Open World, it is worth using a Cleric Robe or Mage Robe.
The Royal Robe is strongest when the entire party can benefit from its area. When playing alone, its group utility is less valuable.
In the Open World, the following are more important:
- survivability;
- the ability to disengage from enemies;
- independent Energy management;
- preparation for encounters with other players.
Roads of Avalon
On the Roads of Avalon, the Great Fire Staff can be used to develop specialization and clear groups of mobs.
However, remember that this is full-loot territory. The build should be inexpensive enough that losing it will not cause a serious problem.
The Cleric Robe is often safer than the Royal Robe in this content, particularly when playing in a small group.
Avalonian Dungeons and ZvZ
Players who are fully specialized in Fire Staff weapons are frequently invited to Avalonian Dungeons and ZvZ content.
However, you should not use exactly the same build in every activity.
Avalonian Dungeons and ZvZ require:
- different Item Power thresholds;
- a different party composition;
- adjusted abilities;
- specific capes;
- different positioning;
- greater coordination with the caller;
- more specialized equipment.
The basic Great Fire Staff build is primarily intended to help you begin progressing the weapon and learn how to play a Pyromancer.
Most common mistakes made by new Fire Mages
Attacking before the tank
This is the most common and most damaging mistake.
When you begin attacking while the tank is gathering the pull, the mobs will spread out between the tank and the DPS players.
Wait a few seconds. Dealing full damage to the entire gathered group is significantly better than beginning the fight slightly earlier.
Using multiple Burning Fields
Burning Field effects do not stack.
When there are several Pyromancers in the party, only one player should use this ability. The others should switch to the first Q ability.
Continuing to use Flame Blast
Flame Blast is good at the beginning, but it should be replaced after Raging Flare has been unlocked.
Raging Flare is the intended and strongest W choice for Group Dungeons.
Using Fire Artillery
Fire Artillery does not take advantage of the way Group Dungeons are played.
The mobs remain next to the tank, so Raging Flare provides better and more consistent damage.
Using Flame Pillar while the pull is still being gathered
The ability’s short delay is not a problem when you attack after the tank has finished positioning the enemies.
Do not cast Flame Pillar at a location the enemies are only running through.
Using every ability against a weak mob
Do not activate the Royal Robe, Flame Pillar, Raging Flare, and Firebreath against a single enemy that will die after a few basic attacks.
Save some of your abilities for the next pull.
Activating Royal Robes at the same time
A beginner party should have at least two Royal Robes, but they should be used one after another.
This allows the buff to remain active for a larger portion of the fight.
Throwing Poison Potions at the same time
Poison effects do not stack.
Determine the throwing order before the fight and do not waste several potions during the same second.
Placing the Royal Robe underneath the tank
The area should be placed underneath the DPS players and healer.
The tank will usually stand on the opposite side of the mobs, so the backline should not move next to the tank.
Failing to manage Energy
When you finish every fight with no Energy:
- use Energetic Sprint earlier;
- equip a Lymhurst Cape;
- change the ability on your Mage Cowl;
- ask a party member to use a Druid Cowl;
- do not use your full rotation against weak mobs;
- do not cast spells between pulls.
Standing in area-of-effect attacks
Do not try to finish your rotation at any cost.
When an attack appears underneath you, move away. The healer should not waste Energy on a DPS player who deliberately stands in enemy damage.
Unnecessarily knocking enemies away
Interrupting dangerous abilities is important, but knocking mobs away without a reason reduces the effectiveness of the entire party.
Do not push enemies out of Burning Field, Raging Flare, or the other area-of-effect abilities used by your group.
Party composition for a Group Dungeon
A basic party consists of:
- one tank;
- one healer;
- three DPS players.
Five players
Group Dungeons are best completed with five players.
This is the most natural composition and provides:
- an appropriate distribution of roles;
- good clearing speed;
- a reasonable distribution of Fame;
- a sufficient number of DPS players;
- no unnecessary increase in party size.
Six players
A six-player party is recommended for beginners.
The sixth player can be:
- another DPS;
- a second Pyromancer;
- a support;
- a player providing additional Energy;
- a character reducing enemy resistances.
The additional player compensates for lower specialization and the greater number of mistakes made by new players.
Seven players
Seven players are the practical maximum for ordinary Group Dungeons.
The seventh player should provide real value through:
- high area-of-effect damage;
- a group buff;
- resistance reduction;
- Energy regeneration;
- an additional interrupt;
- better control over mobs.
Simply having more players does not guarantee faster clearing.
Eight players
With eight active players, mobs receive a powerful defensive bonus.
In practice, adding an eighth player can slow down the run instead of making it faster. The enemies become more durable, while Fame and rewards are divided between more players.
For this reason, ordinary Group Dungeons should be completed with no more than seven players.
General advice for Group Dungeons
The build should benefit the entire party
A Group Dungeon build should not be judged only by its personal damage.
The most important elements are:
- area-of-effect damage;
- group buffs;
- reducing enemy resistances;
- Energy regeneration;
- interrupting dangerous abilities;
- correctly positioning mobs;
- rotating Royal Robes;
- rotating Poison Potions;
- cooperation between the tank, healer, and DPS players.
This is exactly why the Royal Robe is so valuable. Instead of increasing the damage of only one player, it can improve the performance of almost the entire party.
Clearing speed
Clearing the dungeon quickly means:
- completing more dungeons within the same amount of time;
- gaining more Fame per hour;
- progressing specializations faster;
- earning more Silver;
- consuming less food;
- spending less time exposed to mistakes;
- moving more quickly between chests and bosses.
However, this does not mean running forward without thinking.
The best party is one in which:
- the tank gathers mobs smoothly;
- DPS players wait for the pull to be positioned;
- the healer does not need to rescue poorly positioned players;
- Royal Robes are used one after another;
- Poison Potions are not wasted;
- every player manages their Energy;
- everyone avoids enemy attacks.
Cooperation is more important than equipment tier
A more expensive build will not fix a bad rotation or a lack of cooperation.
Clearing speed is affected by:
- specialization level;
- achieved Item Power;
- selected abilities;
- the tank’s experience;
- the healer’s effectiveness;
- correct enemy positioning;
- the DPS players’ area-of-effect damage;
- correct use of group buffs;
- Poison Potion rotation;
- knowledge of boss mechanics.
A coordinated party wearing inexpensive equipment can perform significantly better than a random group using expensive builds.
T8 Group Dungeons in 4.2 equipment
When every party member has unlocked Elder Reaver, which requires approximately three million Fame from killing mobs, the party can begin running T8 Group Dungeons in 4.2 equipment.
It is best to do this with six players.
A practical composition is:
- one tank;
- one healer;
- four DPS players;
or:
- one tank;
- one healer;
- three DPS players;
- one support.
The party should have:
- sufficient area-of-effect damage;
- at least two Royal Robes;
- a source of Energy regeneration;
- a correct Poison Potion rotation;
- a tank who knows how to gather mobs;
- a healer who can manage Energy;
- DPS players who wait until the pull has been completed before attacking.
Merely equipping a 4.2 build is not enough when the party cannot cooperate.
When mobs die very slowly, the tank regularly loses all their health, and the healer runs out of Energy after every pull, the party should return to a lower tier or improve its composition first.
Fire Mage progression
Stage one – first Group Dungeons
At the beginning, use:
- Great Fire Staff;
- Burning Field;
- Flame Blast;
- Flame Pillar;
- Mage Cowl;
- Royal Robe;
- Druid Sandals;
- a regular cape.
At this stage, learn how to:
- wait for the tank;
- position Burning Field correctly;
- hit the entire group;
- manage Energy;
- avoid attacks;
- use the Royal Robe correctly.
Stage two – Raging Flare
After unlocking Raging Flare, replace Flame Blast.
At this stage, focus on:
- correctly rotating Q, W, and E;
- using Raging Flare against the entire pull;
- using Flame Pillar frequently;
- rotating Royal Robes;
- coordinating Poison Potions;
- cooperating with a second Pyromancer.
Stage three – progressing the entire weapon line
After specializing the Great Fire Staff, you can begin progressing:
- the one-handed Fire Staff;
- the other weapons in the Fire Staff line;
- other cloth robes;
- additional cloth sandals;
- more expensive capes;
- equipment prepared for Avalonian Dungeons or ZvZ.
Do not change weapons only because another staff is more expensive.
The Great Fire Staff remains a very effective weapon for ordinary group and solo PvE.
FAQ – Fire Mage for Group Dungeons
Is the Great Fire Staff good for a beginner?
Yes. It is the least expensive and best Fire Staff for beginning group and solo PvE.
It provides high area-of-effect damage, has a simple rotation, and does not require an off-hand item.
Which Q ability should I use?
When you are the only Pyromancer in the party, use Burning Field.
When there are several Fire Mages in the party, only one should use Burning Field. The others should switch to the first Q ability.
Why should several players not use Burning Field?
Its effects do not stack. Additional Pyromancers will provide more value by using the first Q ability.
Which W ability should I use at the beginning?
A new player should begin with Flame Blast.
After unlocking Raging Flare, switch to it.
Which W ability is best for Group Dungeons?
Raging Flare is the best choice.
The tank holds the mobs in one place, allowing the ability to hit the entire group consistently and deal very high area-of-effect damage.
Is Fire Artillery worth using?
Not in ordinary Group Dungeons.
The mobs remain gathered next to the tank, and Raging Flare deals significantly more damage under these conditions.
Is Flame Pillar’s delay a problem?
No.
Simply attack after the tank has positioned the mobs. The enemies will then remain in one place and the entire group will be easy to hit.
How many Royal Robes should the party have?
A beginner party should have at least two.
It is also worth taking several Royal Robes into more difficult dungeons because the fights last longer.
Should Royal Robes be activated at the same time?
Usually not.
It is better to use them one after another so the buff remains active for as much of the fight as possible.
Where should the Royal Robe be placed?
Underneath the DPS players and healer, outside dangerous enemy attacks.
Do not automatically place it underneath the tank.
What should I do when I run out of Energy?
You can:
- use Energetic Sprint earlier;
- equip a Lymhurst Cape;
- change the ability on the Mage Cowl;
- use a Druid Cowl within the party;
- limit the use of your full rotation against weak mobs.
How much food should I bring?
For a typical run, bring between three and five Mutton Stews.
How many Poison Potions should I bring?
For a longer series of dungeons, bring between 30 and 50 Minor Poison Potions.
Do Poison Potion effects stack?
No.
Players should throw them one after another, after the previous effect has ended.
Is the build suitable for Solo Dungeons?
Yes.
For solo play, it is worth replacing the Royal Robe with a Cleric Robe, Mage Robe, or Druid Robe, depending on the activity.
Can this build be used in the Open World?
Yes, but it is worth increasing your survivability and independent Energy regeneration.
Is the build suitable for the Roads of Avalon?
Yes, particularly for gaining Fame. However, you should use equipment that you can afford to lose.
Can T8 Group Dungeons be completed in 4.2 equipment?
Yes.
A six-player party with Elder Reaver unlocked, an appropriate composition, and proper cooperation can complete T8 Group Dungeons in 4.2 equipment.
Summary
The Great Fire Staff is the best weapon in the Fire Staff line for a new player beginning group or solo PvE.
It is inexpensive, easy to use, and provides high area-of-effect damage.
Burning Field is the primary Q ability for clearing groups of enemies, but its effects do not stack. When there are several Pyromancers in the party, only one player should use it.
A new player begins with Flame Blast. After unlocking Raging Flare, they should switch to it because it is the best W ability for Group Dungeons.
Fire Artillery is not an appropriate choice for this activity. The mobs remain gathered next to the tank, allowing Raging Flare to provide significantly higher and more consistent damage.
Flame Pillar has a short delay, but this does not cause a problem when the Pyromancer attacks after the tank has positioned the mobs.
A beginner party should have at least two Royal Robes. It is also worth using several in more difficult dungeons because the enemies survive for longer. The robes should be activated one after another.
Minor Poison Potions should also be thrown in an established order because their effects do not stack.
The most important Fire Mage rules are:
- always wait until the tank has finished gathering the pull;
- place Burning Field underneath the entire group;
- use Raging Flare after unlocking it;
- use Flame Pillar regularly;
- do not use multiple Burning Fields;
- rotate Royal Robes;
- determine the order for throwing Poison Potions;
- manage your Energy;
- do not stand in enemy attacks;
- remember that the party’s effectiveness is more important than your personal damage result.
A good Pyromancer does not begin the fight first. They wait for the tank to position the enemies and then use all their area-of-effect abilities against the entire group.
Correct attack timing, positioning, and cooperation with the party are what make the Great Fire Staff one of the most effective builds for a new player beginning group PvE.