

The Frost Mage PvE Build for Beginner Group Dungeons is a good choice for players who enjoy fast-paced gameplay and frequent ability use. Frost Staffs work best in setups focused on reducing cast times, increasing cooldown rate, and maintaining a steady supply of Energy.
In Group Dungeons, your main task is to deal high area-of-effect damage. The tank gathers the enemies in one place, and you use that opportunity to hit the entire group of mobs with Ice Shard, Glacial Obelisk, and Hail.
The Frost Mage is not a character that you play slowly by using one ability every few seconds. With the Scholar Robe active and the right cast-speed bonuses, you can cast one spell after another very quickly. This is when the build shows its greatest strength.
However, you must remember that fast spellcasting also consumes a large amount of Energy. For this reason, a Frost Mage should always have a personal source of Energy regeneration or at least make sure that someone in the party can restore it regularly.
Frost Staffs also work well in more difficult PvE content, including Static Dungeons, Hardcore Expeditions, and Avalonian Dungeons. End-game content usually requires more expensive and specialized equipment. This guide is intended for new players who want to begin leveling Frost Staffs in regular Group Dungeons.
If you are interested in the final Frost Mage setup for Avalonian Dungeons, check the separate end-game PvE guide.
How to Play This Build
The Frost Mage should stand behind the tank or slightly to the side of the enemy group. Do not stand directly next to the tank, and do not enter the middle of the mobs simply to hit more targets. You can deal most of your damage from a safe distance.
At the beginning of every pull, wait until the tank has gathered the enemies and positioned them in one place. Only then should you begin your full rotation.
If you begin attacking too early, some of the mobs may run toward you. The tank will have to gather them again, the healer will waste Energy healing a DPS player, and the entire party will clear the dungeon more slowly.
The simplest way to play this build is:
- Wait until the tank gathers the mobs.
- Position yourself so that your attacks hit the entire group.
- Place Glacial Obelisk where most of the party is standing.
- Activate Scholar Robe.
- Use Hail on the gathered group of enemies.
- Cast Ice Shard as quickly as the situation allows.
- Monitor your Energy and use Druid Cowl before you run out completely.
- Stop attacking and reposition when a dangerous boss or mob ability appears.
You do not need to remain in one place until the Scholar Robe effect ends. If an area-of-effect attack appears underneath you, move away immediately. Losing some damage is always better than dying or forcing the healer to rescue a DPS player.
The Frost Mage’s Most Important Responsibilities in a Group Dungeon
A Frost Mage should not focus exclusively on personal damage. A good DPS player helps the entire party clear the dungeon faster and more safely.
Your most important responsibilities are:
- waiting until the tank gathers the enemies;
- dealing damage to as many mobs as possible;
- positioning Glacial Obelisk so that the party can benefit from it;
- using Hail on the entire enemy group;
- maintaining a safe position;
- monitoring your own Energy;
- using Druid Cowl before completely running out of Energy;
- avoiding area-of-effect attacks;
- throwing Poison Potions at the strongest enemies;
- not wasting your main abilities on a single weak mob;
- saving your sprint for situations in which you genuinely need to reposition.
The most important rule is simple: the tank gathers the mobs first, and only then does the DPS begin dealing damage.
Great Frost Staff Abilities
Q – Ice Shard
Ice Shard is your basic ability for dealing regular damage. With Scholar Robe active, it can be cast very quickly, making it your main source of damage between uses of Hail.
Position yourself so that the attack hits as many enemies as possible. Do not focus only on the mob standing closest to you when you can place the spell in the middle of the entire group.
Use Ice Shard primarily:
- after the tank has gathered the mobs;
- while Scholar Robe is active;
- when the enemies are standing close together;
- during longer boss fights;
- between uses of W and E.
Do not spam the ability between pulls. Unnecessary spellcasting consumes Energy, and this build can run out very quickly.
W – Glacial Obelisk
Glacial Obelisk is one of the most important abilities in this setup. Once placed, it increases the damage and cooldown rate of players standing near it. It can support several party members at the same time, so do not place it only underneath yourself.
The best place for Glacial Obelisk is between the DPS players and the healer, but outside enemy area-of-effect attacks. The tank does not always need to stand directly inside the Obelisk because they are often positioned on the other side of the mob group.
Use Glacial Obelisk:
- after the tank has positioned the enemies;
- before activating Scholar Robe;
- during stronger pulls;
- during boss fights;
- near chests;
- in a place where most of the party can stand safely for several seconds.
The Obelisk can also be detonated early to deal damage and slow enemies. However, do not detonate it immediately without a reason while the party is still benefiting from the buff.
Glacial Obelisk increases the damage and cooldown rate of up to ten allies standing within its area. When its duration ends or it is detonated early, it also deals damage and slows affected enemies.
E – Hail
Hail is the Great Frost Staff’s main ability. It creates an area of hail at the selected location, deals magical damage, and can be used again within a short period.
The greatest advantage of this ability is that it has no cast time. You can quickly select the target area, deal damage, and immediately return to casting Ice Shard.
Hail is best used:
- on the entire group of mobs after the tank has gathered them;
- near chests;
- during larger pulls;
- on bosses with additional enemies;
- while Scholar Robe and Glacial Obelisk are active;
- in a location that enemies cannot immediately leave.
After the first use, you can cast a second wave of Hail. Do not forget to use E again, because otherwise you will lose a significant part of the ability’s damage.
Do not cast Hail on a single weak enemy that is about to die. It is better to save it for the next group or a more difficult mob.
Hail deals area-of-effect damage, has no cast time, can be recast within a short window, and also slightly slows affected enemies.
Build Summary, Abilities, and Market Price
Below is the complete build card with the selected equipment, abilities, activity, role, difficulty level, recommended tiers, and estimated price on the Albion Online servers.
Use this section as a quick overview of the setup before entering a Group Dungeon. Prices may change depending on the server, city, item quality, enchantment level, and current market conditions, so treat them as estimates.
Albion Online build
Frost Mage Build for Group Dungeons for New Players

Build activities
Loadout




Selected spells and passives
Adept's Druid Cowl
Skill

Circle of Inspiration
Create a Circle of Inspiration with a 4m radius, lasting 5s. Restores 15 Energy for all allies within the circle every 0.5s
Passive

Concentration
Cast speed is increased by 5.263%
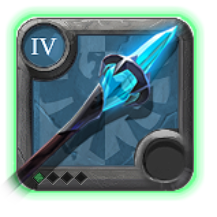
Adept's Great Frost Staff
First Weapon Spell

Ice Shard
Drops an ice shard on the targeted position, exploding in a 3m radius on impact. Deals 339/372 magical damage(vs. players)/ 258/284 magical damage(vs. mobs) to all enemies hit.
Second Weapon Spell

Frost Bomb
Conjure a Frost Bomb at the targeted position, slowing all enemies within a 5m radius by 20%. Explodes after 1.6s, dealing 477/524 magical damage to all enemies in a 5m radius. Slows all enemies hit by 20% for 6.99s/7.68s.
Main Weapon Spell

Hail
Conjure a wave of hail with a 5m radius around the targeted position, which crashes down after 0.4s. Deals 448 magical damage. The spell can be recast within 3s.
Weapon Passive
Aggressive Caster
Every 4 activated spells, you gain a cast speed buff of 40% for 3s.
Adept's Scholar Robe
Skill

Speed Caster
Become more efficient at your casting, reducing your Cast times by 50% and your Energy Costs by 70% for 8s.
Passive
Concentration
Cast speed is increased by 5.263%
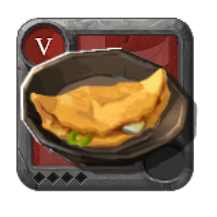
Goose Omelette
Passive

Omelette
Increases your Cast Speed by {0} and Cooldown Rate by {1} for {2} .
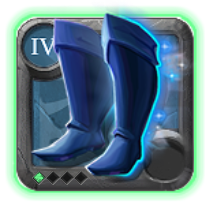
Adept's Feyscale Sandals
Skill

Energetic Sprint
Start to sprint, increasing your Move Speed by 80% for 5s Restores 7 Energy every 1s
Passive
Concentration
Cast speed is increased by 5.263%
Minor Poison Potion
Passive

Poison Potion
Throw the potion at the targeted enemy, poisoning the target and dealing true damage over {0} . [#] Against players: {1} true damage [#] Against mounted players: {2} true damage [#] Against mobs: {3} true damage Whenever the poisoned, unmounted enemy takes direct damage , they will be slowed by {4} for {5} .
Adept's Riding Horse
Passive

Courier
Increases your Max Load by 1.25 kg.
Build prices
Europe Server Cheapest Price
Lowest price: 115,657srebro (last known price)
Build Price in City
Item price breakdown
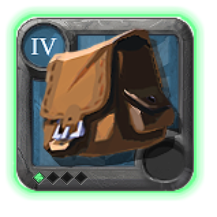
Adept's Bag
- Bridgewatch
- 7,499srebro
- Steppe Cross
- Not available
- Martlock
- 8,745srebro
- Highland Cross
- Not available
- Thetford
- 7,969srebro
- Swamp Cross
- Not available
- Fort Sterling
- 8,466srebro
- Mountain Cross
- Not available
- Lymhurst
- 7,693srebro
- Forest Cross
- Not available
- Caerleon
- 299,999srebro
- Brecilien
- 7,947srebro
- Arthur’s Rest
- Not available
- Merlyn’s Rest
- Not available
- Morgana’s Rest
- Not available
Adept's Druid Cowl
- Bridgewatch
- 7,167srebro (last known price)
- Steppe Cross
- Not available
- Martlock
- 4,991srebro (last known price)
- Highland Cross
- Not available
- Thetford
- 5,797srebro (last known price)
- Swamp Cross
- Not available
- Fort Sterling
- 6,790srebro (last known price)
- Mountain Cross
- Not available
- Lymhurst
- 6,155srebro (last known price)
- Forest Cross
- Not available
- Caerleon
- 20,981srebro (last known price)
- Brecilien
- 3,397srebro (last known price)
- Arthur’s Rest
- Not available
- Merlyn’s Rest
- Not available
- Morgana’s Rest
- Not available
Adept's Cape
- Bridgewatch
- 4,995srebro
- Steppe Cross
- Not available
- Martlock
- 5,388srebro
- Highland Cross
- Not available
- Thetford
- 4,355srebro
- Swamp Cross
- Not available
- Fort Sterling
- 5,800srebro
- Mountain Cross
- Not available
- Lymhurst
- 4,174srebro
- Forest Cross
- Not available
- Caerleon
- 11,105srebro
- Brecilien
- 3,371srebro
- Arthur’s Rest
- Not available
- Merlyn’s Rest
- Not available
- Morgana’s Rest
- Not available
Adept's Great Frost Staff
- Bridgewatch
- 10,753srebro (last known price)
- Steppe Cross
- Not available
- Martlock
- 12,250srebro (last known price)
- Highland Cross
- Not available
- Thetford
- 12,485srebro (last known price)
- Swamp Cross
- Not available
- Fort Sterling
- 12,495srebro (last known price)
- Mountain Cross
- Not available
- Lymhurst
- 8,888srebro (last known price)
- Forest Cross
- Not available
- Caerleon
- 59,964srebro (last known price)
- Brecilien
- 8,944srebro (last known price)
- Arthur’s Rest
- Not available
- Merlyn’s Rest
- Not available
- Morgana’s Rest
- Not available
Adept's Scholar Robe
- Bridgewatch
- 3,898srebro (last known price)
- Steppe Cross
- Not available
- Martlock
- 3,229srebro (last known price)
- Highland Cross
- Not available
- Thetford
- 3,186srebro (last known price)
- Swamp Cross
- Not available
- Fort Sterling
- 4,371srebro (last known price)
- Mountain Cross
- Not available
- Lymhurst
- 4,235srebro (last known price)
- Forest Cross
- Not available
- Caerleon
- 9,480srebro (last known price)
- Brecilien
- 2,989srebro (last known price)
- Arthur’s Rest
- Not available
- Merlyn’s Rest
- Not available
- Morgana’s Rest
- Not available
Goose Omelette
- Bridgewatch
- 887srebro (last known price)
- Steppe Cross
- 3,099srebro (last known price)
- Martlock
- 1,138srebro (last known price)
- Highland Cross
- Not available
- Thetford
- 1,166srebro (last known price)
- Swamp Cross
- Not available
- Fort Sterling
- 1,624srebro (last known price)
- Mountain Cross
- Not available
- Lymhurst
- 1,277srebro (last known price)
- Forest Cross
- Not available
- Caerleon
- 1,856srebro (last known price)
- Brecilien
- 2,104srebro (last known price)
- Arthur’s Rest
- Not available
- Merlyn’s Rest
- Not available
- Morgana’s Rest
- Not available
Adept's Feyscale Sandals
- Bridgewatch
- 69,499srebro (last known price)
- Steppe Cross
- Not available
- Martlock
- 59,978srebro (last known price)
- Highland Cross
- Not available
- Thetford
- 39,997srebro (last known price)
- Swamp Cross
- Not available
- Fort Sterling
- 44,432srebro (last known price)
- Mountain Cross
- Not available
- Lymhurst
- 39,871srebro (last known price)
- Forest Cross
- Not available
- Caerleon
- 89,999srebro (last known price)
- Brecilien
- 62,000srebro (last known price)
- Arthur’s Rest
- Not available
- Merlyn’s Rest
- Not available
- Morgana’s Rest
- Not available
Minor Poison Potion
- Bridgewatch
- 683srebro
- Steppe Cross
- Not available
- Martlock
- 747srebro
- Highland Cross
- Not available
- Thetford
- 797srebro
- Swamp Cross
- Not available
- Fort Sterling
- 796srebro
- Mountain Cross
- Not available
- Lymhurst
- 685srebro
- Forest Cross
- Not available
- Caerleon
- 1,081srebro
- Brecilien
- 719srebro
- Arthur’s Rest
- Not available
- Merlyn’s Rest
- Not available
- Morgana’s Rest
- Not available
Adept's Riding Horse
- Bridgewatch
- 45,937srebro (last known price)
- Steppe Cross
- Not available
- Martlock
- 39,835srebro (last known price)
- Highland Cross
- 56,500srebro (last known price)
- Thetford
- 45,729srebro (last known price)
- Swamp Cross
- 55,999srebro (last known price)
- Fort Sterling
- 37,974srebro (last known price)
- Mountain Cross
- 43,390srebro (last known price)
- Lymhurst
- 42,679srebro (last known price)
- Forest Cross
- 46,798srebro (last known price)
- Caerleon
- 29,997srebro (last known price)
- Brecilien
- 49,998srebro (last known price)
- Arthur’s Rest
- Not available
- Merlyn’s Rest
- Not available
- Morgana’s Rest
- Not available
America Server Cheapest Price
Lowest price: 141,573srebro (last known price)
Build Price in City
Item price breakdown
Adept's Bag
- Bridgewatch
- 11,874srebro (last known price)
- Steppe Cross
- Not available
- Martlock
- 7,764srebro (last known price)
- Highland Cross
- Not available
- Thetford
- 7,662srebro (last known price)
- Swamp Cross
- Not available
- Fort Sterling
- 7,493srebro (last known price)
- Mountain Cross
- 7,000srebro (last known price)
- Lymhurst
- 7,674srebro (last known price)
- Forest Cross
- Not available
- Caerleon
- 33,895srebro (last known price)
- Brecilien
- 7,719srebro (last known price)
- Arthur’s Rest
- Not available
- Merlyn’s Rest
- Not available
- Morgana’s Rest
- Not available
Adept's Druid Cowl
- Bridgewatch
- 3,941srebro (last known price)
- Steppe Cross
- Not available
- Martlock
- 9,975srebro (last known price)
- Highland Cross
- Not available
- Thetford
- 3,493srebro (last known price)
- Swamp Cross
- Not available
- Fort Sterling
- 4,490srebro (last known price)
- Mountain Cross
- Not available
- Lymhurst
- 3,185srebro (last known price)
- Forest Cross
- Not available
- Caerleon
- 20,983srebro (last known price)
- Brecilien
- 2,898srebro (last known price)
- Arthur’s Rest
- Not available
- Merlyn’s Rest
- Not available
- Morgana’s Rest
- Not available
Adept's Cape
- Bridgewatch
- 5,481srebro (last known price)
- Steppe Cross
- Not available
- Martlock
- 3,490srebro (last known price)
- Highland Cross
- Not available
- Thetford
- 4,978srebro (last known price)
- Swamp Cross
- Not available
- Fort Sterling
- 5,038srebro (last known price)
- Mountain Cross
- Not available
- Lymhurst
- 4,581srebro (last known price)
- Forest Cross
- Not available
- Caerleon
- 5,999srebro (last known price)
- Brecilien
- 4,772srebro (last known price)
- Arthur’s Rest
- Not available
- Merlyn’s Rest
- Not available
- Morgana’s Rest
- Not available
Adept's Great Frost Staff
- Bridgewatch
- 11,994srebro (last known price)
- Steppe Cross
- Not available
- Martlock
- 8,075srebro (last known price)
- Highland Cross
- Not available
- Thetford
- 6,900srebro (last known price)
- Swamp Cross
- Not available
- Fort Sterling
- 9,998srebro (last known price)
- Mountain Cross
- Not available
- Lymhurst
- 9,786srebro (last known price)
- Forest Cross
- Not available
- Caerleon
- 42,221srebro (last known price)
- Brecilien
- 18,988srebro (last known price)
- Arthur’s Rest
- Not available
- Merlyn’s Rest
- Not available
- Morgana’s Rest
- Not available
Adept's Scholar Robe
- Bridgewatch
- 2,798srebro (last known price)
- Steppe Cross
- Not available
- Martlock
- 6,602srebro (last known price)
- Highland Cross
- Not available
- Thetford
- 9,694srebro (last known price)
- Swamp Cross
- Not available
- Fort Sterling
- 7,492srebro (last known price)
- Mountain Cross
- Not available
- Lymhurst
- 2,699srebro (last known price)
- Forest Cross
- Not available
- Caerleon
- 18,992srebro (last known price)
- Brecilien
- 3,379srebro (last known price)
- Arthur’s Rest
- Not available
- Merlyn’s Rest
- Not available
- Morgana’s Rest
- Not available
Goose Omelette
- Bridgewatch
- 1,321srebro (last known price)
- Steppe Cross
- Not available
- Martlock
- 1,607srebro (last known price)
- Highland Cross
- Not available
- Thetford
- 1,218srebro (last known price)
- Swamp Cross
- Not available
- Fort Sterling
- 1,464srebro (last known price)
- Mountain Cross
- Not available
- Lymhurst
- 958srebro (last known price)
- Forest Cross
- Not available
- Caerleon
- 1,690srebro (last known price)
- Brecilien
- 1,123srebro (last known price)
- Arthur’s Rest
- Not available
- Merlyn’s Rest
- Not available
- Morgana’s Rest
- Not available
Adept's Feyscale Sandals
- Bridgewatch
- 68,500srebro (last known price)
- Steppe Cross
- Not available
- Martlock
- 99,999srebro (last known price)
- Highland Cross
- Not available
- Thetford
- 89,990srebro (last known price)
- Swamp Cross
- Not available
- Fort Sterling
- 64,457srebro (last known price)
- Mountain Cross
- Not available
- Lymhurst
- 82,996srebro (last known price)
- Forest Cross
- Not available
- Caerleon
- 129,999srebro (last known price)
- Brecilien
- 150,995srebro (last known price)
- Arthur’s Rest
- Not available
- Merlyn’s Rest
- Not available
- Morgana’s Rest
- Not available
Minor Poison Potion
- Bridgewatch
- 670srebro
- Steppe Cross
- Not available
- Martlock
- 752srebro
- Highland Cross
- Not available
- Thetford
- 704srebro
- Swamp Cross
- Not available
- Fort Sterling
- 711srebro
- Mountain Cross
- Not available
- Lymhurst
- 717srebro
- Forest Cross
- Not available
- Caerleon
- 650srebro
- Brecilien
- 579srebro
- Arthur’s Rest
- Not available
- Merlyn’s Rest
- Not available
- Morgana’s Rest
- Not available
Adept's Riding Horse
- Bridgewatch
- 34,994srebro (last known price)
- Steppe Cross
- Not available
- Martlock
- 42,147srebro (last known price)
- Highland Cross
- Not available
- Thetford
- 40,996srebro (last known price)
- Swamp Cross
- 59,999srebro (last known price)
- Fort Sterling
- 41,000srebro (last known price)
- Mountain Cross
- 30,000srebro (last known price)
- Lymhurst
- 39,850srebro (last known price)
- Forest Cross
- Not available
- Caerleon
- 32,891srebro (last known price)
- Brecilien
- 46,996srebro (last known price)
- Arthur’s Rest
- Not available
- Merlyn’s Rest
- Not available
- Morgana’s Rest
- Not available
Asia Server Cheapest Price
Lowest price: 149,955srebro (last known price)
Build Price in City
Item price breakdown
Adept's Bag
- Bridgewatch
- 499,999srebro (last known price)
- Steppe Cross
- Not available
- Martlock
- 499,999srebro (last known price)
- Highland Cross
- Not available
- Thetford
- 217,996srebro (last known price)
- Swamp Cross
- 40,000srebro (last known price)
- Fort Sterling
- 499,999srebro (last known price)
- Mountain Cross
- Not available
- Lymhurst
- 5,899srebro (last known price)
- Forest Cross
- Not available
- Caerleon
- 17,999srebro (last known price)
- Brecilien
- 5,883srebro (last known price)
- Arthur’s Rest
- Not available
- Merlyn’s Rest
- Not available
- Morgana’s Rest
- Not available
Adept's Druid Cowl
- Bridgewatch
- 6,870srebro (last known price)
- Steppe Cross
- Not available
- Martlock
- Not available
- Highland Cross
- Not available
- Thetford
- 19,590srebro (last known price)
- Swamp Cross
- Not available
- Fort Sterling
- 7,946srebro (last known price)
- Mountain Cross
- Not available
- Lymhurst
- 11,751srebro (last known price)
- Forest Cross
- Not available
- Caerleon
- 29,881srebro (last known price)
- Brecilien
- 6,618srebro (last known price)
- Arthur’s Rest
- Not available
- Merlyn’s Rest
- Not available
- Morgana’s Rest
- Not available
Adept's Cape
- Bridgewatch
- 5,479srebro (last known price)
- Steppe Cross
- Not available
- Martlock
- 4,145srebro (last known price)
- Highland Cross
- Not available
- Thetford
- 4,797srebro (last known price)
- Swamp Cross
- Not available
- Fort Sterling
- 6,620srebro (last known price)
- Mountain Cross
- Not available
- Lymhurst
- 4,370srebro (last known price)
- Forest Cross
- Not available
- Caerleon
- 14,987srebro (last known price)
- Brecilien
- 3,034srebro (last known price)
- Arthur’s Rest
- Not available
- Merlyn’s Rest
- Not available
- Morgana’s Rest
- Not available
Adept's Great Frost Staff
- Bridgewatch
- 20,996srebro (last known price)
- Steppe Cross
- Not available
- Martlock
- Not available
- Highland Cross
- Not available
- Thetford
- 14,999srebro (last known price)
- Swamp Cross
- Not available
- Fort Sterling
- 14,962srebro (last known price)
- Mountain Cross
- Not available
- Lymhurst
- 16,589srebro (last known price)
- Forest Cross
- Not available
- Caerleon
- 25,707srebro (last known price)
- Brecilien
- 16,635srebro (last known price)
- Arthur’s Rest
- Not available
- Merlyn’s Rest
- Not available
- Morgana’s Rest
- Not available
Adept's Scholar Robe
- Bridgewatch
- 5,880srebro (last known price)
- Steppe Cross
- Not available
- Martlock
- 9,897srebro (last known price)
- Highland Cross
- Not available
- Thetford
- 5,380srebro (last known price)
- Swamp Cross
- Not available
- Fort Sterling
- 7,378srebro (last known price)
- Mountain Cross
- Not available
- Lymhurst
- 3,500srebro (last known price)
- Forest Cross
- Not available
- Caerleon
- 13,929srebro (last known price)
- Brecilien
- 2,595srebro (last known price)
- Arthur’s Rest
- Not available
- Merlyn’s Rest
- Not available
- Morgana’s Rest
- Not available
Goose Omelette
- Bridgewatch
- 1,763srebro (last known price)
- Steppe Cross
- Not available
- Martlock
- 1,661srebro (last known price)
- Highland Cross
- Not available
- Thetford
- 1,380srebro (last known price)
- Swamp Cross
- Not available
- Fort Sterling
- 2,000srebro (last known price)
- Mountain Cross
- Not available
- Lymhurst
- 1,236srebro (last known price)
- Forest Cross
- Not available
- Caerleon
- 1,597srebro (last known price)
- Brecilien
- 2,798srebro (last known price)
- Arthur’s Rest
- Not available
- Merlyn’s Rest
- Not available
- Morgana’s Rest
- Not available
Adept's Feyscale Sandals
- Bridgewatch
- 55,300srebro (last known price)
- Steppe Cross
- Not available
- Martlock
- 198,999srebro (last known price)
- Highland Cross
- Not available
- Thetford
- Not available
- Swamp Cross
- Not available
- Fort Sterling
- 43,987srebro (last known price)
- Mountain Cross
- Not available
- Lymhurst
- 53,983srebro (last known price)
- Forest Cross
- Not available
- Caerleon
- 219,998srebro (last known price)
- Brecilien
- 77,994srebro (last known price)
- Arthur’s Rest
- Not available
- Merlyn’s Rest
- Not available
- Morgana’s Rest
- Not available
Minor Poison Potion
- Bridgewatch
- 805srebro (last known price)
- Steppe Cross
- Not available
- Martlock
- 785srebro (last known price)
- Highland Cross
- Not available
- Thetford
- 886srebro (last known price)
- Swamp Cross
- Not available
- Fort Sterling
- 930srebro (last known price)
- Mountain Cross
- Not available
- Lymhurst
- 629srebro (last known price)
- Forest Cross
- Not available
- Caerleon
- 1,087srebro (last known price)
- Brecilien
- 640srebro (last known price)
- Arthur’s Rest
- Not available
- Merlyn’s Rest
- Not available
- Morgana’s Rest
- Not available
Adept's Riding Horse
- Bridgewatch
- 50,495srebro (last known price)
- Steppe Cross
- Not available
- Martlock
- 66,666srebro (last known price)
- Highland Cross
- Not available
- Thetford
- 63,399srebro (last known price)
- Swamp Cross
- Not available
- Fort Sterling
- 48,228srebro (last known price)
- Mountain Cross
- Not available
- Lymhurst
- 51,998srebro (last known price)
- Forest Cross
- Not available
- Caerleon
- 39,992srebro (last known price)
- Brecilien
- 55,893srebro (last known price)
- Arthur’s Rest
- Not available
- Merlyn’s Rest
- Not available
- Morgana’s Rest
- Not available
Great Frost Staff – the Best Frost Staff for a New Player in Group Dungeons
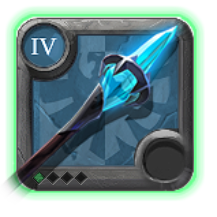
Great Frost Staff is the best starting weapon for a beginner Frost Mage who wants to run Group Dungeons. It is inexpensive, simple to use, and allows you to deal high area-of-effect damage.
The weapon has a short cooldown on its main ability and Hail has no cast time. This allows you to focus on casting Ice Shard very quickly after activating Scholar Robe while also using Hail whenever it becomes available.
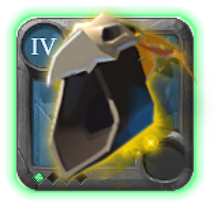
Druid Cowl restores Energy to players standing inside the area it creates. It is one of the most important parts of this build because the Frost Mage consumes Energy very quickly.
With Scholar Robe active and Q being cast repeatedly, your Energy bar can disappear within a short period. Once you run out of Energy, you stop dealing damage and must wait for it to regenerate.

Scholar Robe is the standard robe for a Frost Mage focused on fast spellcasting. Its ability significantly increases cast speed and reduces the Energy cost of abilities.
After activating the robe, you can cast Ice Shard very quickly. This is when you deal most of your regular damage.
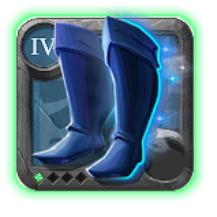
Feyscale Sandals are artifact cloth footwear. They are not required for this build to work, but they allow you to level the artifact-sandal specialization and provide stronger base statistics than regular footwear of the same class.
You can also use other cloth sandals in this setup. The most important thing is to select the second ability, which provides a simple sprint and allows you to leave a dangerous area quickly. Royal Sandals are a more expensive alternative focused on increasing damage.
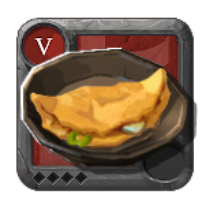
Goose Omelette reduces cast times and ability cooldowns. There is no better basic food for a Frost Mage built around frequent spellcasting.
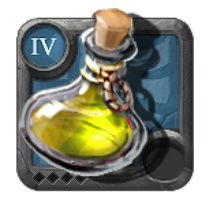
Minor Poison Potion helps kill bosses and strong enemies faster. It is worth bringing a larger supply into Group Dungeons, especially when you plan to complete several dungeons without returning to the city.
Simple Frost Mage Rotation
- Allow the tank to gather and position all the mobs.
- Wait until the tank stabilizes aggro.
- Throw a Poison Potion at the strongest enemy.
- Place Glacial Obelisk.
- Activate Scholar Robe.
- Cast Hail.
- Use Ice Shard.
- Cast the second wave of Hail.
- Use Druid Cowl when you begin to run out of Energy.
- Stop the rotation if you need to avoid a dangerous ability.
Alternative Items
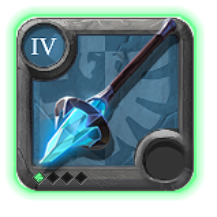
One-handed Frost Staff can be paired with a Cryptcandle or Tome of Spells.
A one-handed setup allows you to select an off-hand based on your needs:
- Cryptcandle provides stronger offensive statistics;
- Tome of Spells is a simpler and cheaper choice;
- other off-hands can improve cast speed, Energy, or damage.
This variant can be useful for leveling another Frost Staff, but it does not have the Great Frost Staff’s Hail ability.

Permafrost Prism is a more expensive artifact weapon. Its main ability deals area-of-effect damage and freezes enemies.
Compared with the Great Frost Staff, its main ability deals less damage, but it provides very strong enemy control.
Freezing is useful for:
- interrupting mob spellcasting;
- stopping enemies;
- protecting the party;
- keeping mobs in one place.
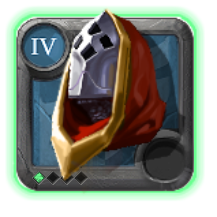
Royal Cowl is mainly used in more expensive builds intended for high-level PvE activities.
It allows you to manage Energy costs better during an intensive rotation, but it is more expensive than the Druid Cowl and does not restore Energy to the entire party.
For regular Group Dungeons, the Druid Cowl is simpler, cheaper, and more useful to the whole party.
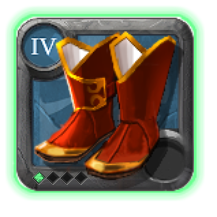
Royal Sandals increase your damage and are a good option for players who already understand enemy mechanics.
However, the damage increase comes with greater risk. If you use them at the wrong moment or remain inside a boss attack, you can lose Health very quickly because of the defense debuff.
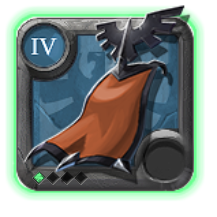
Morgana Cape significantly increases cast speed after activation. It is one of the most important elements of an end-game Frost Mage setup focused on maximum cast speed.
It works very well with:
- Scholar Robe;
- Goose Omelette;
- Glacial Obelisk;
- rapid Ice Shard casting.
However, it is not required in the basic setup. It is more expensive than a regular cape and increases the total cost of the build.
The Most Common Mistakes Made by Beginner Frost Mages
Attacking Before the Tank
This is one of the most common mistakes. If you begin the fight before the tank, the mobs may run toward you and spread out the entire pull.
Wait a few seconds. The tank must gather the enemies first, and only then should you begin your full rotation.
Using Hail on One Weak Mob
Hail is an area-of-effect ability. It provides the greatest value when it hits several targets at the same time.
Do not waste it on an enemy that will die from a few regular attacks.
Forgetting the Second Wave of Hail
After the first use of E, you can cast another wave. Beginner players often use Hail only once and lose part of its damage.
Watch for the opportunity to use the ability again.
Placing Glacial Obelisk Only Underneath Yourself
The Obelisk also strengthens your party members. Position it so that as many players as possible can benefit from it.
However, do not place it directly in the middle of the mobs if the DPS players and healer cannot enter the area safely.
Consuming All Your Energy at the Beginning of a Pull
The Frost Mage consumes Energy very quickly. If you use everything immediately, you may run out during the most difficult part of the fight.
Monitor your Energy bar and use Druid Cowl early enough.
Using Scholar Robe at the Wrong Moment
Do not activate the robe before the mobs have been gathered or when you are about to move away from an attack.
First position yourself safely, and only then begin your fast rotation.
Standing in Area-of-Effect Attacks
Do not try to finish a spell at any cost. If a dangerous area appears underneath you, stop attacking and move away.
The healer should not have to waste Energy on a DPS player who knowingly stands inside a boss attack.
Who Is This Build For?
This build is intended for players who want to begin leveling Frost Staffs in group PvE.
It is suitable for players who:
- enjoy using abilities quickly;
- want to deal high area-of-effect damage;
- plan to play HCE or Avalonian Dungeons later;
- want to level their Frost Staff specialization;
- need an inexpensive starting setup;
- enjoy a dynamic rotation;
- can monitor their positioning and Energy level.
This is not a build for a player who wants to stand in one place and calmly use one ability at a time. The Frost Mage requires active gameplay, frequent spellcasting, and Energy control.
Example Group Dungeon Party Composition
A standard party consists of:
- 1 tank;
- 1 healer;
- 3 DPS players.
Group Dungeons are best completed with five players. A six-player party is recommended for beginners. It is usually worth bringing no more than seven players.
With eight players, mobs receive a very strong defensive bonus that prevents large parties from clearing the content too easily.
The additional sixth player can be:
- another DPS player;
- a support player who reduces enemy resistances;
- a second Frost Mage;
- a player who provides Energy or other buffs.
More players do not always mean faster clearing. Every additional player shares the rewards and should bring real value to the party.
General Advice for Clearing Group Dungeons
Group Dungeons are best completed with five players. For beginners in this type of content, we recommend six players. A maximum of seven players should normally be brought. With eight players, mobs in Group Dungeons receive a powerful defensive bonus.
Remember that a Group Dungeon set should increase the effectiveness of the entire party. The most important elements are party buffs, Energy regeneration, reduced enemy resistances, mob control, and high area-of-effect damage.
Faster dungeon clearing means:
- more completed dungeons within the same amount of time;
- higher income from the activity;
- faster Fame progression;
- faster weapon-specialization progression;
- less risk of making a mistake during a fight that lasts too long.
However, this does not mean that the party should rush forward without thinking. The fastest party is one that moves smoothly from one properly gathered pull to the next.
If every player in the party has unlocked Elder Reaver, meaning they have earned approximately three million Fame from killing mobs, a coordinated six-player party can complete Tier 8 Group Dungeons in 4.2 equipment.
However, the equipment tier itself is not the most important factor. More important factors include:
- specialization;
- correct party composition;
- the tank’s experience;
- the healer’s effectiveness;
- the DPS players’ area-of-effect damage;
- correct use of buffs;
- knowledge of boss mechanics;
- proper Poison Potion rotation.
Summary
The beginner Frost Mage build for Group Dungeons is an inexpensive, fast, and effective setup for leveling Frost Staffs.
The Great Frost Staff provides strong area-of-effect damage and a simple rotation. Druid Cowl helps maintain Energy, Scholar Robe allows you to cast Ice Shard very quickly, Feyscale Sandals provide mobility and allow you to level their specialization, Goose Omelette reduces cast times and cooldowns, and Minor Poison Potion helps kill bosses and the strongest mobs faster.
The most important factor is choosing the correct moment to begin attacking. Wait until the tank gathers the enemies, place Glacial Obelisk, activate Scholar Robe, and only then begin your full rotation.
The Frost Mage can deal very high damage, but only when properly positioned, when abilities are not wasted, and when the fight does not end with an empty Energy bar.
If you enjoy rapid spellcasting and want to move into HCE or Avalonian Dungeons in the future, the Great Frost Staff is a very good place to begin.
Build, Abilities, and Market Price Summary
Below is the complete Frost Mage build card with the selected equipment, abilities, activity, role, difficulty level, minimum and recommended tier, and estimated price on the different Albion Online servers.
This section provides a quick summary of the setup before entering a Group Dungeon. Here, you can check the items used, selected abilities, recommended number of players, difficulty level, and approximate cost of the full build.
Prices change depending on the server, city, item quality, enchantment level, and current market conditions. Treat them as a practical estimate rather than a fixed value.
FAQ – Frost Mage PvE Build for Beginner Group Dungeons
Is the Great Frost Staff good for beginners?
Yes. It is inexpensive, provides strong area-of-effect damage, and does not require an additional off-hand. It is well suited for learning group PvE and leveling Frost Staffs.
Why does the Frost Mage use Scholar Robe?
Scholar Robe increases cast speed and reduces the Energy cost of abilities. This allows you to cast Ice Shard very quickly and deal more damage while the robe is active.
Why does the Frost Mage use Druid Cowl?
Frost Staffs consume Energy quickly. Druid Cowl creates an area that restores Energy to you and the other members of your party.
When should I use Hail?
Use it after the tank has gathered the mobs, during stronger pulls, near chests, and against bosses. Try to hit as many enemies as possible.
Why do I need to use Hail a second time?
After the first wave, the ability can be recast within a short period. The second wave is an important part of the Great Frost Staff’s damage.
Where should I place Glacial Obelisk?
Place it where most DPS players and the healer can stand safely. Do not position it only underneath yourself or directly inside a dangerous area.
Which food is best for a Frost Mage?
The best basic choice is Goose Omelette because it reduces cast times and ability cooldowns.
Is Morgana Cape worth buying?
Morgana Cape works very well in an end-game Frost Mage setup, but it is not required at the beginning. First learn the rotation, positioning, and Energy management.
Is Permafrost Prism better than Great Frost Staff?
Permafrost Prism provides powerful enemy control, but it is significantly more expensive. Great Frost Staff is a simpler and safer choice for a beginner.
Can this build be used for solo play?
Yes, but a setup designed for Group Dungeons will not be optimal for every solo activity. In solo play, you more often need greater survivability, mobility, and independent Energy management.