

The Bow of Badon PvE Build for Beginner Group Dungeons is one of the most useful bows for group PvE in Albion Online. It combines area-of-effect damage with battlefield control and the ability to interrupt enemy spellcasting. Thanks to this, it not only increases its own DPS but also limits the number of dangerous abilities cast by mobs.
The most important ability of this weapon is Raging Storm in the E slot. After hitting an enemy, it creates a storm area that deals damage and interrupts the spellcasting of affected enemies. The effect remains on the ground for some time, so it is best used on tightly grouped mobs or in a place that enemies must pass through.
In the presented setup, the Bow of Badon is combined with items that support the entire party:
- Druid Cowl restores Energy to allies;
- Royal Robe strengthens the spells and healing of party members;
- Fiend Sandals, used for Energy regeneration, can be used as footwear for leveling specialization or replaced with other sandals;
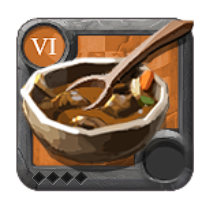
- Mutton Stew increases damage;
- Minor Poison Potion helps kill strong mobs and bosses faster.
This is not a setup focused exclusively on personal statistics. Its purpose is to improve the speed and safety of the entire dungeon run.
Why Does the Bow of Badon Work Well in Group Dungeons?
In Group Dungeons, the most important things are:
- quickly killing many enemies at the same time;
- interrupting dangerous spells;
- maintaining the Energy of the entire party;
- controlling the position of mobs;
- increasing the damage and healing of the entire party.
The Bow of Badon performs several of these tasks at the same time. Its E ability deals area-of-effect damage and makes it harder for enemies to cast spells. This is particularly useful against mobs that use long channeled attacks, healing, buffs, or powerful area-of-effect abilities.
However, this does not mean that every party should bring several Bow of Badon players, because the main ability of this weapon does not stack. In practice, the most effective composition usually includes one Bow of Badon, while additional bow players can choose weapons that complement the party composition better, for example:
- Mistpiercer;
- Longbow.
Bow of Badon Abilities
Q – Deadly Shot
Deadly Shot is a linear ranged attack that can hit more than one enemy. Its most important advantage in PvE is the ability to weaken the target’s defenses, making the party’s subsequent attacks more effective.
It is best to position yourself so that the arrow passes through several mobs. The tank should first gather the enemies into a tightly grouped pack.
How to Use Q
- shoot through the entire group of mobs, not only at the nearest target;
- maintain the debuff on stronger enemies;
- do not stand directly next to the tank;
- position yourself behind or slightly to the side of the enemy group.
W – Ray of Light
Ray of Light is an area-of-effect ability that deals damage and roots enemies. It works well after the tank has gathered the mobs.
The root helps to:
- keep enemies inside the area of Raging Storm;
- stop mobs that are trying to attack the healer;
- prevent the enemy group from spreading out;
- make it easier to hit them with other area-of-effect attacks.
You should not use W randomly before the mobs have been gathered. If you root the enemies too early, the tank may have difficulty positioning them in one place.
E – Raging Storm
Raging Storm is the most important Bow of Badon ability. After hitting an enemy, it creates a storm area that deals damage and interrupts the spellcasting of affected enemies. Even after leaving the area, an enemy may remain affected by the effect for a short time.
The Best Moments to Use Raging Storm
Use E:
- after the tank has gathered the mobs;
- on enemies that are beginning to cast a dangerous spell;
- on a group standing in one place;
- near chests and during stronger pulls;
- on a boss when additional mobs are also nearby;
- in passages where enemies must enter the storm area.
It is not worth using E on a single weak enemy that is about to die. It is better to save the ability for the next stronger pull.
Build Summary, Abilities, and Market Price
Below is the complete build card with the selected equipment, abilities, activity, role, difficulty level, recommended tiers, and estimated price on the Albion Online servers.
Use this section as a quick overview of the setup before entering a Group Dungeon. Prices may change depending on the server, city, quality, enchantment level, and current market situation, so treat them as estimates.
Albion Online build
Bow of Badon Build for Group Dungeons for New Players

Build activities
Loadout
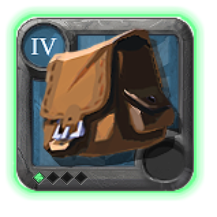

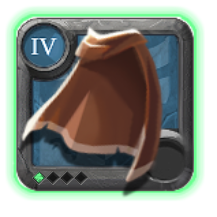
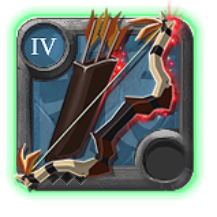
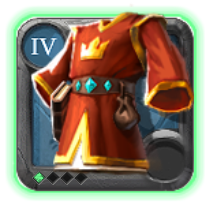



Selected spells and passives
Adept's Druid Cowl
Skill

Circle of Inspiration
Create a Circle of Inspiration with a 4m radius, lasting 5s. Restores 15 Energy for all allies within the circle every 0.5s
Passive

Aggression
Increases your damage and heal power by 3.5%
Adept's Bow of Badon
First Weapon Spell

Deadly Shot
Shoot an arrow in the targeted direction, piercing through all enemies, dealing 252 physical damage to all enemies hit. Decreases damage resistances by 9 for 6s (stacks up to 3 times).
Second Weapon Spell

Ray of Light
Fire an arrow into the sky, which lands after 0.6s at the targeted position. Roots all enemies in a 3m radius for 2.76s Deals 500 physical damage.
Main Weapon Spell

Raging Storm
Shoot a storm-infused arrow in the targeted diercton, which explodes into a 5m radius stormcloud lasting 4.8s upon impact with an enemy. Deals 76 magical damage every 0.3s. Enemies leaving the area will continue to take 534 magical damage over 1.8s(this also happens after the cloud disappears). Whenever the ability deals damage, it will interrupt the hit enemy's spell casting.
Weapon Passive

Piercing Arrows
Each normal attack decreases the targeted enermy's Defense by 1.961% for 3s(stacks up to 4 times).
Adept's Royal Robe
Skill

Magic Rune
Place a magic rune with a 5m radius under your feet, lasting 6s. Increases magical damage and Healing Cast by 5% and reduces Cast Times by 10% for up to 6 allies for every 1s they stand on the rune (stacks up to 6 times). The effect lasts for 5s after they leave the area of the rune (this also happens after the rune disappears).
Passive
Aggression
Increases your damage and heal power by 3.5%
Mutton Stew
Passive

Meat Stew
Increases all damage you deal by $buffovertime[0].value$ for $buffovertime[0].time$ .
Adept's Fiend Sandals
Skill

Energetic Sprint
Start to sprint, increasing your Move Speed by 80% for 5s Restores 7 Energy every 1s
Passive
Aggression
Increases your damage and heal power by 3.5%
Minor Poison Potion
Passive

Poison Potion
Throw the potion at the targeted enemy, poisoning the target and dealing true damage over {0} . [#] Against players: {1} true damage [#] Against mounted players: {2} true damage [#] Against mobs: {3} true damage Whenever the poisoned, unmounted enemy takes direct damage , they will be slowed by {4} for {5} .
Adept's Riding Horse
Passive

Courier
Increases your Max Load by 1.25 kg.
Build prices
Europe Server Cheapest Price
Lowest price: 397,315srebro (last known price)
Build Price in City
Item price breakdown
Adept's Bag
- Bridgewatch
- 7,499srebro
- Steppe Cross
- Not available
- Martlock
- 8,745srebro
- Highland Cross
- Not available
- Thetford
- 7,969srebro
- Swamp Cross
- Not available
- Fort Sterling
- 8,466srebro
- Mountain Cross
- Not available
- Lymhurst
- 7,693srebro
- Forest Cross
- Not available
- Caerleon
- 299,999srebro
- Brecilien
- 7,947srebro
- Arthur’s Rest
- Not available
- Merlyn’s Rest
- Not available
- Morgana’s Rest
- Not available
Adept's Druid Cowl
- Bridgewatch
- 7,167srebro (last known price)
- Steppe Cross
- Not available
- Martlock
- 4,991srebro (last known price)
- Highland Cross
- Not available
- Thetford
- 5,797srebro (last known price)
- Swamp Cross
- Not available
- Fort Sterling
- 6,790srebro (last known price)
- Mountain Cross
- Not available
- Lymhurst
- 6,155srebro (last known price)
- Forest Cross
- Not available
- Caerleon
- 20,981srebro (last known price)
- Brecilien
- 3,397srebro (last known price)
- Arthur’s Rest
- Not available
- Merlyn’s Rest
- Not available
- Morgana’s Rest
- Not available
Adept's Cape
- Bridgewatch
- 4,995srebro
- Steppe Cross
- Not available
- Martlock
- 5,388srebro
- Highland Cross
- Not available
- Thetford
- 4,355srebro
- Swamp Cross
- Not available
- Fort Sterling
- 5,800srebro
- Mountain Cross
- Not available
- Lymhurst
- 4,174srebro
- Forest Cross
- Not available
- Caerleon
- 11,105srebro
- Brecilien
- 3,371srebro
- Arthur’s Rest
- Not available
- Merlyn’s Rest
- Not available
- Morgana’s Rest
- Not available
Adept's Bow of Badon
- Bridgewatch
- 100,000srebro (last known price)
- Steppe Cross
- Not available
- Martlock
- 105,450srebro (last known price)
- Highland Cross
- Not available
- Thetford
- 87,979srebro (last known price)
- Swamp Cross
- Not available
- Fort Sterling
- 91,987srebro (last known price)
- Mountain Cross
- Not available
- Lymhurst
- 83,990srebro (last known price)
- Forest Cross
- Not available
- Caerleon
- 124,979srebro (last known price)
- Brecilien
- 84,997srebro (last known price)
- Arthur’s Rest
- Not available
- Merlyn’s Rest
- Not available
- Morgana’s Rest
- Not available
Adept's Royal Robe
- Bridgewatch
- 274,995srebro (last known price)
- Steppe Cross
- Not available
- Martlock
- 270,000srebro (last known price)
- Highland Cross
- Not available
- Thetford
- 243,333srebro (last known price)
- Swamp Cross
- Not available
- Fort Sterling
- 280,000srebro (last known price)
- Mountain Cross
- Not available
- Lymhurst
- 242,997srebro (last known price)
- Forest Cross
- Not available
- Caerleon
- 249,999srebro (last known price)
- Brecilien
- 255,547srebro (last known price)
- Arthur’s Rest
- Not available
- Merlyn’s Rest
- Not available
- Morgana’s Rest
- Not available
Mutton Stew
- Bridgewatch
- 1,723srebro
- Steppe Cross
- Not available
- Martlock
- 1,650srebro
- Highland Cross
- Not available
- Thetford
- 1,795srebro
- Swamp Cross
- Not available
- Fort Sterling
- 1,808srebro
- Mountain Cross
- Not available
- Lymhurst
- 1,942srebro
- Forest Cross
- Not available
- Caerleon
- 2,181srebro
- Brecilien
- 1,290srebro
- Arthur’s Rest
- Not available
- Merlyn’s Rest
- Not available
- Morgana’s Rest
- Not available
Adept's Fiend Sandals
- Bridgewatch
- 9,958srebro (last known price)
- Steppe Cross
- Not available
- Martlock
- 10,874srebro (last known price)
- Highland Cross
- Not available
- Thetford
- 7,399srebro (last known price)
- Swamp Cross
- Not available
- Fort Sterling
- 4,981srebro (last known price)
- Mountain Cross
- Not available
- Lymhurst
- 7,000srebro (last known price)
- Forest Cross
- Not available
- Caerleon
- 23,999srebro (last known price)
- Brecilien
- 6,696srebro (last known price)
- Arthur’s Rest
- Not available
- Merlyn’s Rest
- Not available
- Morgana’s Rest
- Not available
Minor Poison Potion
- Bridgewatch
- 683srebro
- Steppe Cross
- Not available
- Martlock
- 747srebro
- Highland Cross
- Not available
- Thetford
- 797srebro
- Swamp Cross
- Not available
- Fort Sterling
- 796srebro
- Mountain Cross
- Not available
- Lymhurst
- 685srebro
- Forest Cross
- Not available
- Caerleon
- 1,081srebro
- Brecilien
- 719srebro
- Arthur’s Rest
- Not available
- Merlyn’s Rest
- Not available
- Morgana’s Rest
- Not available
Adept's Riding Horse
- Bridgewatch
- 45,937srebro (last known price)
- Steppe Cross
- Not available
- Martlock
- 39,835srebro (last known price)
- Highland Cross
- 56,500srebro (last known price)
- Thetford
- 45,729srebro (last known price)
- Swamp Cross
- 55,999srebro (last known price)
- Fort Sterling
- 37,974srebro (last known price)
- Mountain Cross
- 43,390srebro (last known price)
- Lymhurst
- 42,679srebro (last known price)
- Forest Cross
- 46,798srebro (last known price)
- Caerleon
- 29,997srebro (last known price)
- Brecilien
- 49,998srebro (last known price)
- Arthur’s Rest
- Not available
- Merlyn’s Rest
- Not available
- Morgana’s Rest
- Not available
America Server Cheapest Price
Lowest price: 381,948srebro (last known price)
Build Price in City
Item price breakdown
Adept's Bag
- Bridgewatch
- 11,874srebro (last known price)
- Steppe Cross
- Not available
- Martlock
- 7,764srebro (last known price)
- Highland Cross
- Not available
- Thetford
- 7,662srebro (last known price)
- Swamp Cross
- Not available
- Fort Sterling
- 7,493srebro (last known price)
- Mountain Cross
- 7,000srebro (last known price)
- Lymhurst
- 7,674srebro (last known price)
- Forest Cross
- Not available
- Caerleon
- 33,895srebro (last known price)
- Brecilien
- 7,719srebro (last known price)
- Arthur’s Rest
- Not available
- Merlyn’s Rest
- Not available
- Morgana’s Rest
- Not available
Adept's Druid Cowl
- Bridgewatch
- 3,941srebro (last known price)
- Steppe Cross
- Not available
- Martlock
- 9,975srebro (last known price)
- Highland Cross
- Not available
- Thetford
- 3,493srebro (last known price)
- Swamp Cross
- Not available
- Fort Sterling
- 4,490srebro (last known price)
- Mountain Cross
- Not available
- Lymhurst
- 3,185srebro (last known price)
- Forest Cross
- Not available
- Caerleon
- 20,983srebro (last known price)
- Brecilien
- 2,898srebro (last known price)
- Arthur’s Rest
- Not available
- Merlyn’s Rest
- Not available
- Morgana’s Rest
- Not available
Adept's Cape
- Bridgewatch
- 5,481srebro (last known price)
- Steppe Cross
- Not available
- Martlock
- 3,490srebro (last known price)
- Highland Cross
- Not available
- Thetford
- 4,978srebro (last known price)
- Swamp Cross
- Not available
- Fort Sterling
- 5,038srebro (last known price)
- Mountain Cross
- Not available
- Lymhurst
- 4,581srebro (last known price)
- Forest Cross
- Not available
- Caerleon
- 5,999srebro (last known price)
- Brecilien
- 4,772srebro (last known price)
- Arthur’s Rest
- Not available
- Merlyn’s Rest
- Not available
- Morgana’s Rest
- Not available
Adept's Bow of Badon
- Bridgewatch
- 194,998srebro (last known price)
- Steppe Cross
- Not available
- Martlock
- 174,000srebro (last known price)
- Highland Cross
- Not available
- Thetford
- 184,999srebro (last known price)
- Swamp Cross
- Not available
- Fort Sterling
- 165,545srebro (last known price)
- Mountain Cross
- Not available
- Lymhurst
- 145,195srebro (last known price)
- Forest Cross
- Not available
- Caerleon
- 142,205srebro (last known price)
- Brecilien
- 180,000srebro (last known price)
- Arthur’s Rest
- Not available
- Merlyn’s Rest
- Not available
- Morgana’s Rest
- Not available
Adept's Royal Robe
- Bridgewatch
- 179,994srebro (last known price)
- Steppe Cross
- Not available
- Martlock
- 179,996srebro (last known price)
- Highland Cross
- Not available
- Thetford
- 229,993srebro (last known price)
- Swamp Cross
- Not available
- Fort Sterling
- 198,495srebro (last known price)
- Mountain Cross
- Not available
- Lymhurst
- 173,985srebro (last known price)
- Forest Cross
- Not available
- Caerleon
- 199,996srebro (last known price)
- Brecilien
- 174,589srebro (last known price)
- Arthur’s Rest
- Not available
- Merlyn’s Rest
- Not available
- Morgana’s Rest
- Not available
Mutton Stew
- Bridgewatch
- 1,901srebro
- Steppe Cross
- Not available
- Martlock
- 1,865srebro
- Highland Cross
- Not available
- Thetford
- 2,248srebro
- Swamp Cross
- Not available
- Fort Sterling
- 2,356srebro
- Mountain Cross
- Not available
- Lymhurst
- 2,298srebro
- Forest Cross
- Not available
- Caerleon
- 2,111srebro
- Brecilien
- 2,098srebro
- Arthur’s Rest
- Not available
- Merlyn’s Rest
- Not available
- Morgana’s Rest
- Not available
Adept's Fiend Sandals
- Bridgewatch
- 4,976srebro (last known price)
- Steppe Cross
- Not available
- Martlock
- 5,879srebro (last known price)
- Highland Cross
- Not available
- Thetford
- 7,494srebro (last known price)
- Swamp Cross
- Not available
- Fort Sterling
- 2,900srebro (last known price)
- Mountain Cross
- Not available
- Lymhurst
- 4,463srebro (last known price)
- Forest Cross
- Not available
- Caerleon
- 31,999srebro (last known price)
- Brecilien
- 2,998srebro (last known price)
- Arthur’s Rest
- Not available
- Merlyn’s Rest
- Not available
- Morgana’s Rest
- Not available
Minor Poison Potion
- Bridgewatch
- 670srebro
- Steppe Cross
- Not available
- Martlock
- 752srebro
- Highland Cross
- Not available
- Thetford
- 704srebro
- Swamp Cross
- Not available
- Fort Sterling
- 711srebro
- Mountain Cross
- Not available
- Lymhurst
- 717srebro
- Forest Cross
- Not available
- Caerleon
- 650srebro
- Brecilien
- 579srebro
- Arthur’s Rest
- Not available
- Merlyn’s Rest
- Not available
- Morgana’s Rest
- Not available
Adept's Riding Horse
- Bridgewatch
- 34,994srebro (last known price)
- Steppe Cross
- Not available
- Martlock
- 42,147srebro (last known price)
- Highland Cross
- Not available
- Thetford
- 40,996srebro (last known price)
- Swamp Cross
- 59,999srebro (last known price)
- Fort Sterling
- 41,000srebro (last known price)
- Mountain Cross
- 30,000srebro (last known price)
- Lymhurst
- 39,850srebro (last known price)
- Forest Cross
- Not available
- Caerleon
- 32,891srebro (last known price)
- Brecilien
- 46,996srebro (last known price)
- Arthur’s Rest
- Not available
- Merlyn’s Rest
- Not available
- Morgana’s Rest
- Not available
Asia Server Cheapest Price
Lowest price: 492,717srebro (last known price)
Build Price in City
Item price breakdown
Adept's Bag
- Bridgewatch
- 499,999srebro (last known price)
- Steppe Cross
- Not available
- Martlock
- 499,999srebro (last known price)
- Highland Cross
- Not available
- Thetford
- 217,996srebro (last known price)
- Swamp Cross
- 40,000srebro (last known price)
- Fort Sterling
- 499,999srebro (last known price)
- Mountain Cross
- Not available
- Lymhurst
- 5,899srebro (last known price)
- Forest Cross
- Not available
- Caerleon
- 17,999srebro (last known price)
- Brecilien
- 5,883srebro (last known price)
- Arthur’s Rest
- Not available
- Merlyn’s Rest
- Not available
- Morgana’s Rest
- Not available
Adept's Druid Cowl
- Bridgewatch
- 6,870srebro (last known price)
- Steppe Cross
- Not available
- Martlock
- Not available
- Highland Cross
- Not available
- Thetford
- 19,590srebro (last known price)
- Swamp Cross
- Not available
- Fort Sterling
- 7,946srebro (last known price)
- Mountain Cross
- Not available
- Lymhurst
- 11,751srebro (last known price)
- Forest Cross
- Not available
- Caerleon
- 29,881srebro (last known price)
- Brecilien
- 6,618srebro (last known price)
- Arthur’s Rest
- Not available
- Merlyn’s Rest
- Not available
- Morgana’s Rest
- Not available
Adept's Cape
- Bridgewatch
- 5,479srebro (last known price)
- Steppe Cross
- Not available
- Martlock
- 4,145srebro (last known price)
- Highland Cross
- Not available
- Thetford
- 4,797srebro (last known price)
- Swamp Cross
- Not available
- Fort Sterling
- 6,620srebro (last known price)
- Mountain Cross
- Not available
- Lymhurst
- 4,370srebro (last known price)
- Forest Cross
- Not available
- Caerleon
- 14,987srebro (last known price)
- Brecilien
- 3,034srebro (last known price)
- Arthur’s Rest
- Not available
- Merlyn’s Rest
- Not available
- Morgana’s Rest
- Not available
Adept's Bow of Badon
- Bridgewatch
- 144,997srebro (last known price)
- Steppe Cross
- Not available
- Martlock
- 140,000srebro (last known price)
- Highland Cross
- Not available
- Thetford
- 126,992srebro (last known price)
- Swamp Cross
- Not available
- Fort Sterling
- 113,799srebro (last known price)
- Mountain Cross
- Not available
- Lymhurst
- 100,000srebro (last known price)
- Forest Cross
- Not available
- Caerleon
- 149,984srebro (last known price)
- Brecilien
- 107,987srebro (last known price)
- Arthur’s Rest
- Not available
- Merlyn’s Rest
- Not available
- Morgana’s Rest
- Not available
Adept's Royal Robe
- Bridgewatch
- 395,900srebro (last known price)
- Steppe Cross
- Not available
- Martlock
- 299,999srebro (last known price)
- Highland Cross
- Not available
- Thetford
- 449,998srebro (last known price)
- Swamp Cross
- Not available
- Fort Sterling
- 335,884srebro (last known price)
- Mountain Cross
- Not available
- Lymhurst
- 309,960srebro (last known price)
- Forest Cross
- Not available
- Caerleon
- 299,999srebro (last known price)
- Brecilien
- 336,980srebro (last known price)
- Arthur’s Rest
- Not available
- Merlyn’s Rest
- Not available
- Morgana’s Rest
- Not available
Mutton Stew
- Bridgewatch
- 2,136srebro (last known price)
- Steppe Cross
- Not available
- Martlock
- 2,777srebro (last known price)
- Highland Cross
- Not available
- Thetford
- 2,525srebro (last known price)
- Swamp Cross
- Not available
- Fort Sterling
- 2,285srebro (last known price)
- Mountain Cross
- Not available
- Lymhurst
- 2,760srebro (last known price)
- Forest Cross
- Not available
- Caerleon
- 3,076srebro (last known price)
- Brecilien
- 3,073srebro (last known price)
- Arthur’s Rest
- Not available
- Merlyn’s Rest
- Not available
- Morgana’s Rest
- Not available
Adept's Fiend Sandals
- Bridgewatch
- 5,955srebro (last known price)
- Steppe Cross
- Not available
- Martlock
- 8,055srebro (last known price)
- Highland Cross
- Not available
- Thetford
- Not available
- Swamp Cross
- Not available
- Fort Sterling
- Not available
- Mountain Cross
- Not available
- Lymhurst
- 5,350srebro (last known price)
- Forest Cross
- Not available
- Caerleon
- 17,997srebro (last known price)
- Brecilien
- 9,986srebro (last known price)
- Arthur’s Rest
- Not available
- Merlyn’s Rest
- Not available
- Morgana’s Rest
- Not available
Minor Poison Potion
- Bridgewatch
- 805srebro (last known price)
- Steppe Cross
- Not available
- Martlock
- 785srebro (last known price)
- Highland Cross
- Not available
- Thetford
- 886srebro (last known price)
- Swamp Cross
- Not available
- Fort Sterling
- 930srebro (last known price)
- Mountain Cross
- Not available
- Lymhurst
- 629srebro (last known price)
- Forest Cross
- Not available
- Caerleon
- 1,087srebro (last known price)
- Brecilien
- 640srebro (last known price)
- Arthur’s Rest
- Not available
- Merlyn’s Rest
- Not available
- Morgana’s Rest
- Not available
Adept's Riding Horse
- Bridgewatch
- 50,495srebro (last known price)
- Steppe Cross
- Not available
- Martlock
- 66,666srebro (last known price)
- Highland Cross
- Not available
- Thetford
- 63,399srebro (last known price)
- Swamp Cross
- Not available
- Fort Sterling
- 48,228srebro (last known price)
- Mountain Cross
- Not available
- Lymhurst
- 51,998srebro (last known price)
- Forest Cross
- Not available
- Caerleon
- 39,992srebro (last known price)
- Brecilien
- 55,893srebro (last known price)
- Arthur’s Rest
- Not available
- Merlyn’s Rest
- Not available
- Morgana’s Rest
- Not available
Equipment for the Bow of Badon Build
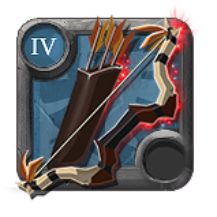
Bow of Badon serves as a ranged DPS weapon and a partial battlefield controller in this setup.
Its strengths are:
- area-of-effect damage;
- spell interruption;
- the ability to weaken enemy defenses;
- control over the position of mobs;
- high usefulness in tight spaces.
The weapon can also be used in other PvE activities and in some forms of PvP, but the presented setup was prepared primarily for Group Dungeons.

Druid Cowl provides the Circle of Inspiration ability. It creates an area that restores Energy to allies within its range. According to the ability description, the circle lasts for several seconds and can restore Energy to a limited number of party members at the same time.
Energy is a key resource in longer fights. When DPS players, the tank, or the healer run out of Energy, the pace of the entire party drops sharply.
How to Use the Druid Cowl
- place the circle underneath most of the party;
- do not activate it when everyone has almost full Energy;
- it is best used between consecutive groups of mobs or during a longer fight;
- do not place the circle inside a boss attack area;
- inform the party before activating it so that players do not leave the area.
Two Druid Cowls can provide the party with very stable Energy regeneration, but the players should use them alternately. Placing two circles at the same time usually wastes part of the ability’s potential.
If the party already has enough sources of Energy regeneration, the next DPS player can choose:
Cowl of Purity as a more expensive option.
Assassin Hood to refresh key abilities more quickly;
Mage Cowl as a cheaper offensive option;

Royal Robe has the Magic Rune ability. It creates an area on the ground that strengthens allies standing within its range. The effect can increase magical damage and healing power and reduce cast times.
In the case of the Bow of Badon, the robe primarily improves the effectiveness of its magical abilities. At the same time, it can strengthen the healer and other party members who use suitable spells.
How to Use Magic Rune
- Wait until the tank positions the enemies.
- Place the rune in a location where the DPS players and healer can stand safely.
- Remain inside the area to charge the effect.
- Use your most important abilities after receiving the buff.
- Watch the active buff icon on your character.
When using two Royal Robes, the players should activate them one after another rather than at the same time. The next one should be used after the previous buff has ended.
Exact values and stacking rules should be checked in the current in-game ability description because item balance can change.
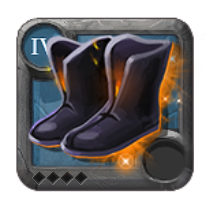
Fiend Sandals are artifact cloth footwear. In this setup, they are not an essential part of how the Bow of Badon works. You can use them to level their specialization or replace them with other sandals equipped with a suitable movement ability.
In Group Dungeons, the most important thing is that the selected shoe ability allows you to:
- quickly leave a dangerous area;
- keep up with the tank and the rest of the party;
- improve your position before using E;
- avoid having your rotation interrupted by a boss attack.
Possible Replacements
Royal Sandals
A more expensive offensive option that can increase your damage at the cost of safety.
Regular cloth sandals
A cheap option for leveling specialization and using a basic sprint.
Soldier Boots
A good option for players who need a longer run or greater versatility.
For a new player, mobility and survivability are more important than a small increase in maximum DPS.
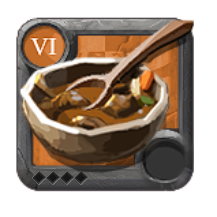
Mutton Stew is food that increases combat damage. Thanks to this, it fits most DPS setups designed for PvE.
For a longer trip, it is worth taking several portions. The number depends on the planned playtime, but there is usually no need to carry a very large supply with a single inexpensive set.
When to Use It
- before starting the first dungeon;
- after the previous effect expires.
However, damage-increasing food will not fix a poor rotation. Correct positioning and hitting many enemies remain more important.
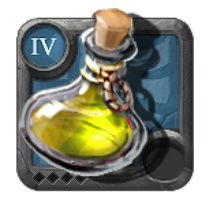
Minor Poison Potion is an inexpensive Tier 4 consumable. The poison weakens the affected enemy and helps kill it faster. The current version of the potion can also briefly slow the target after it receives direct damage.
It is best thrown at:
- bosses;
- strong mobs near chests;
- enemies with a large amount of health;
- targets with high resistances;
- mobs that need to be killed first.
The effects of several identical Poison Potions do not stack, so they should not be used thoughtlessly at the same time. Players can agree on the order in which they throw the potions to maintain the effect for a larger part of the fight.
Recommended Rotation
Regular Group of Mobs
- Wait until the tank gathers the enemies.
- Position yourself behind or to the side of the group.
- Use Deadly Shot through several targets.
- Cast Ray of Light when the mobs are correctly positioned.
- Use Raging Storm on the largest group.
- Continue using Q and basic attacks.
- Save your sprint to avoid a dangerous area.
Strong Chest Pull
- Allow the tank to stabilize aggro.
- Place Magic Rune.
- Use a Poison Potion on the strongest enemy.
- Cast Raging Storm.
- Use Ray of Light to keep the mobs inside the area.
- Continue using Q through as many targets as possible.
- Stop attacking and move away if the boss begins a dangerous mechanic.
Boss
During a boss fight, do not automatically use all your abilities immediately after the fight begins. Some bosses summon additional enemies or begin important spells after a certain amount of time.
It is worth saving Raging Storm for:
- a phase with additional mobs;
- a channeled boss ability;
- the moment when the party’s buffs are activated;
- a period when the boss remains stationary.
Alternative Items
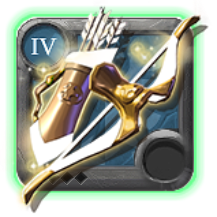
Mistpiercer – if the party already has a Bow of Badon, another bow player can use Mistpiercer. The weapon provides a different type of area-of-effect damage and allows the player to complement the party composition better.
It can also benefit from some of the buffs provided by the Royal Robe, depending on the current damage classification of the relevant ability
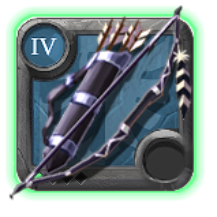
Longbow is a good alternative for group PvE, especially when the player has unlocked the appropriate bow abilities.
It works well in:
- compositions focused on maximum area-of-effect DPS;
- parties that already have a source of spell interruption.
Before using the main ability, it is worth activating an effect that increases the damage of subsequent attacks, provided that the selected ability configuration allows it.

Royal Jacket can replace the Royal Robe if the party needs cooldown reduction more than increased magical damage and healing.
In this version, the Druid Cowl can be replaced with an Assassin Hood to refresh E and the armor ability even more frequently.
This configuration focuses on using key abilities more often, but it requires better coordination from the entire party.
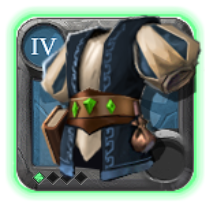
Mage Robe or any other cheap robe. Players with a smaller budget do not need to buy a Royal Robe immediately.
Cheaper alternatives include:
- Mage Robe;
- Fiend Robe;
- Cleric Robe;
- another cloth robe for leveling specialization.
For a beginner, the most important thing is to own a set whose loss will not stop further progression. A more expensive item does not compensate for a lack of specialization, poor positioning, or unfamiliarity with mechanics.
Example Group Dungeon Party Composition
A standard party consists of:
- 1 tank;
- 1 healer;
- 3 DPS players.
Group Dungeons are best completed with five players. A six-player composition is recommended for beginners, and it is worth bringing a maximum of seven players. With eight players, mobs receive a very strong defensive bonus that serves as protection against clearing dungeons too easily with a large group.
A practical explanation can also be added:
This mechanic is particularly important against more difficult bosses and on special floors, where a large number of players could make the fight too easy.
For less experienced players, another DPS player or support can be added, for example a mage with a Cursed Staff who reduces resistances. However, a larger number of players does not always mean faster clearing. Each additional player shares part of the rewards and should provide real value to the party composition.
The Most Important Rules for Clearing Dungeons Efficiently
Wait for the Tank
Do not attack enemies before the tank gathers them. Using W or E too early can spread out the mobs and direct them toward a DPS player or the healer.
Attack Multiple Targets
The Bow of Badon is chosen for Group Dungeons because of its area-of-effect damage. Position yourself so that you hit several mobs with one spell.
Watch the Ground
High DPS does not matter if the player dies to an easily avoidable ability. Stop attacking and change your position when a dangerous area appears.
Use Buffs Alternately
Two Royal Robes or two Druid Cowls should be used one after another. Activating similar effects at the same time often wastes part of their duration.
Do Not Save Poison During a Difficult Boss Fight
Potions are used to speed up and stabilize difficult fights. Losing the entire set costs more than using several potions.
Maintain the Party’s Pace
Faster clearing means more Fame and more completed dungeons in the same amount of time. However, this does not mean running without control. The most important thing is to move smoothly from one properly gathered pull to the next.
Is the Bow of Badon Suitable for Solo Play?
Yes. The Bow of Badon can also be used in solo activities. Raging Storm allows you to deal area-of-effect damage and makes it more difficult for enemies to cast spells, while bow abilities provide range control.
However, this does not mean that the group setup described here is an optimal solo setup. In solo play, you more often need:
- self-healing;
- greater mobility;
- protection against damage;
- a way to recover Energy without help from the party.
Separate equipment variants should be prepared for Solo Dungeons, the Mists, and Corrupted Dungeons. Example PvP builds with the Bow of Badon use different helmets, armor, boots, and food than the group setup presented here. If you are interested in playing bows in solo PvE activities, read Beginner Bow Set for Starting the Game.
Summary
The Bow of Badon is a very good choice for a new player who wants to level bows and participate in Group Dungeons.
It provides:
- strong area-of-effect damage;
- interruption of enemy spellcasting;
- control over groups of mobs;
- good synergy with the Royal Robe;
- usefulness in group PvE and selected PvP activities.
However, it reaches its greatest value when the player cooperates with the tank and the rest of the party. A correctly placed Raging Storm, a well-positioned Magic Rune, and sensible Energy management can improve the pace of the entire dungeon more than simply increasing the tier of the equipment.
FAQ – Bow of Badon PvE Build for Beginner Group Dungeons in Albion Online
Is the Bow of Badon Good for Group Dungeons?
Yes. The Bow of Badon deals area-of-effect damage, helps control mobs, and can interrupt spellcasting with Raging Storm.
How Many Bow of Badon Players Should Be in the Party?
One is usually enough. Additional bow players can use the Longbow, Mistpiercer, or other weapons that provide the party with different effects.
Is the Bow of Badon Good for a Beginner?
Yes, but the player must learn correct positioning, how to hit multiple targets, and how to wait until the tank gathers the enemies.
Is the Royal Robe Mandatory?
No. It is very useful in group PvE, but it can be replaced with a cheaper Mage Robe, Cleric Robe, or another cloth armor item.
Is It Worth Bringing Two Royal Robes?
Yes, provided that the players use them alternately and the party actually benefits from the buffs they provide.
Do Two Druid Cowls Make Sense?
They can be useful in a party that consumes a large amount of Energy. However, the circles should be placed one after another rather than at the same time.
Which Food Should You Choose?
Mutton Stew is a straightforward option that increases damage. In other variants, food that reduces cooldowns can be considered.
When Should You Throw a Poison Potion?
On bosses, strong mobs near chests, and enemies with a large amount of health or high resistances.
Is This Build Suitable for PvP?
The Bow of Badon is also used in PvP, but the presented setup was prepared for Group Dungeons. A PvP build should use different defensive and mobility elements.