Avalonian Crystal Basilisk Boss Guide
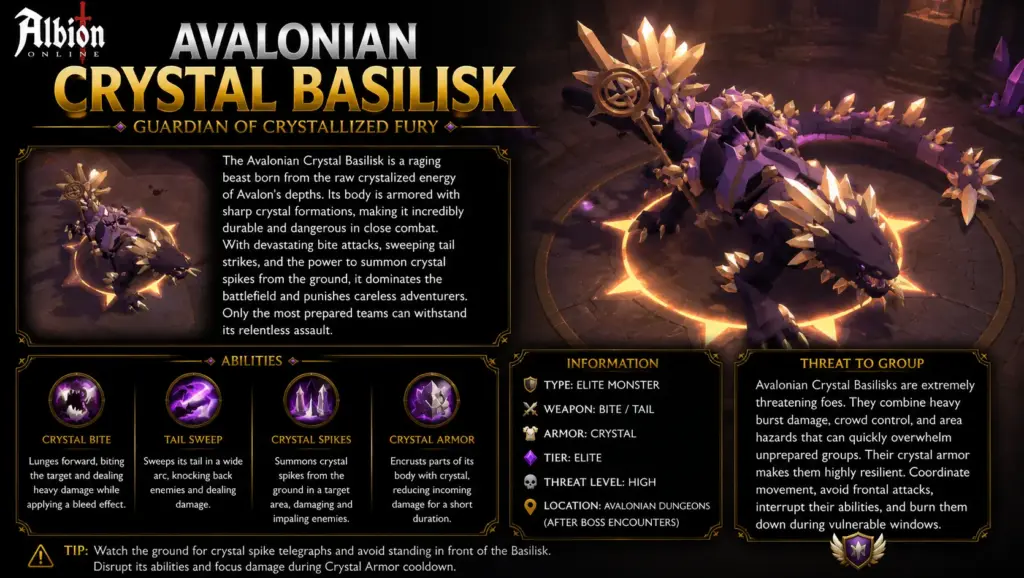
The Avalonian Crystal Basilisk is a two-phase boss. The first phase is simple and mostly tests basic positioning. The second phase is much more dangerous because the boss begins using powerful nuke mechanics and stack management becomes important.
This fight is easiest when the party is split into two clear groups and everyone understands where to stand before phase two begins.
Main Strategy for Avalonian Crystal Basilisk
The party should split into two groups and stand on opposite sides of the boss. In the original positioning concept, these sides are roughly aligned with the chest direction and the corridor direction of the boss room.
The tank should face the boss perpendicular to the two groups. This prevents frontal attacks and dangerous directional mechanics from hitting either side of the party.
Phase 1: Basic Positioning Phase
The first phase is relatively simple. The boss uses windwalls and frontal attacks, but these are manageable if the tank faces the boss correctly and the group avoids standing behind the boss.
Wind Wall
The boss channels windwalls from its sides. Players can walk backward, roll, blink through them or angle around them depending on their position.
This mechanic is not usually dangerous if players react calmly and avoid standing in bad locations.
Tail Smash
Players should not stand behind the boss. If a player stands too close to the tail, the Basilisk can slam behind itself and knock players away.
This is especially important for melee players or anyone repositioning during the fight.
Phase 2: Nuke Phase
The second phase begins when the boss reaches around 60–65% health. This is the dangerous part of the fight.
During phase two, the boss performs two major nuke mechanics:
- Big Nuke: the larger burst mechanic that starts the phase.
- Small Nuke: a follow-up burst mechanic after additional boss actions.
The boss always starts phase two with the Big Nuke. The party must be ready before the phase transition, not after the cast has already started.
How the Big Nuke Works
The boss channels and then deals heavy damage to the party after a short delay. Just before the damage lands, the boss triggers a chain-lightning effect on the five closest players. These players receive stacks related to the Divine Pulse mechanic.
A assigned damage-reduction player should use defensive support just before the damage hits. Correct timing makes the burst much safer.
How the Small Nuke Works
After the Big Nuke, the boss performs additional mechanics such as a cone stun and spray AoE. The Small Nuke comes after this sequence.
The second assigned damage-reduction player should prepare for the Small Nuke timing. If the defensive support is used too early, the group may still take the full burst.
Divine Pulse and Stack Management
The nuke mechanics apply Divine Pulse stacks to players. These stacks can increase damage output, but they also create risk if players position poorly and damage each other.
The optimal approach is to spread properly during phase two so Divine Pulse damage does not overlap too heavily on the group. Strong groups can use the damage increase to kill the boss faster, while inexperienced groups may prefer safer stack removal.
Cleanse Cloud / Boss Cleanse
During the fight, a player may receive a cleanse cloud. This is different from a normal cleanse such as Arcane Cleanse or Mercenary Hood.
The boss cleanse removes important stacks, including Corrosive Breath stacks from the tank and Divine Pulse stacks from players. The tank should receive the first cleanse cloud in phase two to remove resistance shred accumulated during phase one.
Normal Cleanse vs Boss Cleanse
- Normal cleanse: removes effects such as the cone stun when using regular cleanse tools.
- Boss cleanse: removes boss-specific stacks such as Corrosive Breath and Divine Pulse.
Players must not confuse these two mechanics. The boss cleanse should be placed where it helps the correct targets.
Spray AoE
The boss sprays heavy damage in front of itself in a cone. This attack can be lethal if the tank is hit without defensive support.
The tank should avoid moving the boss unpredictably when dodging or returning to position. Soldier Helmet or another defensive option can help stabilize this movement.
Cone Stun
The boss performs a large cone attack that stuns players hit by it. This stun can be cleansed.
In some strategies, the group intentionally interacts with this mechanic to manage cleanse timing. For safer beginner groups, the caller should keep the instruction simple and make sure players do not spread chaos through the room.
Alternative Beginner Strategy
A safer beginner strategy is to use mobility or Occult-based swaps and have each side run out of the room when the nuke damage lands. This avoids some of the damage-reduction and Divine Pulse stack management requirements.
The downside is that this strategy is slower and less efficient. It may be useful for learning groups, but experienced groups should eventually move toward the more optimal strategy that uses proper damage reduction and stack control.
Common Crystal Basilisk Mistakes
- Standing behind the boss and triggering Tail Smash.
- Failing to split the party into clear sides.
- Using damage reduction too early before the nuke damage lands.
- Misplacing the first boss cleanse and leaving tank stacks active.
- Overlapping Divine Pulse damage because players stand too close.
- Confusing regular cleanse with boss cleanse.
Crystal Basilisk Caller Checklist
- Split the party into two sides before pulling.
- Confirm the tank’s boss-facing direction.
- Assign Big Nuke and Small Nuke damage-reduction players.
- Remind players not to stand behind the boss.
- Call the first boss cleanse for the tank.
- Warn the group before phase two begins.