Avalonian Mobs and Bestiary Guide
Avalonian Elite Dungeons contain several dangerous mob types, and each of them has different mechanics. Some mobs are mostly harmless if handled correctly, while others can wipe or heavily disrupt an inexperienced party.
The most important thing to understand is that Avalonian mobs should not be treated like normal dungeon enemies. Many of them cannot be displaced, some casts cannot be interrupted, and several abilities punish poor positioning or bad timing.
This bestiary explains what each Avalonian mob does, whether it can be displaced, which abilities can be interrupted, and how your party should react during pulls.
Group rule: Do not assume every Avalonian mob can be pulled, knocked back or interrupted. Always check which mobs are immune to displacement and which casts are uninterruptible.
Avalonian Acolyte
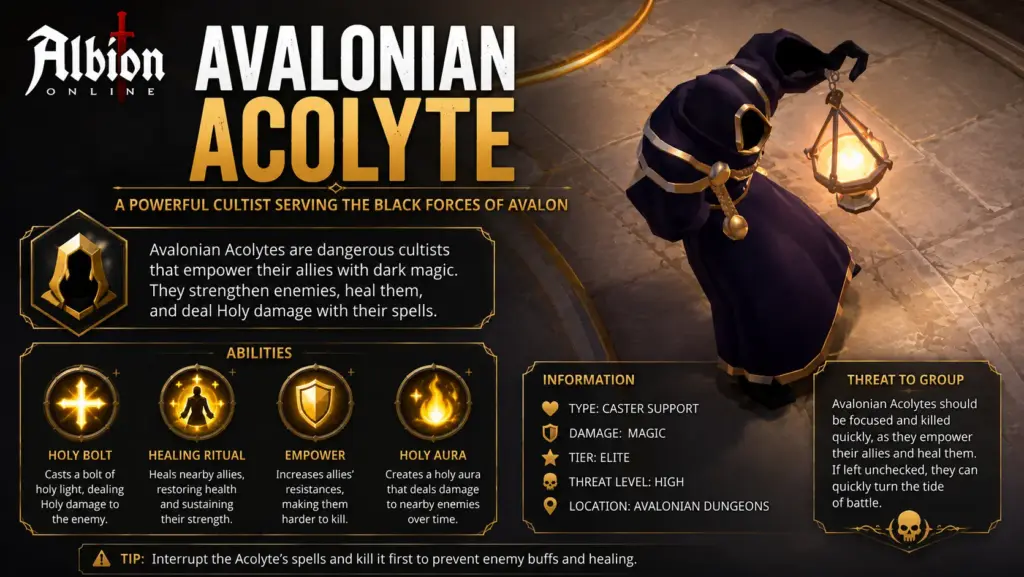
The Avalonian Acolyte is not the most dangerous mob in the dungeon, but it can create problems through debuffs and purge effects. Players should avoid the small floating orbs and move away from the group if they are targeted by the purge smoke.
The Acolyte can be displaced by abilities such as Air Compressor or Realmbreaker E, which makes it easier to control than many other Avalonian mobs.
Avalonian Acolyte Mechanics
- Can be displaced: yes.
- Main danger: damage and healing reduction, purge smoke.
- Important reaction: avoid orbs and move purge smoke away from allies.
Floating Orb
The Acolyte sends out floating orbs. Getting hit applies a stack that reduces the player’s damage and healing output. This debuff can be cleansed, but the better solution is to avoid the orb in the first place.
The Floating Orb cast cannot be interrupted, so the party should focus on dodging instead of trying to stop it.
Purge Smoke
Purge Smoke creates a smoke effect that purges players caught inside it. If the indicator appears on you, move away from the party before it drops. Standing near allies with this mechanic can remove important buffs and defensive effects from the group.
Unlike Floating Orb, the Purge Smoke cast can be interrupted.
Avalonian Archer
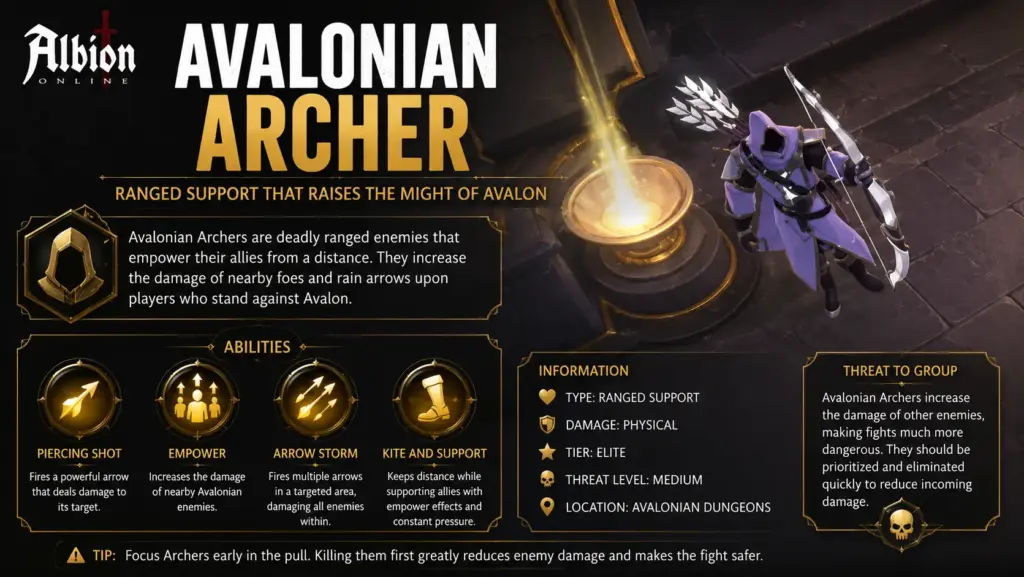
The Avalonian Archer is one of the more annoying regular mobs because of its silence and knockback mechanics. Players who are targeted by the Archer must move away from allies to prevent the silence from spreading through the party.
The Archer cannot be displaced, so tanks and callers must account for its positioning naturally instead of relying on pull or knockback tools.
Avalonian Archer Mechanics
- Can be displaced: no.
- Main danger: silence, knockback and purge effects.
- Important reaction: targeted players should separate from the group.
Silence Shot
Silence Shot channels on a single target, knocks the target back and applies a long silence. The silence can also affect nearby allies, so the marked player should move away from the party before the shot finishes.
The cast cannot be interrupted, but the silence can be cleansed.
Helix Shot
Helix Shot fires a double-arrow pattern in an eight-shaped area. It deals minor damage and can purge players hit near the end of the shot.
This cast can be interrupted, so crowd control can be used to prevent it when needed.
Personal Space
The Archer knocks back and downs players who stand too close in melee range. Melee players and tanks should be aware of this when positioning near Archers.
Avalonian Assembler
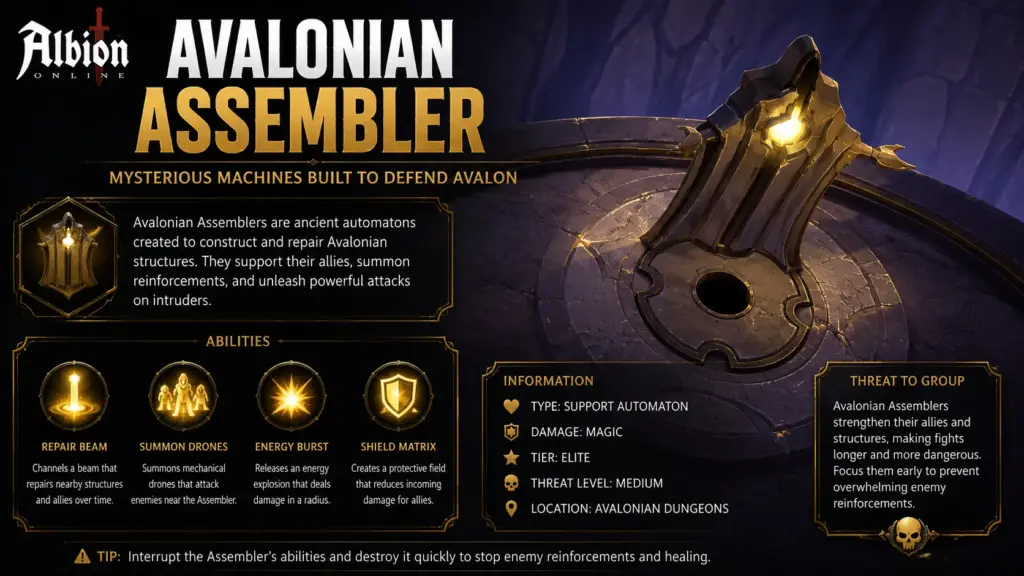
The Avalonian Assembler is a statue-like mob that spawns Attack Drones. The drones it creates do not provide fame or loot, so allowing the Assembler to keep spawning them only slows the group and creates unnecessary danger.
The Assembler cannot be displaced. It should usually be controlled and killed before it creates too many extra enemies.
Avalonian Assembler Mechanics
- Can be displaced: no.
- Main danger: spawning additional Attack Drones.
- Important reaction: kill or control the Assembler quickly.
Spawn Drone
The Assembler spawns an Attack Drone. These spawned drones do not give fame or loot when killed, so they are purely an obstacle. Stunning the Assembler can prevent it from spawning more drones.
Avalonian Attack Drone
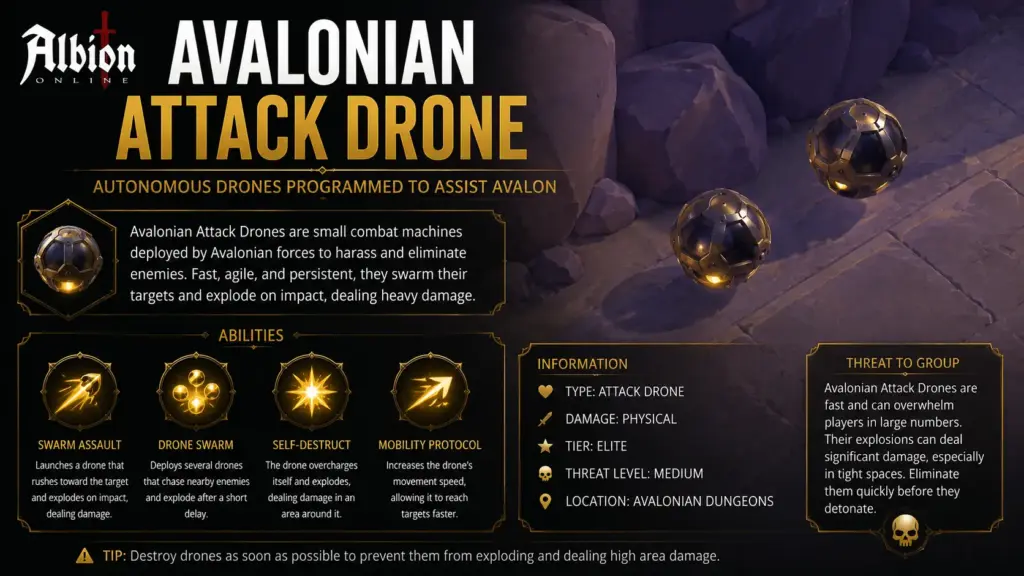
Avalonian Attack Drones are weak by themselves, but they become more dangerous when empowered by an Avalonian Wizard. On their own, they mostly auto-attack. When charged by a Wizard, they can perform a strong line attack.
Attack Drones can be displaced, which makes them easier to reposition than many other Avalonian mobs.
Avalonian Attack Drone Mechanics
- Can be displaced: yes.
- Main danger: empowered line AoE when charged by a Wizard.
- Important reaction: watch Wizard channels and avoid the Drone’s line attack.
Energized Onslaught
When empowered by a nearby Wizard, the Attack Drone flies forward in a line and knocks down players hit by the attack. The party should avoid standing in the projected path when a Wizard is channeling into a Drone.
Avalonian Drone
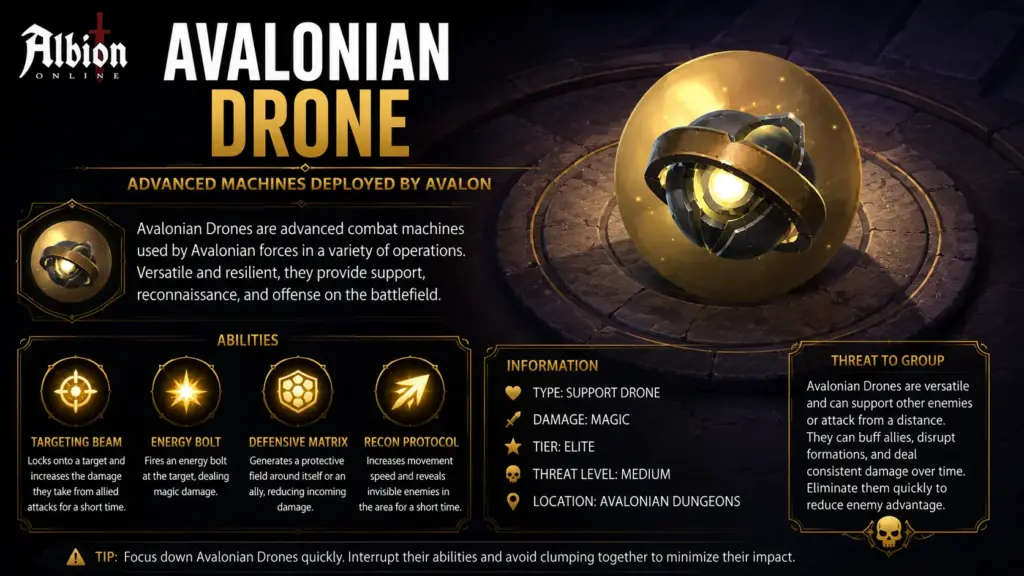
The Avalonian Drone is a small mob that usually dies quickly to area damage. However, its area effect can drain energy and heavily increase mob damage against players, which makes it dangerous if ignored inside a large pull.
Avalonian Drone Mechanics
- Main danger: energy drain and increased damage taken from mobs.
- Important reaction: avoid standing inside the drone’s circle effect.
Unstable Energy
Unstable Energy creates a circular area that pulses around the Drone. Players standing inside can lose energy, and nearby mobs become more dangerous against players. This effect should be avoided, especially during large pulls where incoming damage is already high.
Avalonian Focus
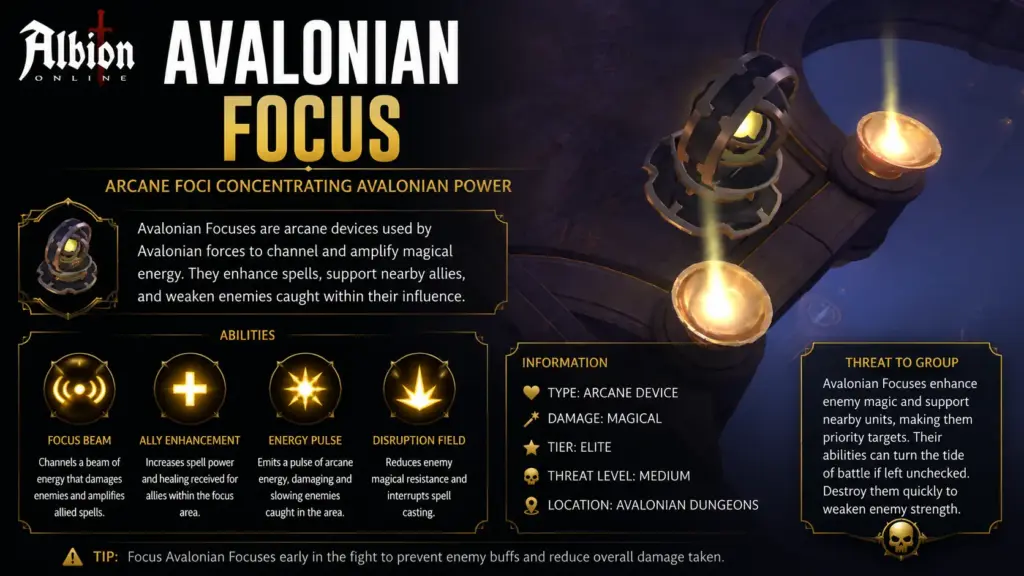
The Avalonian Focus acts like a turret. It does not behave like a normal walking enemy and cannot be displaced. Its main threat is a slow laser beam that knocks players away and applies a defensive debuff.
Avalonian Focus Mechanics
- Can be displaced: no.
- Main danger: laser beam and defense reduction.
- Important reaction: avoid the beam path and move before the channel finishes.
Laser Beam
The Focus channels a slow laser that knocks away and knocks down players hit by it. Players hit also receive a Lens Flare stack, reducing their bonus defense against mobs.
The cast cannot be interrupted. The correct response is to avoid the beam instead of trying to stop the ability.
Avalonian Gate Core
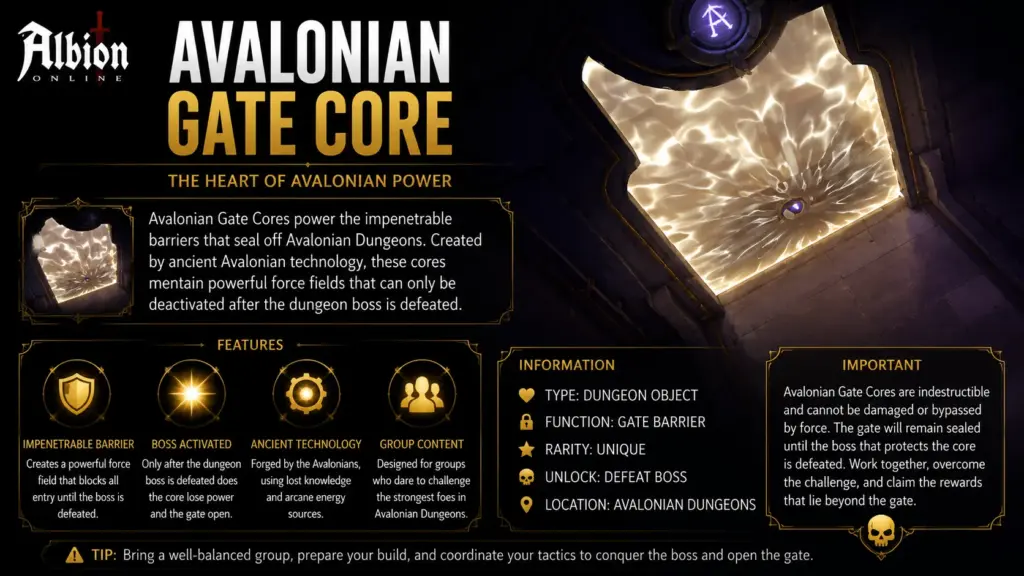
The Avalonian Gate Core protects dungeon gates. It has a large health pool and regenerates quickly, but it is not mechanically complex. Once the Gate Core dies, the gate disappears and the party can continue.
When a Gate Core is destroyed, players on the same floor receive a message that a gate has been breached. This matters for scouting and dungeon safety because it can reveal activity inside the dungeon.
Avalonian Gate Core Mechanics
- Can be displaced: no.
- Main danger: not combat difficulty, but gate timing and information exposure.
- Important reaction: coordinate with the scout before killing the core.
The Gate Core deals a small amount of damage to nearby attackers. Ranged players can usually attack it without taking that damage. Healing reduction can help reduce the effect of its regeneration when killing it with a smaller group.
Avalonian Knight
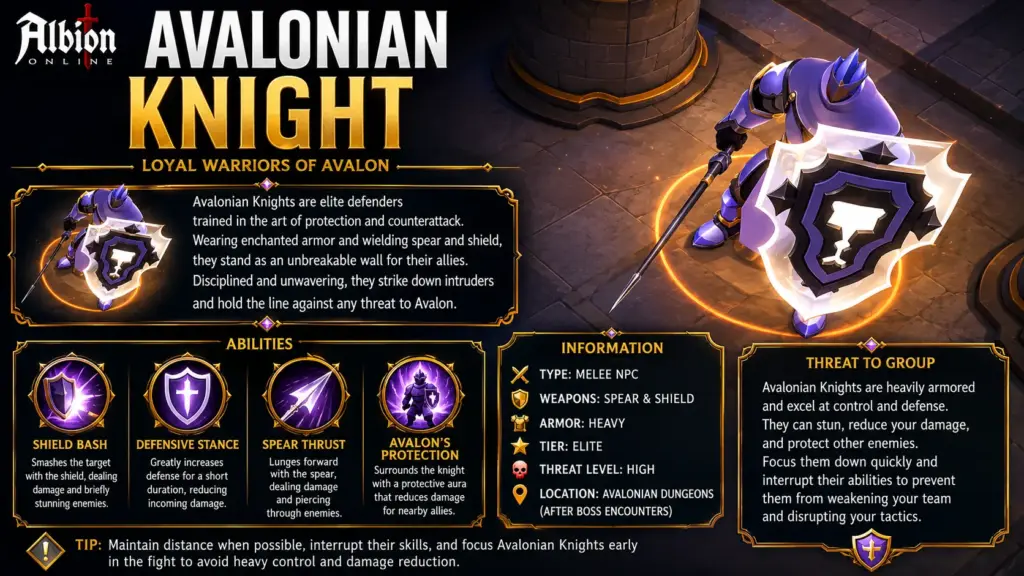
The Avalonian Knight teaches mechanics that later appear in boss fights. It is not always immediately lethal, but players who attack into reflect effects or stand in sword mechanics can take heavy damage.
The Knight cannot be displaced, so the group must position around it correctly.
Avalonian Knight Mechanics
- Can be displaced: no.
- Main danger: sword spin, defense reduction and reflective shield.
- Important reaction: avoid sword damage and stop attacking into reflect.
Bladestorm
The Knight creates a ring of spinning swords around itself. These swords deal heavy damage and reduce defenses with each hit. After spinning, the swords shoot outward and knock down players hit by them.
Players should avoid standing in the sword path. The cast cannot be interrupted.
Avalonian Might
The Knight knocks away nearby players and then creates a reflective shield in a frontal cone. Players who attack into the shield take reflected damage.
The visual direction of the shield can sometimes be misleading, so players should be careful and avoid attacking during the reflect window unless they are clearly positioned safely.
Avalonian Monk
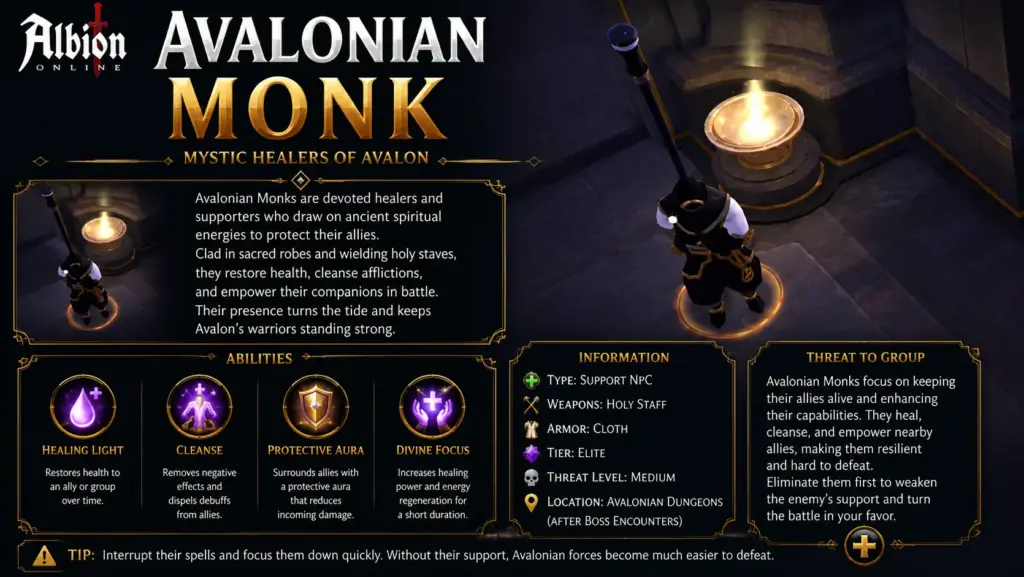
The Avalonian Monk is disruptive because it is difficult to hold in place and can knock players around. It is less dangerous when the stun rotation is clean, but messy pulls involving Monks can quickly become chaotic.
The Monk can be displaced, but its movement and knockback abilities still make it annoying in practice.
Avalonian Monk Mechanics
- Can be displaced: yes.
- Main danger: movement disruption, knockbacks and poor clumping.
- Important reaction: control it early and reset pulls if Monks break the clump badly.
Passing Through
The Monk rolls through players and knocks back anyone hit. This movement can disrupt the party and separate mobs from the clump.
The cast cannot be interrupted.
Sweep
The Monk slams in a frontal cone, dealing damage and slightly knocking players away. The cast cannot be interrupted.
Thrust
The Monk thrusts forward and knocks the target far away. This cast cannot be interrupted and can disrupt the group’s positioning.
Shield Charge
The Monk dashes and instantly applies a shield to nearby mobs. This can make the pull take longer if not handled quickly.
Avalonian Priestess
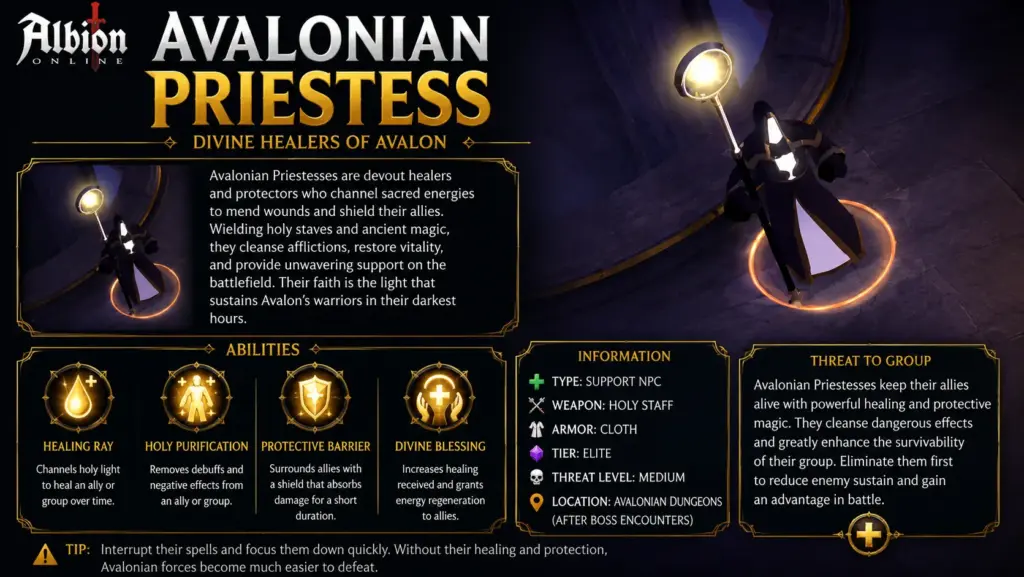
The Avalonian Priestess is a support-style mob that can heal, knock players away and make her own casts harder to stop. She cannot be displaced, so the party should handle her with proper timing and purge awareness.
Avalonian Priestess Mechanics
- Can be displaced: no.
- Main danger: healing, knockback and uninterruptible buff.
- Important reaction: purge healing stacks and Guidance when possible.
Knockback
The Priestess knocks away players near her. This is similar in function to a large holy knockback. The cast can be interrupted unless she has the Guidance buff.
Holy Beam
The Priestess beams a target and applies a stacking healing-over-time effect. The healing stacks can be purged, and the cast can be interrupted if the Priestess does not have Guidance active.
Guidance
Guidance makes the Priestess’s spells uninterruptible. This buff can be purged, so support players should remove it when possible to make the mob easier to control.
Avalonian Spearman
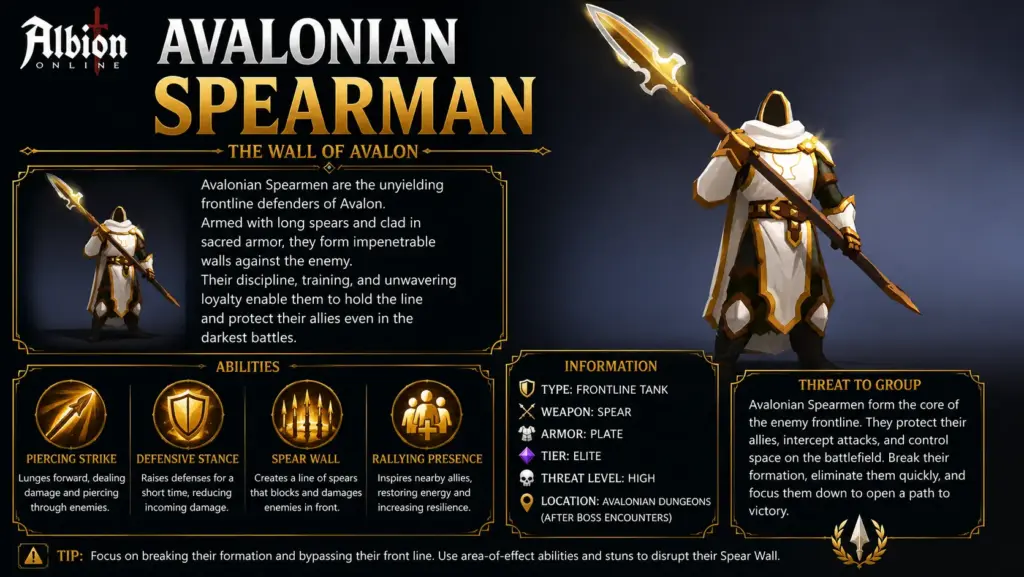
The Avalonian Spearman is one of the trickier regular mobs because it starts its dangerous sequence quickly. It usually begins with a short spear animation, then can quickly spin and jump.
Spearmen can be displaced, but their fast ability timing means the group should not rely only on displacement. Good Arcane and Hammer timing are important when Spearmen are part of a pull.
Avalonian Spearman Mechanics
- Can be displaced: yes.
- Main danger: fast spin, jump and defense reduction.
- Important reaction: control it early and avoid standing in its AoE.
Avalonian Might
The Spearman spins its spear and gains stacks of Avalonian Might. It can then consume these stacks to perform a strong AoE attack. Players hit take damage and receive a defense reduction effect.
The sunder effect does not stack repeatedly, but it can be reapplied. Players should still avoid the attack because the damage and defense reduction can be dangerous during larger pulls.
Jump
The Spearman marks a target and jumps to that target’s location after a delay. The initial cast cannot be interrupted, but the fall and damage portion can be interrupted if timed correctly.
Players should move away from the marked location and avoid stacking on allies when targeted.
Avalonian Spellweaver
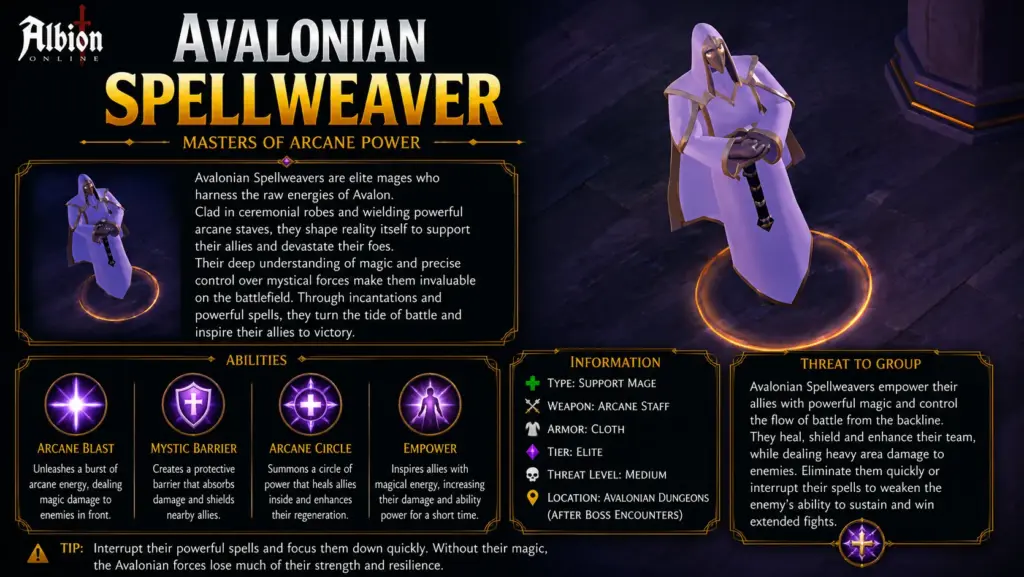
The Avalonian Spellweaver is dangerous because of its laser mechanics. Players should not walk along the path of the laser. Instead, they should move in the opposite direction to reduce the time spent inside the beam.
The Spellweaver cannot be displaced, and its major laser casts cannot be interrupted.
Avalonian Spellweaver Mechanics
- Can be displaced: no.
- Main danger: laser patterns and knockback near the caster.
- Important reaction: move opposite the laser direction and avoid standing on top of the mob.
Laser
The Spellweaver casts a laser in a cone. The indicator shows which direction the laser will travel, giving players time to move.
This cast cannot be interrupted. The laser also knocks away players who stand directly on top of the Spellweaver.
Converging Laser
The Spellweaver may cast a converging laser pattern that starts from the sides and moves toward the front. This version is less common but can punish players who react slowly.
The cast cannot be interrupted.
Diverging Laser
The Spellweaver may also cast a diverging laser that starts in front and splits outward to the sides. Players should watch the indicator and move accordingly.
The cast cannot be interrupted.
Avalonian Warrior
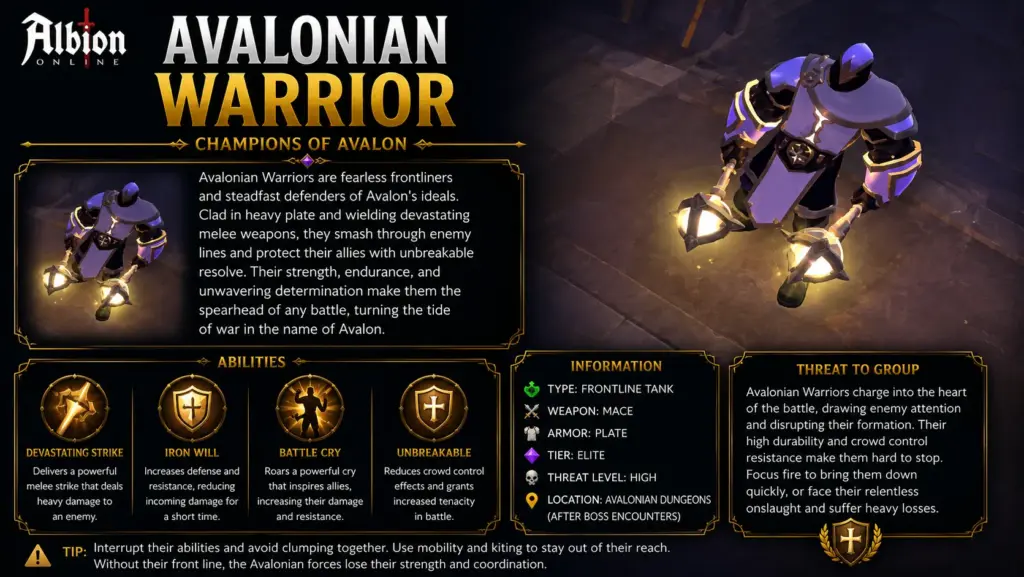
The Avalonian Warrior deals heavy melee pressure and should not be underestimated. Ranged players should stay away from it, and the group should be ready to purge or cleanse its dangerous effects.
The Warrior cannot be displaced.
Avalonian Warrior Mechanics
- Can be displaced: no.
- Main danger: enrage, healing reduction, chain damage and knockbacks.
- Important reaction: purge its buffs and cleanse dangerous debuffs.
Enrage
The Warrior slams the ground, dealing damage and knocking away nearby players. After the slam, it gains increased attack speed, movement speed and bonus damage against players.
The cast cannot be interrupted, but the Warrior’s buff can be purged. The debuff applied to players can be cleansed.
Shatter
The Warrior slams a single target, knocks them down and applies a strong healing-received reduction. This debuff can be cleansed, and the cast can be interrupted.
Berserk Chain
The Warrior empowers its attacks, causing chain-style damage when its target has nearby allies. The buff can be purged, so players should remove it quickly when possible.
Avalonian Winged Guard
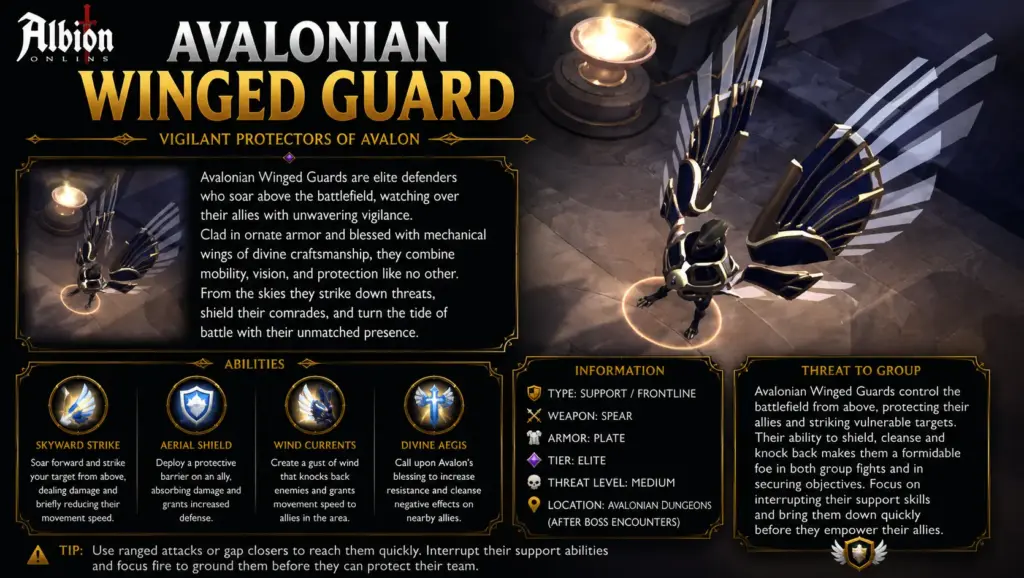
The Avalonian Winged Guard is not always the highest damage threat, but it is disruptive and has unusually high crowd-control resistance. Standard stun rotation timing is less reliable against it than against most other mobs.
The Winged Guard cannot be displaced. In pulls that include this mob, the usual strategy is to kill the rest of the pack first and leave the Winged Guard for last.
Avalonian Winged Guard Mechanics
- Can be displaced: no.
- Main danger: windwalls, displacement and high CC resistance.
- Important reaction: burst other mobs first and avoid getting knocked into extra mob group.
Windwall
The Winged Guard casts four windwalls that move outward. Players can roll, blink or move through the gaps between the walls. The front windwall usually faces the player who has aggro.
The cast cannot be interrupted.
Avalonian Wizard
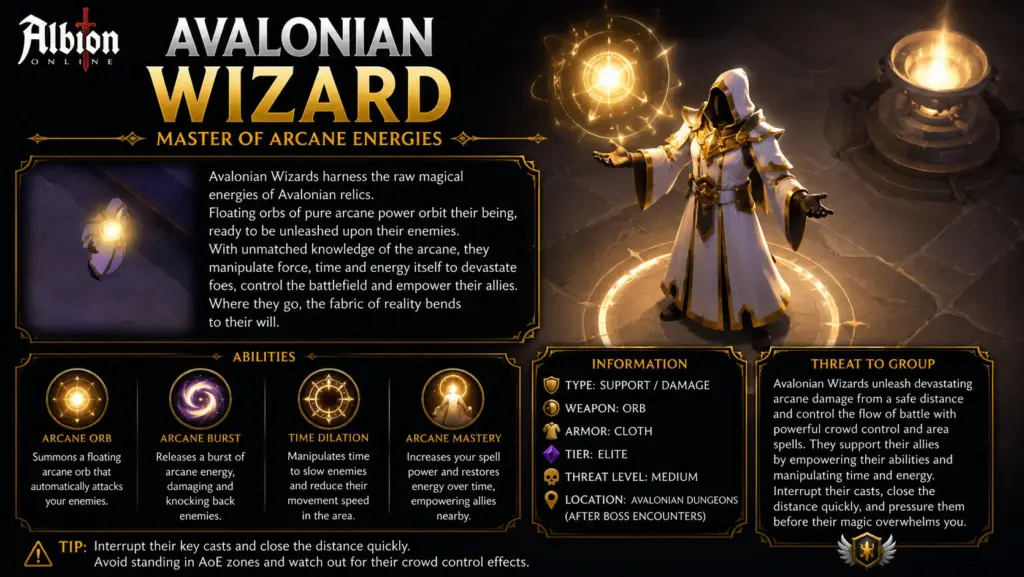
The Avalonian Wizard is fragile but dangerous. It uses strong AoE mechanics and can empower Attack Drones. In large pulls, Wizards can create serious problems if the party fails to control or dodge their abilities.
The Wizard cannot be displaced.
Avalonian Wizard Mechanics
- Can be displaced: no.
- Main danger: Lightning Circle, sleep and Drone empowerment.
- Important reaction: avoid the circle, cleanse sleep and interrupt Drone channel when possible.
Lightning Circle
The Wizard throws a circular AoE that damages players inside it. Players still inside the area at the end of the channel fall asleep.
The cast cannot be interrupted, but sleep can be cleansed. Players should move out quickly instead of expecting the ability to be stopped.
Channel Drone
The Wizard channels into a nearby Drone. When the channel completes, the Drone becomes empowered and can perform a fast line attack that knocks players down.
Unlike Lightning Circle, Channel Drone can be interrupted. When Wizards and Drones are together in a pull, interrupting this channel can prevent unnecessary damage and crowd control.
Bestiary Summary: Which Avalonian Mobs Are Most Dangerous?
Every Avalonian mob can become dangerous in the wrong situation, but some deserve special attention during pulls.
| Mob | Main Threat | Can Be Displaced? | Priority Note |
|---|---|---|---|
| Avalonian Spearman | Fast spin, jump and defense reduction | Yes | Control early and avoid delayed reaction. |
| Avalonian Monk | Knockbacks and bad clumping | Yes | Reset if Monks break the pull badly. |
| Avalonian Spellweaver | Laser mechanics | No | Move opposite the laser direction. |
| Avalonian Wizard | AoE sleep and Drone empowerment | No | Interrupt Drone channel when possible. |
| Avalonian Archer | Silence and knockback | No | Targeted players should separate from allies. |
| Avalonian Warrior | Enrage, healing reduction and chain damage | No | Purge buffs and cleanse debuffs. |
| Avalonian Winged Guard | Windwall and high CC resistance | No | Kill other mobs first, leave it for last. |
General Tips for Fighting Avalonian Mobs
- Do not waste interrupts on casts that cannot be interrupted.
- Do not assume all mobs can be pulled or knocked back.
- Use clean stun rotation timing instead of random crowd control.
- Move away from allies when targeted by silence or purge mechanics.
- Purge dangerous mob buffs when possible.
- Cleanse sleep, healing reduction and other major debuffs quickly.
- Reset bad pulls when mobs are spread out and still high health.
- Prioritize dangerous casters and mechanics over passive damage padding.
Understanding the Avalonian bestiary makes the entire dungeon easier. Once the party knows which mobs can be displaced, which casts can be interrupted and which mechanics must be dodged, the stun rotation becomes more reliable and boss rooms become much safer to reach.