
Healer Build for Group Dungeons for New Players
This Holy Healer PvE Build for Beginner Group Dungeons in Albion Online is an inexpensive, simple, and very good setup for learning how to heal in group PvE. It is not a complicated build that requires extensive experience, expensive artifacts, or perfect knowledge of every mechanic. It is a set that allows you to comfortably start playing as a healer and learn the most important fundamentals of this role.
The build is based on the one-handed Holy Staff, which is very effective at healing a single target. This makes it excellent for keeping the tank alive. In Group Dungeons, the tank usually takes the most damage, so a beginner healer should first learn to monitor the tank’s Health, position, and the moments when stronger healing must be used.
When the party plays correctly, healing in Group Dungeons is fairly calm. The biggest problems begin when DPS players stand in area-of-effect attacks, the tank pulls too many mobs at once, or players spread across the entire room and move outside healing range. A good healer can compensate for many mistakes, but should not be forced to constantly correct the poor positioning of the entire party.
This set is inexpensive, effective, and demonstrates how healing works in Albion Online. It provides strong single-target healing, emergency tools for saving the tank, a healing bonus from the armor, additional Energy from the off-hand, mobility from the boots, and food and a potion that help maintain a smooth rotation.
How to Play This Build
Your main responsibility is keeping the tank alive. The tank leads the party, gathers the mobs, and decides where the pull stops. As the healer, you should stay behind the tank, but you should not stand directly among the mobs. You must remain close enough to heal while staying far enough away to avoid unnecessary damage.
At the beginning of a pull, observe how many mobs the tank has gathered and how quickly the tank’s Health is dropping. Against small groups, regular healing from the Holy Staff is enough. During larger pulls, you need to react more quickly, activate the Druid Robe, and prepare to use your stronger abilities.
Do not panic whenever Health drops. The tank does not need to remain at full HP at all times. What matters is preventing the tank from falling too low while you have no response available. The best approach is to play calmly: use basic healing against normal damage, activate the Druid Robe before greater pressure, and use the Graveguard Helmet as an emergency tool when the tank is genuinely in danger.
Energy is extremely important. A healer without Energy stops being a healer. Do not waste healing on players who are almost at full Health, and do not spam abilities unnecessarily. Use an Energy Potion before your Energy bar reaches zero, especially when you can see that the fight is taking longer or the party is handling a larger pull.
The Healer’s Most Important Responsibilities in a Group Dungeon
A healer does more than simply heal. A good healer continuously observes the tank, the DPS players, their own Energy, and the positioning of the entire party. The healer is often the first person to notice that a pull is too large or that the party is beginning to play too chaotically.
Your most important responsibilities are:
- keeping the tank alive;
- healing DPS players when they take accidental damage;
- remaining within healing range while staying outside the mobs;
- monitoring your own Energy;
- using emergency abilities only when they are genuinely needed;
- avoiding area-of-effect attacks from bosses and mobs;
- informing the party when you are running out of Energy;
- not chasing players who move outside healing range for no reason.
The most important rule is this: stabilize the tank first. If the tank dies, the pull will usually fall apart. A DPS player with low Health is also important, but if you lose the tank while trying to save one DPS player, the party can die very quickly.

Graveguard Helmet is a very powerful emergency button for a healer. Its Sacrifice ability allows you to heal an ally for a large portion of their maximum Health with a single click. You will usually use it on the tank when the tank’s HP drops dangerously low.
This is not an ability that should be used every time it becomes available. Treat it as emergency healing. The best moment to use it is when the tank has taken a powerful hit from a boss, the pull turned out to be larger than planned, or you were unable to deliver regular healing for a moment.
Remember that using this ability costs some of your own Health. If you are standing in fire, being attacked by the boss, or already have low HP, you may put yourself at risk of dying. First protect your own position, and only then save others. A dead healer cannot help the party.
Combined with the Holy Staff and Druid Robe, this helmet provides very strong emergency healing for the tank. This is one of the reasons why this inexpensive build works so well in Group Dungeons.

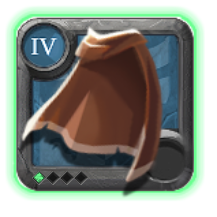
Druid Robe strengthens your healing as you use abilities. In practice, this means that the more actively you heal within a short period, the stronger your following heals become. This works very well with the Holy Staff because the staff allows you to cast consecutive abilities quickly.
It is best to use the Druid Robe shortly before heavier incoming damage. If you can see that the tank has gathered a large group of mobs or that the boss is about to begin a more dangerous phase, activate the robe and then heal more intensively. This allows your healing to stabilize the tank more quickly.
Do not use it without reason when nothing is happening. If you activate the robe between pulls or against a small group of mobs, you will waste most of its value. This ability should be reserved for moments when you genuinely want to increase your healing.
The Druid Robe is useful for learning how to plan ahead. The point is not to activate it randomly, but to predict when the tank will need stronger healing several seconds later.

Knight Boots allow you to charge toward an ally and apply a shield. For a healer, Shield Charge is useful both as an emergency tool and as a way to reposition quickly.
You will most often use them when the tank has moved too far away, someone in the party has taken heavy damage, or you need to enter healing range quickly. The shield can help the player survive for the next few seconds, which is often enough time to follow it with regular healing from the Holy Staff.
However, you need to be careful. Do not charge thoughtlessly into the middle of the mobs. If the tank is standing in the center of a large pull and area attacks are appearing around them, using the boots may place you in a bad position. Knight Boots are very effective, but only when used deliberately.
When used correctly, the boots can save a player. When used poorly, they can cause the healer to become the person who needs saving.

Holy Staff is the main weapon in this build. It is simple, powerful, and very good for beginner healers. Its greatest advantage is strong single-target healing, which is exactly what you need when healing a tank in Group Dungeons.
During most fights, the tank will be your main healing target. The mobs focus on the tank, and the tank receives the most damage. The Holy Staff allows you to respond quickly when the tank’s Health begins to fall, and when combined with proper use of the Druid Robe, it can restore a large amount of HP within a short period.
You do not need to make the gameplay complicated at the beginning. Focus on the basics: the tank must remain within range, you must stand in a safe position, your Energy must not fall to zero, and your stronger healing abilities should be available for more difficult moments.
This staff teaches one of the healer’s most important principles very effectively: it is not only the amount of healing that matters, but also the moment when you use it.

Tome of Spells is a very convenient off-hand for a beginner healer. It helps with Energy and cast times, which are exactly the things that matter when healing.
The Tome allows you to cast abilities more smoothly and maintain healing for longer during combat. This is particularly useful in Group Dungeons, where fights can sometimes take longer because of party mistakes, excessively large pulls, or insufficient damage.
A major advantage of the Tome of Spells is that you do not need to manage it actively. It does not add another button that you need to control. It simply improves the comfort of the build. This is very useful for new players because it allows them to focus on positioning, healing, and Energy.
If you are only beginning to learn healing, the Tome of Spells is one of the most convenient off-hand choices.
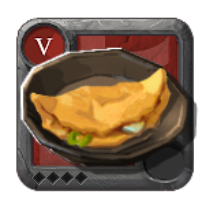
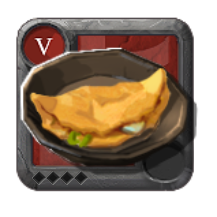
Goose Omelette reduces cast times and cooldowns. This is very important for a healer because it allows you to react more quickly and use key abilities more frequently.
Use the food after entering the dungeon and make sure that the effect remains active throughout the entire run. Playing without food may not appear as dangerous for a healer as it is for a tank, but the difference becomes very noticeable during more difficult moments.
The Goose Omelette makes healing smoother. It becomes easier to complete a cast in time, easier to keep the tank alive, and easier to recover from a difficult situation when several players take damage simultaneously.

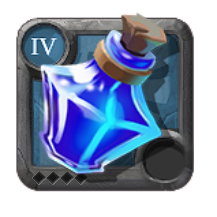
Energy Potion is your basic emergency tool when you begin to run out of Energy. A healer consumes Energy very quickly, especially when the tank makes large pulls or the party takes unnecessary damage.
The biggest mistake is waiting until your Energy reaches zero. If you can see that the fight is taking longer and your Energy bar is disappearing quickly, use the potion earlier. This prevents you from reaching the point where the tank needs healing and you have no Energy available to heal them.
The Energy Potion is inexpensive, simple, and extremely important in this set. It is always worth having it prepared, particularly when you are still learning how to manage Energy.
Simple Healing Rotation for Beginners
The simplest gameplay pattern for this build looks like this:
- Use the Goose Omelette after entering the dungeon.
- Stand behind the tank, but not in the middle of the mobs.
- Focus primarily on the tank’s Health.
- Heal with the basic abilities from the Holy Staff.
- Activate the Druid Robe during a larger pull.
- Use the strengthened healing to stabilize the tank.
- Use the Graveguard Helmet if the tank’s Health drops very low.
- Use the Knight Boots if you need to charge quickly toward an ally or give them a shield.
- Use the Energy Potion before you completely run out of Energy.
- After the fight, position yourself behind the tank again and prepare for the next pull.
This is not a rigid rotation that must be followed to the exact second. Healing in Albion Online is based on reacting to the situation. You play differently against a small pull, differently against a large group of mobs, and differently during a boss fight.
The most important thing is not to waste emergency abilities when regular healing is sufficient.
The Most Common Mistakes Made by Beginner Healers
The first mistake is panic. The tank loses Health, so the beginner healer immediately uses everything: the Druid Robe, Graveguard Helmet, Knight Boots, and Energy Potion. Sometimes this saves the situation, but it often means that a moment later you have no response available for the real danger.
The second mistake is poor positioning. The healer should not stand in front of the tank, next to the boss, or in the middle of the mobs. You should remain within healing range while staying outside the most dangerous part of the fight. If you continuously take damage yourself, you waste time and Energy healing yourself.
The third mistake is ignoring Energy. You do not need to heal every player to full Health immediately after every small hit. If you spam healing unnecessarily, you will quickly run out of Energy. A healer without Energy usually means a dead tank.
The fourth mistake is chasing players who are positioned badly. If a DPS player runs to the opposite side of the room or stands somewhere they should not be, it is not always worth risking your own position to save them. The tank and the stability of the entire party are the priorities.
The fifth mistake is using the Energy Potion too late. The potion is supposed to help you maintain healing, not only rescue the situation after your Energy bar is already empty.
Who Is This Build For?
This build is intended for players who want to start playing as a healer in Group Dungeons and need an inexpensive, simple, and effective setup. It works well in basic PvE, Fame Farming, easier Static Dungeons, and when learning how to play in a five-player party.
It is not the most advanced or expensive healer set. That is a good thing. At the beginning, it is better to use a build that is inexpensive and easy to understand than an expensive setup that you do not yet know how to use effectively.
This set allows you to learn the fundamentals: targeting, healing the tank, controlling Energy, positioning, and using emergency abilities. Once you have mastered this build, moving on to more difficult activities will be much easier.
Summary
The Healer Build for Group Dungeons for new players is an inexpensive, simple, and very good setup for learning how to heal in Albion Online. The Holy Staff provides strong single-target healing, the Graveguard Helmet saves the tank during critical moments, the Druid Robe strengthens healing, the Tome of Spells improves casting comfort and Energy management, the Knight Boots help you charge quickly toward an ally and provide a shield, the Goose Omelette speeds up casting, and the Energy Potion protects you from running out of Energy.
This is a build that allows you to begin learning how to heal comfortably. It does not require a huge budget, but it does require concentration. The most important elements are positioning, monitoring the tank, using powerful healing abilities sensibly, and controlling Energy.
If you want to play as a healer in Group Dungeons, this setup is a very good starting point.
Build, Abilities, and Market Price Summary
Below you will find the complete healer build card with the selected equipment, abilities, activity, role, difficulty level, minimum and recommended tier, and estimated market price on the different Albion Online servers.
This section provides a quick summary of the setup before entering a Group Dungeon. Here, you can check which items are used in the build, which abilities have been selected, how many players the set is intended for, its budget category, and its approximate price on the Europe, Asia, and America servers.
Prices in Albion Online change depending on the server, city, item quality, enchantment level, current supply, and market conditions. Treat the displayed price as a practical estimate rather than a fixed value. If you are a new player, begin with the minimum recommended tier, test the build in easier PvE content, and upgrade your equipment only when you feel more confident in the healer role.
Albion Online build
Healer Build for Group Dungeons for New Players

Build activities
Loadout





Selected spells and passives
Adept's Graveguard Helmet
Skill

Sacrifice
Sacriface yourself for the targeted ally (can't be cast on self), healing the target for 25% of their Max Health. Take 15% of your Max Health as true damage.
Passive

Toughness
Incoming damage is reduced by 2.439%
Adept's Holy Staff
First Weapon Spell

Generous Heal
Cast a healing prayer on the targeted ally, restoring 266/283 health.
Second Weapon Spell

Holy Beam
Focus a Holy Beam at the targeted ally, slowing yourself by 30% while channeling for 6s. Restores 60/64 Health every 1s. The healing increases by 60/64 every 2s(stacks up to 7 times).
Main Weapon Spell

Desperate Prayer
Cast a Desperate Prayer on the targeted ally, healing the target based on their current Health. Current Health: above 40% | below 40% Healing: 201 | 443 If the current Health of your target is above 40%, your Healing Cast is increased by 5% for 15s(stacks up to 3 times).
Weapon Passive

Adrenaline Driven Charity
After every 4 spells cast,increase your Healing Cast by 20% for 3s.
Adept's Druid Robe
Skill

Obsessive Burst
Get a burst of power whenever you cast a spell within the next 10s. Increases your damage and your Healing Cast by 6% (stacks up to 6 times) for 10s
Passive

Aggression
Increases your damage and heal power by 3.5%
Goose Omelette
Passive

Omelette
Increases your Cast Speed by {0} and Cooldown Rate by {1} for {2} .
Adept's Knight Boots
Skill

Shield Charge
Charge toward a target, Applies a shield on you, absorbing up to 505 damage (before resistanced) for 3s, upon arrival at the target. if the target is an ally, the shield is also applied to the target.
Passive
Toughness
Incoming damage is reduced by 2.439%
Energy Potion
Passive

Energy Potion
Restores {0} of your Max Energy . Restores {1} of your Max Energy over {2} . Increases your Cooldown Rate by {3} .
Adept's Riding Horse
Passive

Courier
Increases your Max Load by 1.25 kg.
Build prices
Europe Server Cheapest Price
Lowest price: 67,131srebro (last known price)
Build Price in City
Item price breakdown
Adept's Bag
- Bridgewatch
- 7,068srebro (last known price)
- Steppe Cross
- Not available
- Martlock
- 6,549srebro (last known price)
- Highland Cross
- Not available
- Thetford
- 5,990srebro (last known price)
- Swamp Cross
- 24,890srebro (last known price)
- Fort Sterling
- 6,298srebro (last known price)
- Mountain Cross
- Not available
- Lymhurst
- 6,398srebro (last known price)
- Forest Cross
- Not available
- Caerleon
- 12,980srebro (last known price)
- Brecilien
- 5,596srebro (last known price)
- Arthur’s Rest
- Not available
- Merlyn’s Rest
- Not available
- Morgana’s Rest
- Not available
Adept's Graveguard Helmet
- Bridgewatch
- 4,733srebro (last known price)
- Steppe Cross
- Not available
- Martlock
- 4,980srebro (last known price)
- Highland Cross
- Not available
- Thetford
- 3,924srebro (last known price)
- Swamp Cross
- Not available
- Fort Sterling
- 3,000srebro (last known price)
- Mountain Cross
- Not available
- Lymhurst
- 4,895srebro (last known price)
- Forest Cross
- Not available
- Caerleon
- 8,869srebro (last known price)
- Brecilien
- 3,000srebro (last known price)
- Arthur’s Rest
- Not available
- Merlyn’s Rest
- Not available
- Morgana’s Rest
- Not available
Adept's Cape
- Bridgewatch
- 3,492srebro (last known price)
- Steppe Cross
- Not available
- Martlock
- 3,895srebro (last known price)
- Highland Cross
- Not available
- Thetford
- 3,862srebro (last known price)
- Swamp Cross
- Not available
- Fort Sterling
- 4,195srebro (last known price)
- Mountain Cross
- Not available
- Lymhurst
- 3,753srebro (last known price)
- Forest Cross
- Not available
- Caerleon
- 6,662srebro (last known price)
- Brecilien
- 3,500srebro (last known price)
- Arthur’s Rest
- Not available
- Merlyn’s Rest
- Not available
- Morgana’s Rest
- Not available
Adept's Holy Staff
- Bridgewatch
- 4,979srebro (last known price)
- Steppe Cross
- 15,000srebro (last known price)
- Martlock
- 3,897srebro (last known price)
- Highland Cross
- 23,000srebro (last known price)
- Thetford
- 6,488srebro (last known price)
- Swamp Cross
- Not available
- Fort Sterling
- 3,131srebro (last known price)
- Mountain Cross
- Not available
- Lymhurst
- 4,434srebro (last known price)
- Forest Cross
- Not available
- Caerleon
- 13,999srebro (last known price)
- Brecilien
- 2,998srebro (last known price)
- Arthur’s Rest
- Not available
- Merlyn’s Rest
- Not available
- Morgana’s Rest
- Not available
Adept's Druid Robe
- Bridgewatch
- 16,590srebro (last known price)
- Steppe Cross
- Not available
- Martlock
- 8,994srebro (last known price)
- Highland Cross
- Not available
- Thetford
- 7,500srebro (last known price)
- Swamp Cross
- Not available
- Fort Sterling
- 7,392srebro (last known price)
- Mountain Cross
- Not available
- Lymhurst
- 11,989srebro (last known price)
- Forest Cross
- Not available
- Caerleon
- 18,995srebro (last known price)
- Brecilien
- 6,993srebro (last known price)
- Arthur’s Rest
- Not available
- Merlyn’s Rest
- Not available
- Morgana’s Rest
- Not available
Adept's Tome of Spells
- Bridgewatch
- 3,474srebro (last known price)
- Steppe Cross
- Not available
- Martlock
- 3,795srebro (last known price)
- Highland Cross
- Not available
- Thetford
- 2,500srebro (last known price)
- Swamp Cross
- Not available
- Fort Sterling
- 2,363srebro (last known price)
- Mountain Cross
- Not available
- Lymhurst
- 2,079srebro (last known price)
- Forest Cross
- Not available
- Caerleon
- 8,496srebro (last known price)
- Brecilien
- 2,193srebro (last known price)
- Arthur’s Rest
- Not available
- Merlyn’s Rest
- Not available
- Morgana’s Rest
- Not available
Goose Omelette
- Bridgewatch
- 1,479srebro (last known price)
- Steppe Cross
- 3,099srebro (last known price)
- Martlock
- 3,998srebro (last known price)
- Highland Cross
- Not available
- Thetford
- 1,255srebro (last known price)
- Swamp Cross
- Not available
- Fort Sterling
- 1,438srebro (last known price)
- Mountain Cross
- Not available
- Lymhurst
- 987srebro (last known price)
- Forest Cross
- Not available
- Caerleon
- 1,575srebro (last known price)
- Brecilien
- 1,390srebro (last known price)
- Arthur’s Rest
- Not available
- Merlyn’s Rest
- Not available
- Morgana’s Rest
- Not available
Adept's Knight Boots
- Bridgewatch
- 3,030srebro (last known price)
- Steppe Cross
- 17,000srebro (last known price)
- Martlock
- 2,539srebro (last known price)
- Highland Cross
- Not available
- Thetford
- 1,498srebro (last known price)
- Swamp Cross
- Not available
- Fort Sterling
- 2,278srebro (last known price)
- Mountain Cross
- Not available
- Lymhurst
- 2,687srebro (last known price)
- Forest Cross
- Not available
- Caerleon
- 8,982srebro (last known price)
- Brecilien
- 2,000srebro (last known price)
- Arthur’s Rest
- Not available
- Merlyn’s Rest
- Not available
- Morgana’s Rest
- Not available
Energy Potion
- Bridgewatch
- 2,160srebro (last known price)
- Steppe Cross
- Not available
- Martlock
- 2,938srebro (last known price)
- Highland Cross
- Not available
- Thetford
- 2,331srebro (last known price)
- Swamp Cross
- Not available
- Fort Sterling
- 2,961srebro (last known price)
- Mountain Cross
- Not available
- Lymhurst
- 2,353srebro (last known price)
- Forest Cross
- Not available
- Caerleon
- 5,900srebro (last known price)
- Brecilien
- 2,157srebro (last known price)
- Arthur’s Rest
- Not available
- Merlyn’s Rest
- Not available
- Morgana’s Rest
- Not available
Adept's Riding Horse
- Bridgewatch
- 33,420srebro (last known price)
- Steppe Cross
- 65,000srebro (last known price)
- Martlock
- 33,284srebro (last known price)
- Highland Cross
- 56,500srebro (last known price)
- Thetford
- 32,150srebro (last known price)
- Swamp Cross
- 60,000srebro (last known price)
- Fort Sterling
- 34,075srebro (last known price)
- Mountain Cross
- 43,390srebro (last known price)
- Lymhurst
- 30,998srebro (last known price)
- Forest Cross
- 37,990srebro (last known price)
- Caerleon
- 21,989srebro (last known price)
- Brecilien
- 10,000,000srebro (last known price)
- Arthur’s Rest
- Not available
- Merlyn’s Rest
- Not available
- Morgana’s Rest
- Not available
America Server Cheapest Price
Lowest price: 63,247srebro (last known price)
Build Price in City
Item price breakdown
Adept's Bag
- Bridgewatch
- 5,795srebro (last known price)
- Steppe Cross
- Not available
- Martlock
- 5,588srebro (last known price)
- Highland Cross
- Not available
- Thetford
- 6,458srebro (last known price)
- Swamp Cross
- Not available
- Fort Sterling
- 10,277srebro (last known price)
- Mountain Cross
- 12,500srebro (last known price)
- Lymhurst
- 6,673srebro (last known price)
- Forest Cross
- Not available
- Caerleon
- 9,597srebro (last known price)
- Brecilien
- 14,996srebro (last known price)
- Arthur’s Rest
- Not available
- Merlyn’s Rest
- Not available
- Morgana’s Rest
- Not available
Adept's Graveguard Helmet
- Bridgewatch
- 5,409srebro (last known price)
- Steppe Cross
- Not available
- Martlock
- 4,000srebro (last known price)
- Highland Cross
- Not available
- Thetford
- 3,269srebro (last known price)
- Swamp Cross
- Not available
- Fort Sterling
- 1,997srebro (last known price)
- Mountain Cross
- Not available
- Lymhurst
- 2,992srebro (last known price)
- Forest Cross
- Not available
- Caerleon
- 8,518srebro (last known price)
- Brecilien
- 993srebro (last known price)
- Arthur’s Rest
- Not available
- Merlyn’s Rest
- Not available
- Morgana’s Rest
- Not available
Adept's Cape
- Bridgewatch
- 4,443srebro (last known price)
- Steppe Cross
- Not available
- Martlock
- 3,598srebro (last known price)
- Highland Cross
- Not available
- Thetford
- 2,397srebro (last known price)
- Swamp Cross
- Not available
- Fort Sterling
- 2,998srebro (last known price)
- Mountain Cross
- Not available
- Lymhurst
- 2,998srebro (last known price)
- Forest Cross
- Not available
- Caerleon
- 6,296srebro (last known price)
- Brecilien
- 3,600srebro (last known price)
- Arthur’s Rest
- Not available
- Merlyn’s Rest
- Not available
- Morgana’s Rest
- Not available
Adept's Holy Staff
- Bridgewatch
- 6,971srebro (last known price)
- Steppe Cross
- Not available
- Martlock
- 7,198srebro (last known price)
- Highland Cross
- Not available
- Thetford
- 4,975srebro (last known price)
- Swamp Cross
- Not available
- Fort Sterling
- 3,471srebro (last known price)
- Mountain Cross
- Not available
- Lymhurst
- 3,595srebro (last known price)
- Forest Cross
- Not available
- Caerleon
- 10,991srebro (last known price)
- Brecilien
- 2,950srebro (last known price)
- Arthur’s Rest
- Not available
- Merlyn’s Rest
- Not available
- Morgana’s Rest
- Not available
Adept's Druid Robe
- Bridgewatch
- 19,985srebro (last known price)
- Steppe Cross
- Not available
- Martlock
- 9,999srebro (last known price)
- Highland Cross
- Not available
- Thetford
- 19,814srebro (last known price)
- Swamp Cross
- Not available
- Fort Sterling
- 6,490srebro (last known price)
- Mountain Cross
- Not available
- Lymhurst
- 9,810srebro (last known price)
- Forest Cross
- Not available
- Caerleon
- 50,000srebro (last known price)
- Brecilien
- 5,495srebro (last known price)
- Arthur’s Rest
- Not available
- Merlyn’s Rest
- Not available
- Morgana’s Rest
- Not available
Adept's Tome of Spells
- Bridgewatch
- 2,486srebro (last known price)
- Steppe Cross
- Not available
- Martlock
- 2,769srebro (last known price)
- Highland Cross
- Not available
- Thetford
- 1,900srebro (last known price)
- Swamp Cross
- Not available
- Fort Sterling
- 1,346srebro (last known price)
- Mountain Cross
- Not available
- Lymhurst
- 2,445srebro (last known price)
- Forest Cross
- Not available
- Caerleon
- 6,991srebro (last known price)
- Brecilien
- 1,021srebro (last known price)
- Arthur’s Rest
- Not available
- Merlyn’s Rest
- Not available
- Morgana’s Rest
- Not available
Goose Omelette
- Bridgewatch
- 1,570srebro (last known price)
- Steppe Cross
- Not available
- Martlock
- 1,729srebro (last known price)
- Highland Cross
- Not available
- Thetford
- 890srebro (last known price)
- Swamp Cross
- Not available
- Fort Sterling
- 1,158srebro (last known price)
- Mountain Cross
- Not available
- Lymhurst
- 1,077srebro (last known price)
- Forest Cross
- Not available
- Caerleon
- 1,200srebro (last known price)
- Brecilien
- 1,900srebro (last known price)
- Arthur’s Rest
- Not available
- Merlyn’s Rest
- Not available
- Morgana’s Rest
- Not available
Adept's Knight Boots
- Bridgewatch
- 3,164srebro (last known price)
- Steppe Cross
- Not available
- Martlock
- 3,078srebro (last known price)
- Highland Cross
- Not available
- Thetford
- 1,992srebro (last known price)
- Swamp Cross
- Not available
- Fort Sterling
- 2,763srebro (last known price)
- Mountain Cross
- Not available
- Lymhurst
- 3,366srebro (last known price)
- Forest Cross
- Not available
- Caerleon
- 5,791srebro (last known price)
- Brecilien
- 1,971srebro (last known price)
- Arthur’s Rest
- Not available
- Merlyn’s Rest
- Not available
- Morgana’s Rest
- Not available
Energy Potion
- Bridgewatch
- 2,186srebro (last known price)
- Steppe Cross
- Not available
- Martlock
- 2,795srebro (last known price)
- Highland Cross
- Not available
- Thetford
- 2,590srebro (last known price)
- Swamp Cross
- Not available
- Fort Sterling
- 2,777srebro (last known price)
- Mountain Cross
- Not available
- Lymhurst
- 2,561srebro (last known price)
- Forest Cross
- Not available
- Caerleon
- 4,399,888srebro (last known price)
- Brecilien
- 1,992srebro (last known price)
- Arthur’s Rest
- Not available
- Merlyn’s Rest
- Not available
- Morgana’s Rest
- Not available
Adept's Riding Horse
- Bridgewatch
- 31,500srebro (last known price)
- Steppe Cross
- Not available
- Martlock
- 26,930srebro (last known price)
- Highland Cross
- 48,786srebro (last known price)
- Thetford
- 29,938srebro (last known price)
- Swamp Cross
- 59,999srebro (last known price)
- Fort Sterling
- 29,970srebro (last known price)
- Mountain Cross
- 30,000srebro (last known price)
- Lymhurst
- 29,897srebro (last known price)
- Forest Cross
- Not available
- Caerleon
- 25,563srebro (last known price)
- Brecilien
- 31,826srebro (last known price)
- Arthur’s Rest
- Not available
- Merlyn’s Rest
- Not available
- Morgana’s Rest
- Not available
Asia Server Cheapest Price
Lowest price: 92,778srebro (last known price)
Build Price in City
Item price breakdown
Adept's Bag
- Bridgewatch
- 7,759srebro (last known price)
- Steppe Cross
- Not available
- Martlock
- 8,995srebro (last known price)
- Highland Cross
- Not available
- Thetford
- 7,699srebro (last known price)
- Swamp Cross
- 40,000srebro (last known price)
- Fort Sterling
- 6,485srebro (last known price)
- Mountain Cross
- Not available
- Lymhurst
- 6,997srebro (last known price)
- Forest Cross
- Not available
- Caerleon
- 13,500srebro (last known price)
- Brecilien
- 9,082srebro (last known price)
- Arthur’s Rest
- Not available
- Merlyn’s Rest
- Not available
- Morgana’s Rest
- Not available
Adept's Graveguard Helmet
- Bridgewatch
- 4,068srebro (last known price)
- Steppe Cross
- Not available
- Martlock
- Not available
- Highland Cross
- Not available
- Thetford
- 3,898srebro (last known price)
- Swamp Cross
- Not available
- Fort Sterling
- 4,989srebro (last known price)
- Mountain Cross
- Not available
- Lymhurst
- 5,977srebro (last known price)
- Forest Cross
- Not available
- Caerleon
- 12,946srebro (last known price)
- Brecilien
- 4,500srebro (last known price)
- Arthur’s Rest
- Not available
- Merlyn’s Rest
- Not available
- Morgana’s Rest
- Not available
Adept's Cape
- Bridgewatch
- 4,000srebro (last known price)
- Steppe Cross
- Not available
- Martlock
- 6,489srebro (last known price)
- Highland Cross
- Not available
- Thetford
- 3,495srebro (last known price)
- Swamp Cross
- Not available
- Fort Sterling
- 5,000srebro (last known price)
- Mountain Cross
- Not available
- Lymhurst
- 4,458srebro (last known price)
- Forest Cross
- Not available
- Caerleon
- 8,555srebro (last known price)
- Brecilien
- 2,288srebro (last known price)
- Arthur’s Rest
- Not available
- Merlyn’s Rest
- Not available
- Morgana’s Rest
- Not available
Adept's Holy Staff
- Bridgewatch
- 15,000srebro (last known price)
- Steppe Cross
- Not available
- Martlock
- 7,491srebro (last known price)
- Highland Cross
- Not available
- Thetford
- 13,747srebro (last known price)
- Swamp Cross
- Not available
- Fort Sterling
- 7,984srebro (last known price)
- Mountain Cross
- Not available
- Lymhurst
- 6,990srebro (last known price)
- Forest Cross
- Not available
- Caerleon
- 18,863srebro (last known price)
- Brecilien
- 5,448srebro (last known price)
- Arthur’s Rest
- Not available
- Merlyn’s Rest
- Not available
- Morgana’s Rest
- Not available
Adept's Druid Robe
- Bridgewatch
- 8,496srebro (last known price)
- Steppe Cross
- Not available
- Martlock
- 23,957srebro (last known price)
- Highland Cross
- Not available
- Thetford
- 11,475srebro (last known price)
- Swamp Cross
- Not available
- Fort Sterling
- 17,776srebro (last known price)
- Mountain Cross
- Not available
- Lymhurst
- 12,995srebro (last known price)
- Forest Cross
- Not available
- Caerleon
- 31,998srebro (last known price)
- Brecilien
- 9,221srebro (last known price)
- Arthur’s Rest
- Not available
- Merlyn’s Rest
- Not available
- Morgana’s Rest
- Not available
Adept's Tome of Spells
- Bridgewatch
- 2,975srebro (last known price)
- Steppe Cross
- Not available
- Martlock
- 2,496srebro (last known price)
- Highland Cross
- Not available
- Thetford
- 2,996srebro (last known price)
- Swamp Cross
- Not available
- Fort Sterling
- 3,499srebro (last known price)
- Mountain Cross
- Not available
- Lymhurst
- 3,346srebro (last known price)
- Forest Cross
- Not available
- Caerleon
- 8,711srebro (last known price)
- Brecilien
- 999srebro (last known price)
- Arthur’s Rest
- Not available
- Merlyn’s Rest
- Not available
- Morgana’s Rest
- Not available
Goose Omelette
- Bridgewatch
- 2,950srebro (last known price)
- Steppe Cross
- Not available
- Martlock
- 4,438srebro (last known price)
- Highland Cross
- Not available
- Thetford
- 3,199srebro (last known price)
- Swamp Cross
- Not available
- Fort Sterling
- 2,810srebro (last known price)
- Mountain Cross
- Not available
- Lymhurst
- 3,483srebro (last known price)
- Forest Cross
- Not available
- Caerleon
- 5,992srebro (last known price)
- Brecilien
- 2,100srebro (last known price)
- Arthur’s Rest
- Not available
- Merlyn’s Rest
- Not available
- Morgana’s Rest
- Not available
Adept's Knight Boots
- Bridgewatch
- 2,293srebro (last known price)
- Steppe Cross
- Not available
- Martlock
- 2,400srebro (last known price)
- Highland Cross
- Not available
- Thetford
- 2,269srebro (last known price)
- Swamp Cross
- Not available
- Fort Sterling
- 1,289srebro (last known price)
- Mountain Cross
- Not available
- Lymhurst
- 3,194srebro (last known price)
- Forest Cross
- Not available
- Caerleon
- 5,988srebro (last known price)
- Brecilien
- 1,326srebro (last known price)
- Arthur’s Rest
- Not available
- Merlyn’s Rest
- Not available
- Morgana’s Rest
- Not available
Energy Potion
- Bridgewatch
- 4,580srebro (last known price)
- Steppe Cross
- Not available
- Martlock
- 3,888srebro (last known price)
- Highland Cross
- Not available
- Thetford
- 2,999srebro (last known price)
- Swamp Cross
- Not available
- Fort Sterling
- 3,989srebro (last known price)
- Mountain Cross
- Not available
- Lymhurst
- 3,485srebro (last known price)
- Forest Cross
- Not available
- Caerleon
- 3,997srebro (last known price)
- Brecilien
- 3,210srebro (last known price)
- Arthur’s Rest
- Not available
- Merlyn’s Rest
- Not available
- Morgana’s Rest
- Not available
Adept's Riding Horse
- Bridgewatch
- 41,700srebro (last known price)
- Steppe Cross
- Not available
- Martlock
- 45,399srebro (last known price)
- Highland Cross
- Not available
- Thetford
- 49,881srebro (last known price)
- Swamp Cross
- Not available
- Fort Sterling
- 45,736srebro (last known price)
- Mountain Cross
- Not available
- Lymhurst
- 41,853srebro (last known price)
- Forest Cross
- Not available
- Caerleon
- 34,970srebro (last known price)
- Brecilien
- 57,974srebro (last known price)
- Arthur’s Rest
- Not available
- Merlyn’s Rest
- Not available
- Morgana’s Rest
- Not available
FAQ — Holy Healer PvE Build for Beginner Group Dungeons for New Players
Is this healer build suitable for new players?
Yes. It is an inexpensive and simple build for learning how to heal in Group Dungeons. It focuses mainly on keeping the tank alive and provides several powerful emergency tools.
Is the one-handed Holy Staff good for beginners?
Yes. The one-handed Holy Staff is very good for beginners because it provides strong single-target healing and does not require complicated gameplay.
When should I use the Graveguard Helmet?
It is best used when the tank’s Health drops very low or when the boss is about to deal a powerful hit. It is emergency healing, not an ability that should be used without thinking.
Why does the healer use a Druid Robe?
The Druid Robe strengthens your healing. It is best used before a larger pull or when you expect the tank to take heavier damage.
Why does the healer use a Tome of Spells?
The Tome of Spells helps with Energy and cast times. This makes healing smoother and makes it easier to keep the tank alive during longer fights.
Which food should a healer use?
The Goose Omelette is a good choice because it reduces cast times and ability cooldowns. This allows the healer to respond more quickly when Health drops.
When should I use an Energy Potion?
Use it before you completely run out of Energy. If you can see that the fight is taking longer and your Energy is falling quickly, do not wait until the last second.
The Albion Online terminology used above follows the English names Graveguard Helmet, Sacrifice, Druid Robe, Obsessive Burst, Knight Boots, and Shield Charge.